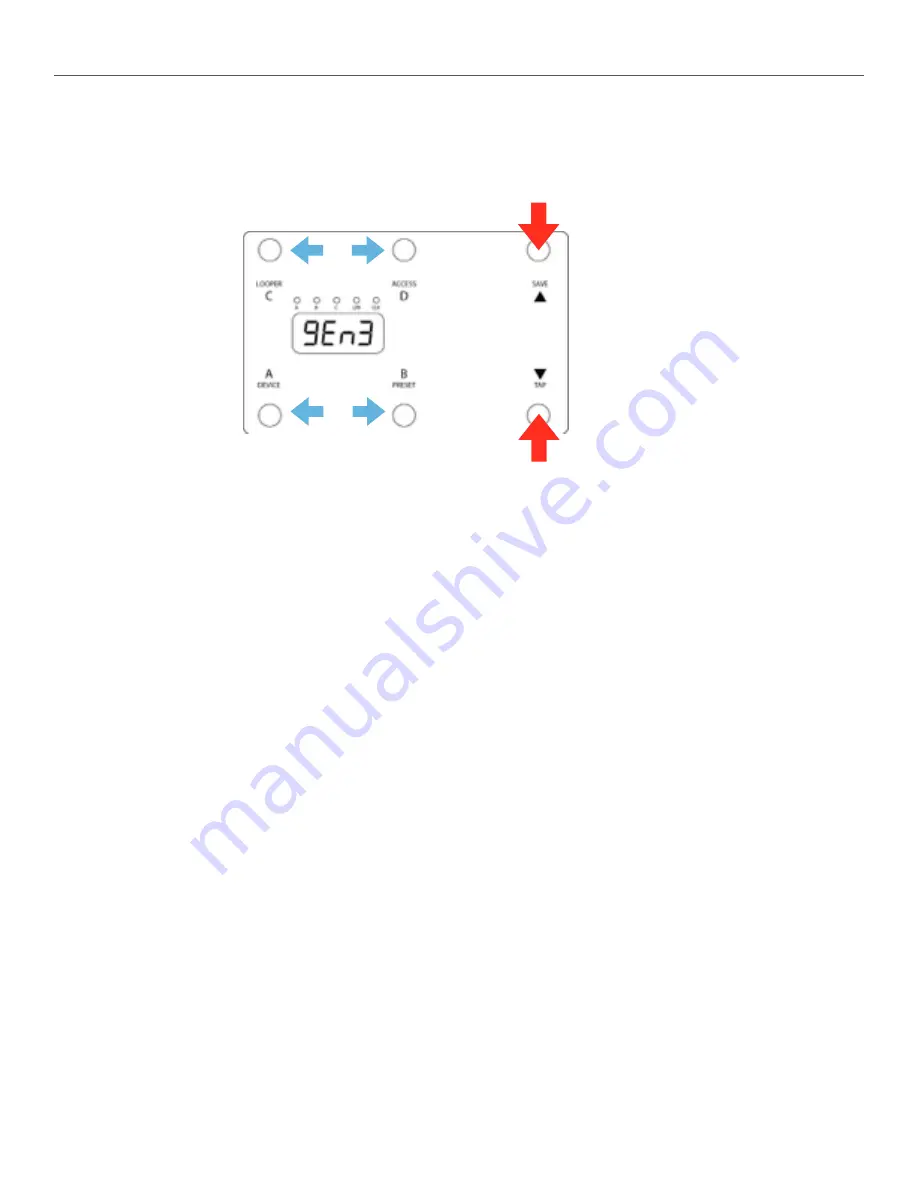
Disaster Area Designs DMC-6 Gen3 Скачать руководство пользователя страница 9

 of 

9

20

6.  Device Mode 

Device Mode allows you to change presets and bypass your connected devices.  You can access Device Mode by holding down the A 
button from any mode except Looper or Clock.

Device Mode Controls:

A:  Decrease the preset for the current device by one
B:  Increase the preset for the current device by one

Hold to enter Preset Mode

C:  Decrease the preset for the current device by one bank (Strymon) or by ten (all other devices)

Hold to enter Looper Mode

D:  Increase the preset for the current device by one bank (Strymon) or by ten (all other devices)

TAP / DOWN:  Tap to tap tempo to all devices, hold to bypass or engage the current device.
SAVE / UP:

Tap to select the next available device.  Hold to save the current settings to a preset.

Device Mode Tips:

Device Mode for manually changing settings on your MIDI devices.  Scroll around until you find a sound you like, then move to 

the next device and do the same.  When you’ve got all of your devices set where you like, you can save all of those programs to a 
combined preset for instant access later.  Please consult the Preset Mode section for details on saving presets.

Disaster Area Designs 

DMC-6 / DMC-8 Gen3

TAP FOR +/- BANK or 
+/- 10 PROGRAMS

TAP FOR NEXT DEVICE

HOLD TO SAVE TO PRESET

TAP FOR PROGRAM
DOWN / UP

TAP FOR TAP TEMPO

HOLD TO BYPASS CURRENT 
DEVICE

Содержание DMC-6 Gen3

Страница 1: ...DMC 6 Gen3 DMC 8 Gen3 User Manual v1 01...

Страница 2: ...of 2 20 Revision History v1 01 10 21 16 Added USB Mode configuration user may now select USB MIDI or HOST in setup menu v1 00 Initial Release Disaster Area Designs DMC 6 DMC 8 Gen3...

Страница 3: ...by the Scrolling and Preset modes for program selection and recall The Preset mode may also control a seventh MIDI device with the capability for MIDI learning such as the Disaster Area DPC 8EZ or SMA...

Страница 4: ...more details DC 9V Standard DC power supply input 9V center negative The DMC Gen3 requires approximately 80mA if used by itself If an external USB HOST device is connected the DMC will need to be supp...

Страница 5: ...e some devices that won t re transmit MIDI or that will mangle interfere drop messages so sometimes you have to get creative with your routing Each MIDI device receives commands on one or more MIDI ch...

Страница 6: ...tap the A and B button to change the menu options When you re done hold SAVE to save the setup and start using the controller Here s how to set up your devices Enter setup as described above The firs...

Страница 7: ...actory In order for these devices to recognize the commands we send a few parameters must be set in their MIDI menus If using H9 Control navigate to Pedal MIDI Settings MIDI Channel Set MIDI Receive C...

Страница 8: ...ge bypass and tap messages correctly DISASTER AREA DPC 8EZ SMARTCLOCK SMARTLOOP If you are connecting to a Disaster Area DPC 8EZ SMARTClock or SMARTLoop the DMC Gen3 can automatically set them to the...

Страница 9: ...devices TAP DOWN Tap to tap tempo to all devices hold to bypass or engage the current device SAVE UP Tap to select the next available device Hold to save the current settings to a preset Device Mode T...

Страница 10: ...or the current bank or bypass if B was previously selected Hold to enter Preset Mode C Load the C preset for the current bank or bypass if C was previously selected Hold to enter Looper Mode D Load th...

Страница 11: ...save at any time by holding the A B C or D buttons The bypass zero preset is a special case If you press the button of the currently loaded preset while in Preset Mode the DMC Gen3 will bypass by loa...

Страница 12: ...dubbing and enter playback You may tap this button at any time while the loop is recording to overdub additional parts B Play Tapping this button will set the loop length and begin playback if the loo...

Страница 13: ...LOCK TAP TO CHANGE DIVISIONS TAP BPM DECREASE TAP FOR TAP TEMPO TAP BPM INCREASE Setup Menu Option Description How is the tempo set What kind of messages does the controller send Does the BPM change w...

Страница 14: ...tions determine which MIDI channels each input will use for sending messages Example The user has connected a Strymon Timeline B and Mobius A The user wishes to have the side roller control the looper...

Страница 15: ...how as zero and the MultiJack is set to EXPR no expression will be sent If all three locations show as zero and the MultiJack is set to MIDI all channels will be active but MIDI clock will not be sent...

Страница 16: ...have a pedal with a remote tap tempo input such as a Boss DD 7 JHS Panther Cub Matthews Conductor etc and you d like to send taps or clock signal to it you can use the MultiJack as a remote controlle...

Страница 17: ...the Setup Menu While you re in there make sure that USB is set to HOST and save to exit Once you have configured the device and the USB mode you can connect the MultiStomp USB port to a standard USB A...

Страница 18: ...the transfer status 8 This should result in a data transfer being sent to your computer which will record the data in a file 9 When the transfer is complete you can use the right and left buttons to...

Страница 19: ...footswitch input FAVE favorite preset load save footswitch input BANK advance to the previous mode E CH Expression Pedal input channel selection A B C Expression Pedal enable disable If the location s...

Страница 20: ...r will display SCRL4 the preset name will scroll when loaded then the first four characters of the preset name will display USB USB Mode Configuration MIDI USB port will function as a MIDI interface w...

Отзывы: