4
Basic Operation
Network Configuration
1.
Login to the Maestro web interface. See the previous page for more information.
2.
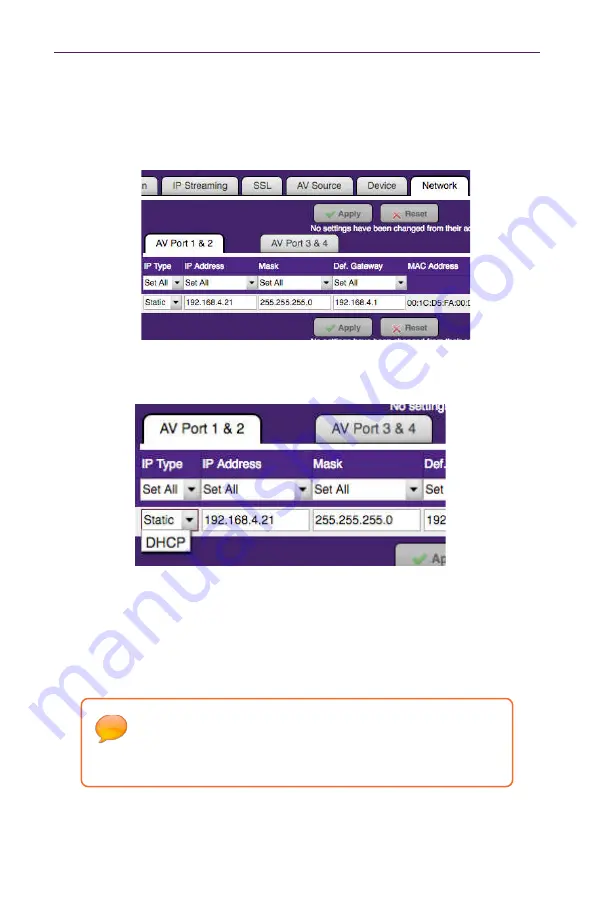
Click the
Network
tab and then select either
AV Port 1 & 2
or
AV Port 3 & 4.
Note the
ZyPerMX2 only uses AV Ports 1 & 2.
3.
The current network settings will be displayed.
4.
Click the drop-down list, under
IP Type
, to select the desired network mode.
The default setting for
IPType
is
DHCP
.
Note that the ZyPerMX4 has 2 independent IP address while the ZyPerMX2 has only one IP
address. There is an IP address for AV ports 1 & 2 and a different IP address for AV ports 3 & 4.
Both addresses should be set using this procedure.
Once the ZyPerMX4/MX2 is properly configured, click the “
lightbulb” icon, at
any time, to physically identify the ZyPerMX4/MX2 on the network. This will
cause the
Status
LED indicator on the front panel to flash rapidly for about 10
seconds.
Содержание ZeeVee ZyPerMX2
Страница 1: ...User Manual June 2020 Firmware Release 2 13 ZyPerMX4 MX2 Quad Dual Video Encoders ...
Страница 34: ...30 Basic Operation ...
Страница 37: ...3 Appendix ...


