background image

24 

2.1.9


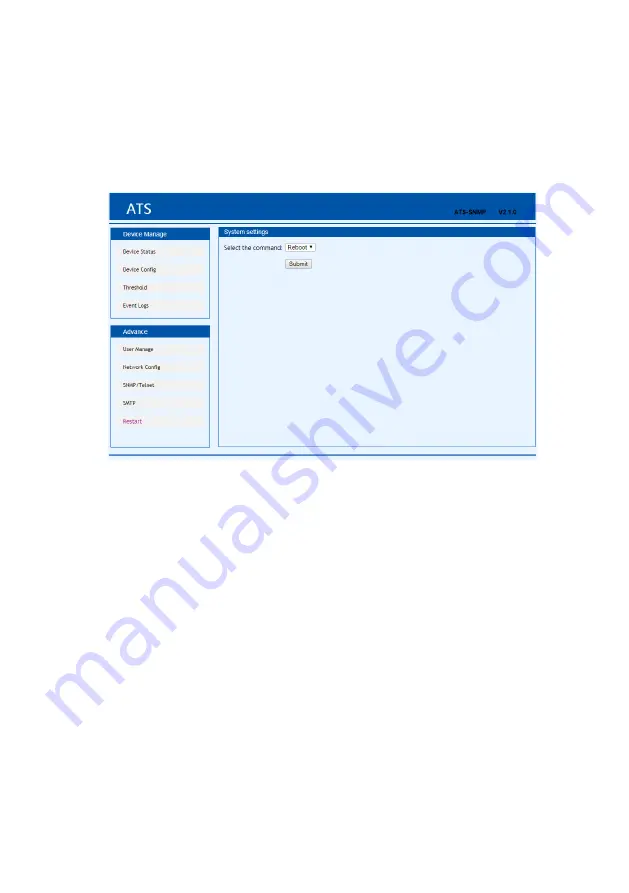
Restart 

User can restart the system or restore to factory settings in the Restart 

interface.  

Restart is to refresh the system software like changing the IP address, SMTP, 

HTTP port, restart the system will not affect the power supply.  

Reset system setting is to retore the system to default IP, system 

configuration, user name and password. 


Note: Make sure there is no power failure, no internet disconnection, and 

no operation on the web interface during restart, If the device is directly 

connected to PC, the local connection will disconnected and connected 

automatically. 


2.2


SNMP 

SNMP (Simple Network Management Protocol), the device software support V1 

version of SNMP, A MIB file which contain an enterprise number will be attached 

to the software, network management system offer network management of 

device through SNMP and the user can change the output port name, view the 

device and sensor status, receive alarm information through SNMP approach. 

The user has to enable the SNMP function through IE browser, please refer to 

the 13th item of IE access method SNMP introduction. Install corresponding 

SNMP management software after completing the SNMP start setting, set up the 

configuration according to the software menu provided by SNMP software 

company, leading-in MIB file on the SNMP management platform, user can 

monitor and manage the device status information and alarm Trap information 

after translating and editing success, the details information of device status are 

as detailed in figure 2-1: 

Содержание DN-95639

Страница 1: ...Automatic Transfer Switch User Manual DN 95639 ...

Страница 2: ...net connection only intelligent type 7 7 9 The software of hardware update method 7 8 Hyper Terminal user guide 8 9 Software user guide 16 9 1 Software Introduction 16 9 2 Software configuration 16 9 2 1 Device default settings 16 9 2 2 Device configuration when first log in 16 9 3 Access method 17 9 3 1 Web 17 9 3 1 1 Device Status 18 9 3 1 2 Device Config 18 9 3 1 3 Threshold Setting 19 9 3 1 4 ...

Страница 3: ...stall or connect equipment to reduce the risk of electric shock when you cannot verify grounding Reconnect the ATS to the power outlet only after you make all connections Operation under unfavorable environmental conditions must be avoided Humidity over 80 relative wet ambient temperatures above 50 C solvents flammable gases dust vapors If external damage to this ATS is detected do not operate thi...

Страница 4: ...tching occur 6 Alarming method Buzz and flesh alarming E mail alarming only intelligent type 7 Log recording record and save the log of the device running and alarming information User can view and export the data history 8 System support Single user operation system support software update 9 Account management set the authorization of the account 10 Access method Ethernet connection web interface...

Страница 5: ...utton Preference to select the preferred power source Input indicator of source B Output indicator of source B RUN Operation indicator NET Ethernet Port Press to select data To view power date and information Preference indicator of source A Preference indicator of source B Input indicator of source A Output indicator of source A 5 Accessories list 1 One serial cable 2 One network cable only intel...

Страница 6: ...ower source or user can leave this open The corresponding indicator will always light on if a choice was made If not the two indicators will stay the off status Please be noted that the intelligent ATS is with the Lock function if user cannot do the setting above please log on to the Web web interface to unlock 4 Reset operation If want to manual reset ATS Press the Reset button to reset the rack ...

Страница 7: ...C 9 2 Open the the software update file double click the setup exe file to install 9 3 Running the software as below when installation finished 9 4 Insert the RJ45 connector of the update signal cable into the RS232 port of the ATS front panel connect the other end to the port COM1 of local PC 9 5 Select the serial port are using from other items please refer to the above pictures 9 6 Click the fr...

Страница 8: ... port 9 11Power off the ATS 9 12Power on on the ATS digital screen will display the new hardware version number it can perform normal communication after software update success 8 Hyper Terminal user guide 1 Use the supplied serial cable connect one end to the RS232 port and the other end to serial port of local PC Running the Hyper terminal program like Windows Hyper terminal Here we take the Win...

Страница 9: ...9 3 Enter one or several numbers at random when it require your area code for instance 0755 and click OK 4 Click OK it pop up the link description window as below 5 Enter a Name like ATS and click OK ...

Страница 10: ...mation for data bits parity and flow control as provided below then click OK 8 If it is not the first time that the PC run the Hyper Terminal it will goes directly to the window as the 4th item of this chapter then follow up the instruction from the 4th to 7th and enter the Hyper Terminal monitoring interface as below ...

Страница 11: ...on directly 9 2 Click on ASCII Setup 9 3 Tick off the boxes as window above then click the OK button and return to the monitoring interface 10 Press Enter following message will be displayed in the interface if setting success Main Menu 1 Device Manager 2 Set Current And Voltage Limit 3 System Time ...

Страница 12: ...source B Preferred Source The preferred input power is source A Back To The Main Power Supply Time Re transfer time is 10 seconds 1 Set The Preferred Source Enter 1 then press Enter to set the primary power source 2 Set Switchover Time Enter 2 then press Enter to set the Re transfer time 0 Main Menu Enter 0 then press Enter to return to main menu 12 Set the preferred power input follow up the path...

Страница 13: ...rimary power source 13 Set the Re transfer time the path are Main Menu 1 Device Manager 2 Set Switchover Time enter the value preferred then press Enter The Re transfer time ranges from 10 to 60 seconds The ATS will transfer to the preferred input power after defined time when user give the order to transfer or the preferred input line recover from power failure 14 Define the threshold voltage and...

Страница 14: ...to set the maximum value of voltage to alarm For instance If user want to change the value of the minimum current to alarm enter 1 then press Enter to enter the interface as below Enter the value wanted then press Enter Return to Set Current And Voltage Limit interface user can view the Re define value just now 15 Setup the system time of ATS the path are Main Menu 3 System Time 15 1 Select 1 to m...

Страница 15: ...r instance 2010 07 22 The above window shows that the setting is a success 15 2 Timing re define the path are Main Menu 3 System Time 2 Enter the correct time form in the window for instance 11 15 23 The above window show that the setting is a success ...

Страница 16: ... 168 1 163 Default username admin Default password admin Note Both the default username and password are in lowercase user cannot log on to the interface with uppercase 2 2 Device configuration when first log in Connect the device to PC directly Rework the network configuration of PC make sure the changed PC IP address and the IP of the ATS is in the same segment the default of the IP address is 1...

Страница 17: ...through IE 6 0 IE 7 0 IE 8 0 IE 9 0 Firefox and Google chrome the Web access method are as below Open the browser Enter the IP address of the ATS in the address bar support HTTP protocol user can enable or disable the HTTP function according to situation for more information please refer to Network Config menu Enter the valid username and password in the login window The below interface will show ...

Страница 18: ...ent and voltage when current abnormality detected the value of the current will turn to red 4 The Status Description shows the connection status of the source A and source B OK mean normal and displayed in green abnormal means abnormality detected when the the device disconnected abnormal will be displayed in red 2 1 2 Device Config Device Config shows the preferred power source re transfer time h...

Страница 19: ... of current and voltage 1 The default acceptable current range is between 0A to 32A If the current is not within this range device will alarm 2 The default acceptable voltage range is between 180V to 260V If the current is not within this range device will alarm 2 1 4 Event logs User can adjust the system time and record view and export event logs There are alarm events and operation events the de...

Страница 20: ...0 the alarm logs or operate logs will be delete automatically if new logs generated If a prompt message like Insufficient Permissions pop up please add the site to the trust list and adjust the trusted site to lowest security level Follow the following steps to adjust the browser security level Click Tools Internet Options Security Custom Level To enable the Script ActiveX controls marked safe for...

Страница 21: ... is 255 255 255 0 3 Gateway Default gateway is 192 168 1 1 4 DNS Default one is 0 0 0 0 Note Network configuration will take effect after restart The changed IP address can be the same as other devices and must be in the same segment as PC b HTTP 1 HTTP function default status is enabled 2 Configurate and save the HTTP port according to network environment the port range from 1 65535 and default o...

Страница 22: ...us of these three item were public private private The length of the community string can reach 30 character at most 3 Set the Trap destination enter the address of the SNMP platform in the trap destination box the trap information will be sent to corresponding address 4 SNMP Contact to define the contact information of the SNMP system 5 SNMP Location defines the server location of SNMP Note SNMP ...

Страница 23: ...orresponding port according to mail level 4 User name Enter the sender s e mail address make sure this e mail address is accordant with the SMTP address 5 Password require the password of the sender s e mail address 6 Recipients address enter the recipients e mail address which limited 25 character Note Click Test after configuration to make sure the settings is correct The Text box to enter lette...

Страница 24: ...V1 version of SNMP A MIB file which contain an enterprise number will be attached to the software network management system offer network management of device through SNMP and the user can change the output port name view the device and sensor status receive alarm information through SNMP approach The user has to enable the SNMP function through IE browser please refer to the 13th item of IE acces...

Страница 25: ...966 10 1 1 11 The current output load voltlowlimit 1 3 6 1 4 1 30966 10 1 1 12 The minimum value of voltage volthighlimit 1 3 6 1 4 1 30966 10 1 1 13 The maximum value of voltage curentlowlimit 1 3 6 1 4 1 30966 10 1 1 14 The minimum value of load curenthighlimit 1 3 6 1 4 1 30966 10 1 1 15 The maximum value of load sourcea 1 3 6 1 4 1 30966 10 1 1 16 A power status sourceb 1 3 6 1 4 1 30966 10 1 ...

Страница 26: ...start the device C RESET Entry RESET command line to restore to factory settings 10 Quality guarantee The product is guaranteed for two years from the date of purchase If product has already exceeded the warranty period or the problem are caused because of improper operation a corresponding fee will be charged The below cases are not covered by the warranty 1 Problem caused because of improper mai...

Отзывы: