12. MIDI In
This jack receives all incoming MIDI data. Connect this jack to the MIDI out of
a computer, sequencer, MIDI controller, or MIDI storage device.
13. MIDI Out/Thru
This jack sends MIDI data from the GNX2. Connect this jack to the MIDI in of
a computer, or external MIDI recording device. When enabled, MIDI Thru sends
the same information the GNX2 received at the MIDI In.
14. Strain Relief
This secures the power cord and to help prevent it from disconnecting during a
performance.
Getting Started
Making Connections
The GNX2 has several different connection options. You can run mono into an
amp or power amp, stereo into two amps or a stereo power amp, direct into a
mixing console, or any combination of these. Before connecting the GNX2,
make sure both the GNX2 and the amplifier are OFF. The following diagrams
show some examples.
NOTE:The type of amplification system the GNX2 will be used with
should be selected at the Target System Setup of the Utility menu.
See page 40 for more information about selecting the Target System
Setup.
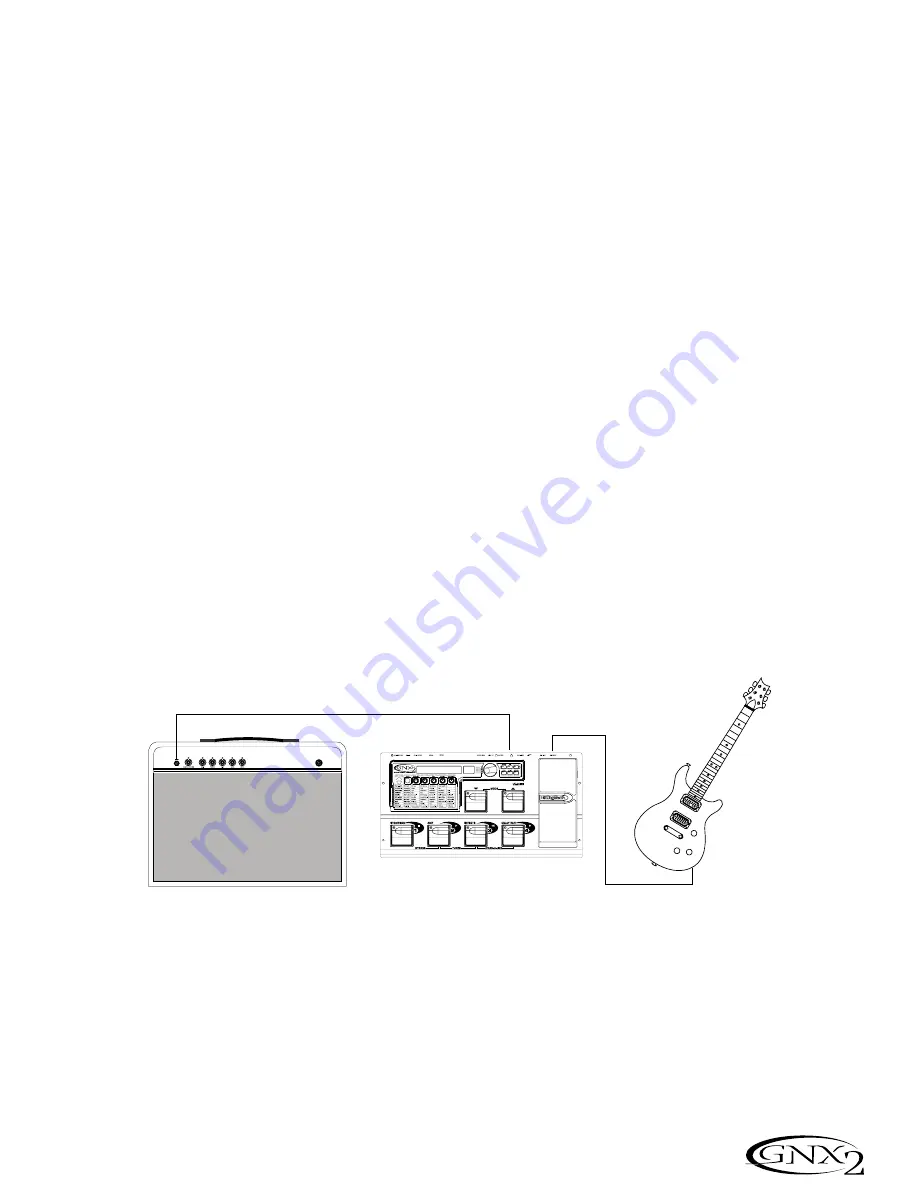
Mono Operation
1. Connect your guitar to the input of the GNX2.
2. Connect the GNX2’s left output to the instrument input on your amplifier, or
to the line input of a power amp.
3. Select Mono as the Output mode from the Utility menu. See page 40 for
more on selecting the Output mode.
Stereo Operation
1. Connect the guitar to the input of the GNX2.
2. Connect the GNX2’s Left output to the input of one amplifier or channel of a
power amp.
3. Connect the GNX2’s right output to a second amplifier, or to a second chan-
nel of a power amp.
4. Select Stereo as the Output mode from the Utility menu. See page 40 for
more on selecting the Output mode.
12. MIDI In
Este conector recibe todos los datos MIDI entrantes. Conecte esta entrada a la
toma MIDI out de un ordenador, secuenciador, controlador MIDI o unidad de
almacenamiento MIDI.
13. MIDI Out/Thru
Este conector envía los datos MIDI emitidos desde el GNX2. Conecte esta clav-
ija a la toma MIDI In de un ordenador o unidad de grabación MIDI exterior.
Cuando esté activa, la función MIDI Thru de esta clavija emitir· la misma infor-
mación que sea recibida en la toma MIDI In del GNX2.
14. Enganche anti-tirones
Se usa para fijar el cable de alimentación y evitar posibles desconexiones acci-
dentales durante la ejecución.
Inicio
Conexiones
El GNX2 dispone de varias opciones de conexión posibles. Puede hacer una conexión
en mono a un amplificador o etapa de potencia, en stereo a dos amplificadores o una
etapa de potencia stereo, directo a una mesa de mezclas o usar una combinación de
estas conexiones.Antes de conectar el GNX2, asegúrese que tanto el GNX2 como su
amplificador estén apagados. Los diagramas siguientes le muestran algunos ejemplos.
NOTA: El tipo de sistema de amplificación con el que será usado el
GNX2 debe ser elegido en la Configuración de sistema de destino del
menú de utilidades.Vea la página 40 para más información acerca de
estos ajustes.
Funcionamiento Mono
1. Conecte su guitarra a la entrada del GNX2.
2. Conecte la salida izquierda del GNX2 a la entrada de instrumento de su
amplificador o a la entrada de línea de una etapa de potencia.
3. Elija Mono como modo de salida en el menú de utilidades.Vea la página 40
para más información acerca del modo de salida.
Funcionamiento Stereo
1. Conecte la guitarra a la entrada del GNX2.
2. Conecte la salida izquierda del GNX2 a la entrada de un amplificador o a un
canal de una etapa de potencia.
3. Conecte la salida derecha del GNX2 a un segundo amplificador o a un segun-
do canal de la etapa de potencia.
4. Elija Stereo como modo de salida en el menú de utilidades.Vea la página 40
para más información acerca de la selección del modo de salida.
Guitar Input/Effect Return
Entrada de guitarra/retorno de efectos
Left Output
Salida izquierda
Input
Entrada
7
Introduction / Introducción
Содержание GeNetX GNX2
Страница 1: ...GENETX GUITAR PROCESSOR PROCESADOR DE GUITARRA T M USER S GUIDE MANUAL DE INSTRUCCION...
Страница 4: ...IV...
Страница 6: ......


