INSTALLATION (cont.)
A. Loosen the fixing screw using the L-wrench that came with the camera
B. Separate the upper case and the base case.
C. Cut a hole in the ceiling for routing the cables.
D. Place the camera horizontally on the ceiling, drill the screw
holes at the marked four positions.
E. Pass the power cable and video cable from the camera
unit through the cable hole in the ceiling.
F. Align the screw holes of the camera unit with the holes in the
ceiling, secure with the four screws.
G. Install and adjust the camera unit.
H. Adjust the dome liner to show the lens through the camera
window and attach it to the base
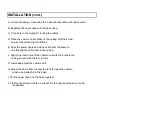
A. Loosen the fixing screw using the L-wrench that came with the camera
B. Separate the upper case and the base case.
C. Cut a hole in the ceiling for routing the cables.
D. Place the camera horizontally on the ceiling, drill the screw
holes at the marked four positions.
E. Pass the power cable and video cable from the camera
unit through the cable hole in the ceiling.
F. Align the screw holes of the camera unit with the holes in the
ceiling, secure with the four screws.
G. Install and adjust the camera unit.
H. Adjust the dome liner to show the lens through the camera
window and attach it to the base.
I. Put the upper case and the base together.
J. Tighten the screws with the L-wrench for the upper and base not to be
separated .


