8
Setting Up The Expansion Bay
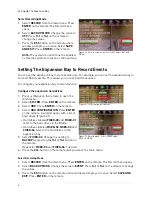
Select Recording Mode
1. Select
RECORD
from the main menu. Press
ENTER
on the remote. The Record menu opens.
2. Select
BACK UP MODE
. Change the value to
MIRROR
. Press
f(-)
or
f(+)
on the remote to
change the values.
3. Press the
ESC
button on the remote until a
window prompts you to save. Select
SAVE AND
EXIT
. Press
ENTER
on the remote.
Error Messages
You may encounter an error message that reads:
"BACKUP HDD NOT CONFIGURED"if you do not set
the HDD CONFIGURATION properly.
The hard drive(s)
must
be set in BACKUP mode in
order for the mirroring function to work (Figure 2.4).
NOTE:
At least ONE hard drive needs to be set to
BACKUP mode for Mirror mode to function. Do not
set all the hard drives to BACKUP mode. See figure
2.4 as an example.
Restarting The Expansion Bay
If you need to power off the expansion bay, you must restart the Blade in order to detect the
expansion bay hard drives. To restart the expansion bay, unplug the power cord from the rear
panel. Wait five seconds before powering back on.
Always set up the expansion bay in an area where you will not accidently trip or unplug the power
cord. If this happens, you must restart the Blade in order for the expansion bay hard drives to
function.
Upgrading The Hard Drive
You may need to upgrade the hard drive on the expansion bay to increase storage capacity or for
future maintenance.
Remove The Casing
1. Unscrew the four black screws on the sides of
the casing.
2. Slide the casing off of the unit.
NOTE:
The two vent slots on the casing face
toward the two internal hard drives.
Figure 2.5 Record setup menu. Select MIRROR under
BACKUP MODE.
Figure 2.6 Error message during Recording configuration.
Double-check and make sure that you correctly set the
HDD CONFIGURATION menu. The hard drives must be set
to BACKUP mode.
Figure 2.7 Unscrew the four black screws on the sides of the
casing.
Содержание VBAY3HD
Страница 8: ...viii...


