16
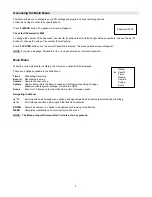
Camera Channel Setup
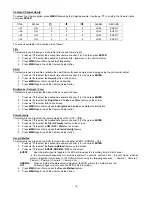
To access the Camera option, press
MENU
followed by the 4-digit password. Use the
▲
/
▼
to scroll to the Camera
option
and press
ENTER.
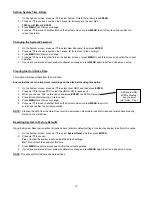
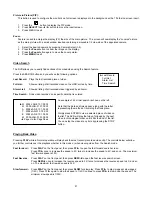
TITLE
DWELL
ALARM
RECORD
---01 ON 5
5
5 LOW
EVENT
---02 ON 5
5
5 LOW
EVENT
---03 ON 5
5
5 LOW
EVENT
---04 ON 5
5
5 LOW
EVENT
The options available in this section are as follows…
Title
This feature is used to assign a 6-character title to each camera input.
1. Press
▲
/
▼
to select the desired time camera channel (1-9), and then press
ENTER
.
2. Press
▲
/
▼
to select the desired character and
◄
/
►
to move to the next character
3. Press
MENU
to confirm and exit the
Title
setting.
4. Press
MENU
again to exit the Camera Setup Option
Dwell
This feature is used to enable or disable the dwell feature for each camera when viewing using the call monitor output.
1. Press
▲
/
▼
to select the desired time camera channel (1-9), then press
ENTER
.
2. Press
◄
/
►
to select the
Dwell
feature on the screen.
3. Press
MENU
to confirm and exit the dwell setting.
4. Press
MENU
again to exit the Camera Setup Option
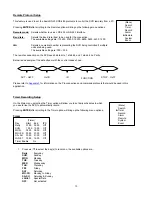
Brightness / Contrast / Color
This feature is used to adjust the video settings on each channel.
1. Press
▲
/
▼
to select the desired time camera channel (1-9), then press
ENTER
.
2. Press
◄
/
►
to select the
Brightness, Contrast, or Color
feature on the screen.
3. Press
▲
/
▼
to select
0~9
on the screen.
4. Press
MENU
to confirm and exit the
Brightness, Contrast, or Color
control feature
5. Press
MENU
again to exit the Camera Setup Option
Alarm Polarity
This feature is used to select the alarm polarity as LOW / OFF / HIGH.
1. Press
▲
/
▼
to select the desired time camera channel (1-9), then press
ENTER
.
2. Press
◄
/
►
to select the
Alarm Polarity
feature on the screen.
3. Press
▲
/
▼
to select
LOW / OFF / HIGH
on the screen.
4. Press
MENU
to confirm and exit the
Alarm Polarity
feature
5. Press
MENU
again to exit the Camera Setup Option
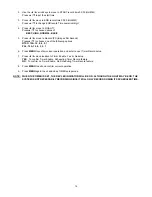
Record Method
This feature is used to select the DVR record method as either EVENT / NORMAL / OFF.
1. Press
▲
/
▼
to select the desired time camera channel (1-9), then press
ENTER
.
2. Press
◄
/
►
to select the
Record Method
feature on the screen.
3. Press
▲
/
▼
to select
EVENT
/
NORMAL
/
OFF
on the screen.
EVENT
:
when the alarm input is triggered, the DVR will increase the recording time to that channel.
i.e. the normal record sequence for cameras is camera 1, camera 2, camera 3 etc… In Event mode, when an
alarm in triggered from channel 1, the DVR will record using the following sequence…., Camera 1, Camera 2,
Camera 1, Camera 3, Camera 1, Camera 4 etc….
NORMAL
: When an External Audible Alarm is triggered, the DVR will record normally as set up.
OFF
:
An Alarm Trigger will not cause the DVR to start recording
4. Press
MENU
to confirm and exit the
Record Method
feature
5. Press
MENU
again to exit the Camera Setup Option
Содержание DGR109
Страница 1: ...9 Channel Digital Video Recorder Models DGR109 Installation User Manual Digimerge Technologies Inc ...
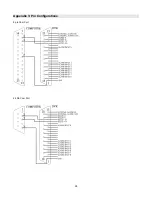
Страница 29: ...28 Appendix 3 Pin Configurations 9 pin Com Port 25 Pin Com Port ...
Страница 36: ...35 Digimerge Technologies Inc 300 Alden Road Markham Ontario L3R 4C1 www digimerge com rev04 ...

