Page 11 Manual_Revised_V1.0
and arms.
10
Use suitable detectors to find hidden electric
cables or gas and water pipes.
11
Sawdust and splinters must not be removed
while the machine is running.
12
Do not pierce the motor housing as this
could damage the double insulation
13
Ensure that ventilation openings are kept
clear when working in dusty conditions.
14
Do not operate the tool for long time, or the
quiver of the machine will hurt hands or arms.
WARNING
: Some dust created by
power Cutting contains chemicals
known to cause cancer, birth defects or other
reproductive harm. Some examples of these
chemicals are:
■ lead from lead-based paints
■ Arsenics and chromium from chemically
reacted lumber.
Your risk from these exposures varies,
depending on how often you do this type
of work. To reduce your exposure to these
chemicals: work in a well ventilated area, and
work with approved safety equipment.
STANDERD ACCESSORIES
●
Guide ruler: a set
●
Auxiliary handle: a set
Be sure to check the accessories as it is
subject to change by areas and models.
OPERATION
1 POWER SUPPLY
The power tool supply must match the
nameplate date.
2. AUTOMATIC SAFETY CLUTCH.
Protects the operator and machine from the
high reverse torque, which develops if the tool
jams all of a sudden.
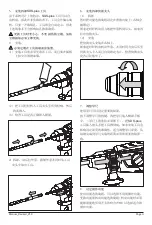
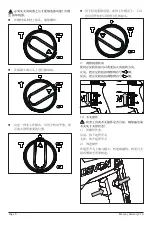
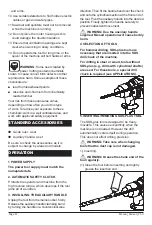
3. INSTALLING THE AUXILIARY HANDLE
Unplug the tool from the mains socket, firstly.
Release the auxiliary handle clamping band
by turning the handle in a counter-clockwise
direction. Then fit the handle band over the chuck
and onto the cylindrical section at the front end of
the tool. Pivot the auxiliary handle into the desired
position. Finally, tighten the handle securely to
prevent inadvertent movement.
WARNING:
Use the auxiliary handle
supplied. Missed operation will cause bodily
harm.
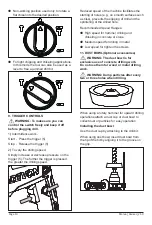
4. SELECTION OF TOOLS
For hammer drilling, SDS-plus tools are
necessary that are inserted into the SDS
drill chuck of the machine.
For drilling in steel or wood, tools without
SDS-plus (e.g., drills with cylindrical shafts)
are used. For these tools, a special drill
chuck is required (see APPLICATIONS).
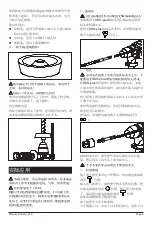
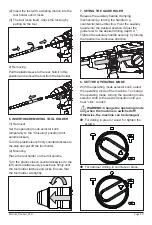
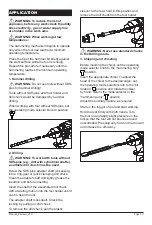
5. INSERTING/REMOVING SDS-PLUS TOOL
The SDS-plus tool is designed to be freely
movable. This causes eccentricity when the
machine is not loaded. However the drill
automatically centers itself during operation.
This does not affect drilling precision.
WARNING:
Take care when changing
tools that the dust cap is not damaged.
1
)
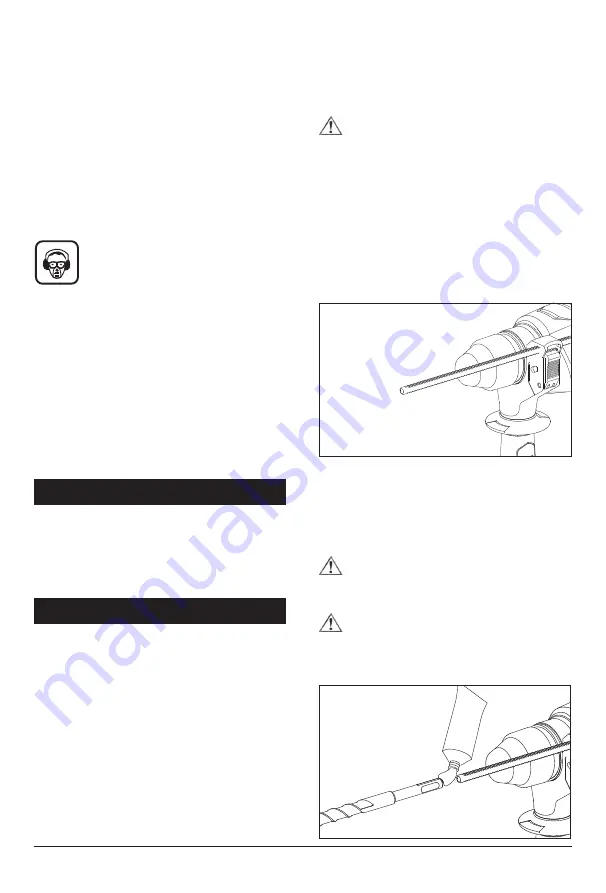
Inserting:
WARNING:
Grease the shank end of the
tool regularly.
(1
)
Clean the tool before inserting and lightly
grease the insertion end.
Содержание 1107-26DE
Страница 1: ...PROFESSIONAL TOOLS GB Rotary Hammer 1107 26E 1107 26RE 1107 26DE 1107 26DRE...
Страница 3: ...Manual_Revised_V1 0 Page 2 1 1 2 3 2 1 2 3 4 5 6 RCD RCD 3 1 2 3 4 5 6 7 4 1 2 3 4 5 6 7 5...
Страница 5: ...Manual_Revised_V1 0 Page 4 5 SDS plus SDS plus 1 1 2 3 2 6 1 2 7 SDS plus 8...
Страница 6: ...Page 5 Manual_Revised_V1 0 9 10 1 2...
Страница 7: ...Manual_Revised_V1 0 Page 6 11 2 3 1 SDS plus SDS plus SDS plus 2 SDS plus SDS plus 3...
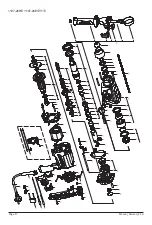
Страница 23: ...Manual_Revised_V1 0 Page 22...
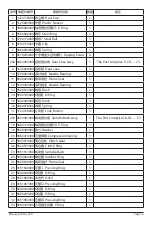
Страница 24: ...Page 23 Manual_Revised_V1 0...
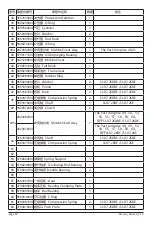
Страница 25: ...Manual_Revised_V1 0 Page 24...
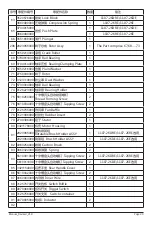
Страница 26: ...Page 25 Manual_Revised_V1 0...
Страница 27: ......


