background image

Introduction

1

FK-506

1-15

Installation

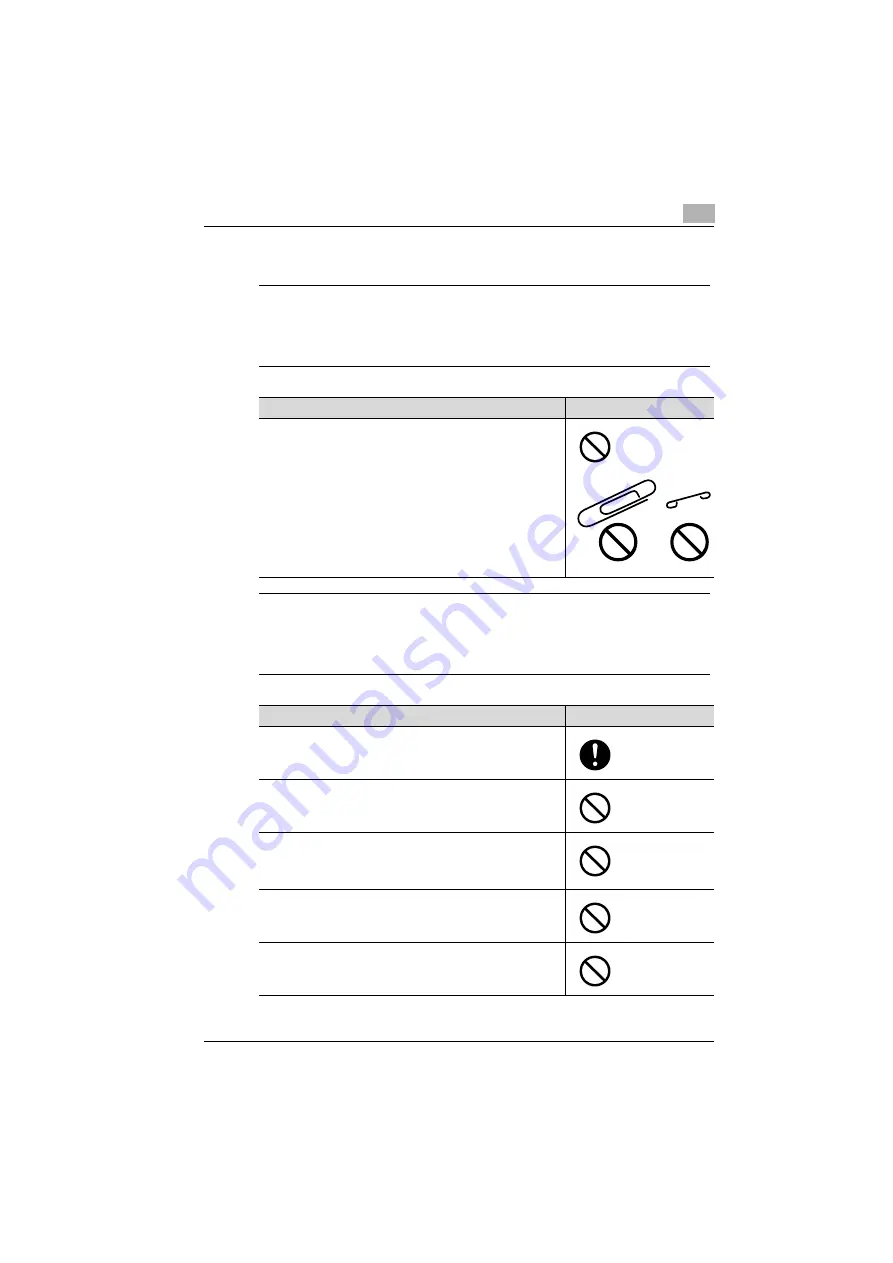
WARNING

Ignoring this warnings could cause serious injury or even death.

%

Do not ignore this safety advices.

CAUTION 

Ignoring this cautions could cause injury or damage to property.

%

Do not ignore this safety advices.

Warning

Symbol

• Do not place a flower vase or other container that contains 

water, or metal clips or other small metallic objects on this 
product. Spilled water or metallic objects dropped inside the 
product could result in a fire, electrical shock, or breakdown.
Should a piece of metal, water, or any other similar foreign 
matter get inside the product, immediately turn OFF the pow-
er switch, unplug the power cord from the power outlet, and 
then call your authorized service representative.

Caution

Symbol

• After installing this product, mount it on a secure base. If the 

unit moves or falls, it may cause personal injury.

• Do not place the product in a dusty place, or a site exposed 

to soot or steam, near a kitchen table, bath, or a humidifier. 
A fire, electrical shock, or breakdown could result.

• Do not place this product on an unstable or tilted bench, or 

in a location subject to a lot of vibration and shock. It could 
drop or fall, causing personal injury or mechanical break-
down.

• Do not let any object plug the ventilation holes of this prod-

uct. Heat could accumulate inside the product, resulting in a 
fire or malfunction.

• Do not use flammable sprays, liquids, or gases near this 

product, as a fire could result.

Содержание FK-506

Страница 1: ...FK 506 ineo 163 213 Dynamic balance www develop de User Manual ...

Страница 2: ......

Страница 3: ...semble and modification 1 11 Power cord 1 12 Power source 1 13 Power plug 1 14 Grounding 1 14 Installation 1 15 Ventilation 1 16 Actions in response to troubles 1 16 Consumables 1 17 When moving the machine 1 18 1 5 Special notice to user 1 19 For Canada 1 19 For U S A 1 20 For New Zealand 1 23 For Europe 1 23 2 Precaution 2 1 Part names and their functions 2 3 Main unit 2 3 2 2 Control panel part...

Страница 4: ...arameter 2 25 Selecting the telephone dialing system TONE PULSE parameter 2 28 Selecting the telephone wiring system PSTN PBX parameter 2 31 3 Faxing 3 1 General transmission operation 3 3 3 2 Positioning the document 3 6 Loading the document into the document feeder 3 6 Placing the document on the original glass 3 9 3 3 Selecting the fax quality 3 10 Selecting a Quality setting 3 11 3 4 Specifyin...

Страница 5: ...GE PRINT 3 43 ONE TOUCH LIST 3 44 SPEED DIAL LIST 3 44 KEY SETTING LIST 3 44 RELAY BOX LIST 3 44 MACHINE STATUS LIST 3 44 Configuration Page 3 44 PCL Font List 3 44 3 12 Memory transmission and real time transmission 3 45 Memory transmission 3 45 Real time transmission 3 46 3 13 Sending a fax at a specified time 3 48 3 14 Batch transmission 3 51 3 15 Receiving 3 52 Memory reception 3 52 Paper size...

Страница 6: ...cifying transmission settings 5 8 Specifying the transmission time 5 8 Selecting BASIC ADVANCED settings 5 10 Selecting the setting for MAX TX SIZE 5 12 Selecting the setting for MAX QUALITY 5 14 Selecting the setting for CODING METHOD 5 16 5 3 Specifying the image quality and density when scanning 5 18 Quality settings 5 18 Density settings 5 19 5 4 Specifying additional settings 5 20 Specifying ...

Страница 7: ...grammed speed dial number 6 31 Registering a group of fax numbers 6 33 Changing deleting a registered group of fax numbers 6 36 Registering a dialing program 6 39 Changing deleting a broadcast transmission program 6 41 Changing deleting a timer transmission program 6 44 Changing deleting a mailbox transmission program 6 46 Changing deleting a polling reception program 6 48 Changing deleting a rela...

Страница 8: ...r 6 90 6 8 REPORTING 6 91 Displaying the REPORTING menu 6 92 Selecting automatic printing of the activity report ACTIVITY REPORT parameter 6 93 Selecting automatic printing of the queued jobs report RESERVATION REPORT parameter 6 94 Selecting automatic printing of the transmission results report TX RESULT REPORT parameter 6 95 Selecting automatic printing of the reception results report RX RESULT ...

Страница 9: ...Editing speed dialing settings 8 15 Registering group dialing settings 8 16 Editing group dialing settings 8 18 Printing the list of one touch dialing speed dialing and group dialing settings 8 19 Saving settings to a computer 8 19 Saving settings to this machine 8 19 Specifying Utility mode settings 8 20 Specifying administrator settings 8 23 Checking the counter totals 8 26 Checking the configur...

Страница 10: ...Contents 8 FK 506 ...

Страница 11: ...1 Introduction ...

Страница 12: ......

Страница 13: ...n this user manual 1 1 Trademarks and copyrights Netscape is a registered trademark of Netscape Communications Corporation in the United States and other countries Novell and Novell NetWare are registered trademarks of Novell Inc in the United States and other countries Microsoft Windows and Windows NT are either registered trademarks or trademarks of Microsoft Corporation in the United States and...

Страница 14: ...1 Introduction 1 4 FK 506 1 2 Available fax features Sending Broadcast transmission For details refer to page 3 27 Timer transmission For details refer to page 3 48 ...

Страница 15: ... 1 FK 506 1 5 Polling transmission For details refer to page 4 14 Relay initiating transmission For details refer to page 4 22 2 Reminder Specify a model compatible with F code communications for the relay station ...

Страница 16: ...1 Introduction 1 6 FK 506 Receiving Memory reception For details refer to page 3 52 Mailbox reception For details refer to page 4 12 2 Note Mailbox reception is compatible with F code communication ...

Страница 17: ...Introduction 1 FK 506 1 7 Polling reception For details refer to page 4 19 Forwarding For details refer to page 4 28 ...

Страница 18: ...age Observe all warnings in order to prevent injuries and to ensure safe use of the machine 7 CAUTION Failure to observe instructions highlighted in this manner may result in slight injuries or property damage Observe all cautions in order to prevent injuries and to ensure safe use of the machine Sequence of action 1 The number 1 as formatted here indicates the first step of a sequence of actions ...

Страница 19: ...chine 2 Reminder Text highlighted in this manner contains information that should be reminded Detail Text highlighted in this manner contains references for more detailed information Special text markings Stop key The names of keys on the control panel are written as shown above MACHINE SETTING Display texts are written as shown above ...

Страница 20: ...t problems Please keep this manual in a handy place near the machine Make sure you observe all of the precautions appear in each section of this manual KM_Ver 01E_C 2 Note Some parts of the contents of this section may not correspond with the purchased product Warning and precaution symbols The following indicators are used on the warning labels or in this manual to categorize the level of safety ...

Страница 21: ...s a pro hibited course of action This symbol warns against dis mantling the device A black circle indicates an im perative course of action This symbol indicates you must unplug the device Warning Symbol Do not attempt to remove the covers and panels which have been fixed to the product Some products have a high volt age part or a laser beam source inside that could cause an electrical shock or bl...

Страница 22: ...electrical shock Use the power cord supplied in the package only for this ma chine and NEVER use it for any other product Failure to ob serve this precaution could result in a fire or electrical shock Do not scratch abrade place a heavy object on heat twist bend pull on or damage the power cord Use of a damaged power cord exposed core wire broken wire etc could re sult in a fire or breakdown Shoul...

Страница 23: ... to inadequate power supply voltage current capacity grounding and may result in fire or shock If proper wall outlet is not available the customer shall ask qualified electrician for the installation Do not use a multiple outlet adapter nor an extension cord in principle Use of an adapter or an extension cord could cause a fire or electrical shock Contact your authorized service representative if ...

Страница 24: ...in the power cord with a wet hand as an electrical shock could result Plug the power cord all the way into the power outlet Failure to do this could result in a fire or electrical shock Caution Symbol Do not tug the power cord when unplugging Pulling on the power cord could damage the cord resulting in a fire or elec trical shock Remove the power plug from the outlet more than one time a year and ...

Страница 25: ... the pow er switch unplug the power cord from the power outlet and then call your authorized service representative Caution Symbol After installing this product mount it on a secure base If the unit moves or falls it may cause personal injury Do not place the product in a dusty place or a site exposed to soot or steam near a kitchen table bath or a humidifier A fire electrical shock or breakdown c...

Страница 26: ... Ventilate the room at regular intervals Warning Symbol Do not keep using this product if this product becomes inor dinately hot or emits smoke or unusual odor or noise Imme diately turn OFF the power switch unplug the power cord from the power outlet and then call your authorized service representative If you keep on using it as is a fire or electrical shock could result Do not keep using this pr...

Страница 27: ...ch may cause burns When checking the inside of the unit for malfunctions such as a paper misfeed do not touch the locations around the fus ing unit etc which are indicated by a Caution HOT caution label Warning Symbol Do not throw the toner cartridge or toner into an open flame The hot toner may scatter and cause burns or other damage Caution Symbol Do not leave a toner unit or drum unit in a plac...

Страница 28: ...er moving this product be sure to disconnect the power cord and other cables Failure to do this could damage the cord or cable resulting in a fire electrical shock or breakdown When moving this product always hold it by the locations specified in the user manual or other documents If the unit falls it may cause severe personal injury The product may also be damaged or malfunction ...

Страница 29: ...shock and injury to persons including the follwing 1 Do not use this product near water for example near a bathtub washbowl kitchen sink or laundry tub in a wet basement or near a swimming pool 2 Avoid using a telephone other than a cordless type during an electrical storm There may be a remote risk of electric shock from lightning 3 Do not use the telephone to report a gas leak in the vicinity of...

Страница 30: ...nt à l élimination des piles CONSERVER CES INSTRUCTIONS For U S A FCC PART 68 REQUIREMENTS This equipment complies with Part 68 of the FCC rules and the requirements adopted by the ACTA On the cover of this equipment is a label that contains among other information a product identifier in the format US AAAEQ TXXXX If required this information must be provided to the telephone company This equipmen...

Страница 31: ...s experienced with this equipment FK 506 for repair or warranty information please contact the Develop dealer location where you purchased this equipment If the equipment is causing harm to the telephone network the telephone company may request that you disconnect the equipment until the problem is resolved Connection to party line service is subject to state tariffs Contact the state public util...

Страница 32: ...orm There may be a remote risk of electric shock from lightning 3 Do not use the telephone to report a gas leak in the vicinity of the leak 4 Use only the power cord and batteries indicated in this manual Do not dispose of batteries in a fire They may explode Check with local codes for possible special disposal instructions SAVE THESE INSTRUCTONS 7 WARNING The exclamation point within an equilater...

Страница 33: ...erent make or model nor does it imply that any product is compatible with all of Telecom s network services 4 The automatic calling functions of this equipment must not be used to cause a nuisance to other customers 5 Telepermitted equipment only may be connected to the auxiliary telephone port The auxiliary port is not specifically designed for 3 wire connected equipment 3 wire might not respond ...

Страница 34: ...1 Introduction 1 24 FK 506 ...

Страница 35: ...2 Precaution ...

Страница 36: ......

Страница 37: ...Precaution 2 FK 506 2 3 2 Precaution 2 1 Part names and their functions Main unit 1 2 3 4 5 6 7 8 9 10 11 12 13 ...

Страница 38: ... to open close the right side door 6 Right side door Opened when clearing paper misfeeds 7 Mechanical counter Indicates the total number of copy and printout pages that were printed 8 RJ45 connector for networking optional Used for connecting the network cable when this ma chine is used for network printing 9 USB connector Used for connecting a USB cable from the computer 10 Telephone line connect...

Страница 39: ...or messages 5 and keys OK key Press the and keys to select menu items in the display and change their settings Press the OK key to apply the setting 6 Printer key indicator This indicator lights up while data is being printed from the computer and flashes while data is being sent For details refer to the user manual for the printer driver 7 Access key Press when account track settings have been ap...

Страница 40: ...onfidential documents 17 Finishing key indicator Press to select a copy Finishing function 18 Combine Original key indicator Specify settings to copy multiple 2 or 4 document pages together within a single sheet of paper 2in1 or 4in1 19 Confirm key Press to view the counters or communication results or to print a communication results report 20 Utility key Press to specify settings in Utility mode...

Страница 41: ...n terrupt mode Press the key again to cancel Interrupt mode and re turn to the mode before Interrupt mode was entered If this key is pressed while a received fax or computer document is being printed printing stops so that the interrupting copy job can be performed Press this key again to continue printing the received fax or computer document 28 Clear Stop key Press to erase the entered letters a...

Страница 42: ...he last recipient called While dialing this key is used to generate a pause when transferring from an internal to an external line or receiving information services 35 One touch dial keys Use to dial previously registered fax numbers Use 01 through 32 for specifying one touch dial ing and group dialing settings Use keys 29 through 32 for specifying program dialing settings 36 Switching plate Switc...

Страница 43: ...FINE TEXT Indicates that the FINE TEXT setting is selected S FINE TEXT Indicates that the S FINE TEXT setting is selected STD PHOTO Indicates that the STD PHOTO setting is selected FINE PHOTO Indicates that the FINE PHOTO setting is selected S FINE PHOTO Indicates that the S FINE PHOTO setting is selected 4 Input mode Indicates the currently selected input mode 1 Indicates that the number input mo...

Страница 44: ...ent is being received In standby for timer transmission A document is queued for timer transmission In standby for poll ing transmission A document is queued for polling transmission In standby for mail box reception A mailbox reception document is ready to be printed Memory reception A document is being received and stored in the mem ory or has been received and stored in the memory ...

Страница 45: ...the machine is turned on or when the settings are reset are called the default settings These settings serve as a reference for all functions 2 Note The default settings can be changed from Utility mode Refer to page 6 3 Fax mode Quality TEXT Density STD Transmission setting MEMORY TX Reception setting AUTO RX ...

Страница 46: ...Using the keypad type in numbers letters and symbols Switch between numbers and letters symbols by pressing the 123 ABC key When 1 appears in the display numbers will be entered When A appears in the display letters symbols will be entered The following characters can be entered with each key in the keypad Characters that can be entered with keypad Keypad Available characters 1 A 1 1 period _ unde...

Страница 47: ...Precaution 2 FK 506 2 13 Detail Repeatedly press the keypad to scroll through the corresponding characters and symbols listed until the desired character appears in the display ...

Страница 48: ...e 01 Press the 123 ABC key until input mode A is selected The cursor _ flashes alternately in the display with the character at its current location Press the 6 key three times Press the 3 key seven times ONE TOUCH DIAL _ NAME ONE TOUCH DIAL O NAME ONE TOUCH DIAL Of NAME ...

Страница 49: ...Precaution 2 FK 506 2 15 Press the key Press the 3 key seven times Press the 4 key seven times ONE TOUCH DIAL Of_ NAME ONE TOUCH DIAL Off NAME ONE TOUCH DIAL Offi NAME ...

Страница 50: ...2 Precaution 2 16 FK 506 Press the 2 key seven times Press the 3 key six times Press the 0 key ONE TOUCH DIAL Offic NAME ONE TOUCH DIAL Office NAME ONE TOUCH DIAL Office_ NAME ...

Страница 51: ...Precaution 2 FK 506 2 17 Press the 123 ABC key Press the 0 key Press the 1 key ONE TOUCH DIAL Office _ NAME ONE TOUCH DIAL Office 0 NAME ONE TOUCH DIAL Office 01 NAME ...

Страница 52: ... character is to be added and then type in the new character The new character is inserted in front of the character at the cursor s position To enter text with the keypad To enter a character with the same key used to enter the previously entered character press the key before entering the next character Refer to Text input example on page 2 14 To enter a space Press the 123 ABC key until input m...

Страница 53: ...ese settings Required settings Before using the machine settings must be specified for the following Current date time Machine s fax number Telephone dialing system Telephone wiring external internal system If settings are specified for the following the machine can be used more efficiently We recommend specifying the appropriate settings Transmission source your name and fax number One touch dial...

Страница 54: ... 2 Press the or key until ADMIN MANAGEMENT is selected and then press the OK key 3 Use the keypad to type in the administrator access code and then press the OK key The default administrator access code is 000000 The ADMIN MANAGEMENT menu appears UTILITY MODE ADMIN MANAGEMENT USER MANAGEMENT COPY SETTING 1 ADMIN MANAGEMENT ADMIN NO ...

Страница 55: ...l DATE TIME is selected and then press the OK key 6 Use the keypad to type in time and date and then press the OK key Enter the time in the 24 hour format For the year enter the last two digits ADMIN MANAGEMENT COMM SETTING REMOTE MONITOR USER SETTING USER SETTING USER FAX NO DATE TIME USER NAME DATE TIME DATE TIME ZONE GMT ...

Страница 56: ...cted and then press the OK key This setting is required only if optional image controller IC 206 or optional network interface card NC 503 is installed on the machine The USER SETTING menu appears again To return to the main screen press the Reset key DATE TIME DATE TIME ZONE GMT ...

Страница 57: ... UTILITY MODE menu appears 2 Press the or key until ADMIN MANAGEMENT is selected and then press the OK key 3 Use the keypad to type in the administrator access code and then press the OK key The ADMIN MANAGEMENT menu appears UTILITY MODE ADMIN MANAGEMENT USER MANAGEMENT COPY SETTING 1 ADMIN MANAGEMENT ADMIN NO ...

Страница 58: ...d to type in the fax number and then press the OK key For details on entering text refer to Entering text on page 2 12 A maximum of 20 digits can be entered for the fax number Characters that can be entered Numbers 0 through 9 spaces and The USER SETTING menu appears again ADMIN MANAGEMENT COMM SETTING REMOTE MONITOR USER SETTING USER SETTING USER FAX NO DATE TIME USER NAME USER FAX NO 012_ ...

Страница 59: ...xes sent from this machine Detail The transmission source name is printed at the top of sent documents Faxes can also be sent without adding the transmission source name 1 Press the Utility key The UTILITY MODE menu appears 2 Press the or key until ADMIN MANAGEMENT is selected and then press the OK key UTILITY MODE ADMIN MANAGEMENT USER MANAGEMENT COPY SETTING 1 ...

Страница 60: ...r access code is 000000 The ADMIN MANAGEMENT menu appears 4 Press the or key until USER SETTING is selected and then press the OK key 5 Press the or key until USER NAME is selected and then press the OK key ADMIN MANAGEMENT ADMIN NO ADMIN MANAGEMENT COMM SETTING REMOTE MONITOR USER SETTING USER SETTING USER FAX NO DATE TIME USER NAME ...

Страница 61: ...d to type in the user name and then press the OK key For details on entering text refer to Entering text on page 2 12 A maximum of 32 characters can be entered for the transmission source name The USER SETTING menu appears again USER NAME ABC ...

Страница 62: ...em used by your telephone line Select the correct setting after checking which type of dialing system is used 1 Press the Utility key The UTILITY MODE menu appears 2 Press the or key until ADMIN MANAGEMENT is selected and then press the OK key 3 Use the keypad to type in the administrator access code and then press the OK key The ADMIN MANAGEMENT menu appears UTILITY MODE ADMIN MANAGEMENT USER MAN...

Страница 63: ...s the OK key 5 Press the or key until TONE PULSE is selected and then press the OK key 6 Press the or key until TONE or PULSE is selected and then press the OK key ADMIN MANAGEMENT COMM SETTING REMOTE MONITOR USER SETTING COMM SETTING LINE MONITOR TONE PULSE PSTN PBX TONE PULSE PULSE TONE ...

Страница 64: ...2 Precaution 2 30 FK 506 If PULSE was selected select 10pps or 20pps in the next menu that appears and then press the OK key The COMM SETTING menu appears again PULSE 20pps 10pps ...

Страница 65: ...r extension number must be specified The outside line access number or extension number is programmed with the key 1 Press the Utility key The UTILITY MODE menu appears 2 Press the or key until ADMIN MANAGEMENT is selected and then press the OK key 3 Use the keypad to type in the administrator access code and then press the OK key The ADMIN MANAGEMENT menu appears UTILITY MODE ADMIN MANAGEMENT USE...

Страница 66: ...press the OK key 5 Press the or key until PSTN PBX is selected and then press the OK key 6 Press the or key until PSTN or PBX is selected and then press the OK key ADMIN MANAGEMENT COMM SETTING REMOTE MONITOR USER SETTING COMM SETTING LINE MONITOR TONE PULSE PSTN PBX PSTN PBX PBX PSTN ...

Страница 67: ...Precaution 2 FK 506 2 33 If PBX was selected type the outside line access number in the next screen that appears and then press the OK key The COMM SETTING menu appears again PBX PRE FIX NO 1_ ...

Страница 68: ...2 Precaution 2 34 FK 506 ...

Страница 69: ...3 Faxing ...

Страница 70: ......

Страница 71: ... This is a G3 fax machine Faxes can only be sent or received with this machine if the recipient s or sender s machine complies with the G3 standard 1 Press the Fax key The machine enters Fax mode and the Fax mode screen appears 2 Position the document to be faxed For details on positioning the document refer to Positioning the document on page 3 6 ...

Страница 72: ...into the document feeder the machine starts scanning the document and sending the fax When the transmission is finished a beep is sounded To stop the transmission press the Clear Stop key and then select YES in the screen that appeared If the document is placed on the original glass continue with step 6 6 Press the or key until AUTO DETECTION or MANUAL is selected and then press the OK key If MANU...

Страница 73: ...he transmission begins When the transmission is finished a beep is sounded To stop the transmission press the Clear Stop key and then select YES in the screen that appeared Detail For details on canceling the transmission of a scanned document refer to Canceling deleting a queued transmission on page 3 35 If the fax could not be sent a transmission report is printed For details refer to Checking c...

Страница 74: ... sure to remove all staples and paper clips before faxing a document 1 Press the Fax key The machine enters Fax mode and the Fax mode screen appears 2 Load the document into the document feeder with the side to be scanned facing up A maximum of 50 sheets of plain A3 size paper can be loaded Only a single page can be loaded if the document has a length of 432 mm 17 inches or more ...

Страница 75: ...ment being loaded Non standard sized documents with the following maximum sizes can be scanned 1000 mm 39 1 4 inch 297 mm 11 3 4 inch 210 mm Sizes less than 210 mm are scanned as 210 mm Paper feed direction Paper feed direction 139 7 mm 5 1 2 inch Maximum size Minimum size ...

Страница 76: ...s sent with a width of A4 w B4 w or A3 w Letter w Legal w Ledger w whichever is closest to but greater than the width of the document If the length of the document exceeds 1 000 mm 39 1 4 inches this machine may determine that a document misfeed occurred and stop scanning Any part of the image within a 2 mm 1 16 inch border around the edge of the document cannot be scanned When a document with an ...

Страница 77: ...he machine enters Fax mode and the Fax mode screen appears 2 Lift open the document feeder and then place the document on the original glass with the side to be scanned facing down Align the document on the scales above and to the left of the original glass 3 Close the document feeder ...

Страница 78: ...tings to match the type of document whether it contains a large amount of small print detailed illustrations or photos to be faxed will produce a sharper result Document type Quality setting Text documents TEXT photo docu ments PHOTO or documents containing text and photos TEXT PHOTO STD FINE S FINE ...

Страница 79: ...Detail Depending on the recipient s fax machine it may not be possible to send faxes using the S FINE TEXT or S FINE PHOTO setting In this case the fax is sent with the FINE TEXT or FINE PHOTO setting If the PHOTO or S FINE PHOTO setting is selected the fax may have a decreased image quality depending on the quality of the recipient s fax machine or on whether the document size is larger than the ...

Страница 80: ...fax number are entered immediately after the prefix for an international call 001 0061 or 0041 when sending international faxes not enough time may be allowed for establishing a connection causing a busy signal to be heard If this is the case press the Redial Pause key twice before entering the country code and fax number so that there is a pause of about 6 seconds after the prefix for internation...

Страница 81: ... Scanning and transmission begin Detail A maximum of 30 digits can be entered for the fax number Characters that can be entered Numbers 0 through 9 spaces and pauses For details on entering text refer to Entering text on page 2 12 If the Redial Pause key is pressed while entering the fax number a 3 second pause is added A pause appears as P in the display If the machine is connected to a PBX line ...

Страница 82: ...r to Registering one touch dial destinations on page 6 21 1 Position the document to be faxed Refer to Positioning the document on page 3 6 2 If necessary select the Quality setting For details on selecting the Quality setting refer to Selecting the fax quality on page 3 10 3 Press the one touch dial key 01 through 32 programmed with the destination where the fax is to be sent When the switching p...

Страница 83: ... numbered 17 through 32 If a one touch dial key was incorrectly pressed press the Clear Stop key to clear the specified destination 4 Press the Start key Scanning and transmission begin To stop the transmission press the Clear Stop key and then press the OK key when the next screen appears ...

Страница 84: ...n page 6 27 1 Position the document to be faxed Refer to Positioning the document on page 3 6 2 If necessary select the Quality setting For details on selecting the Quality setting refer to Selecting the fax quality on page 3 10 3 Press the Speed Dial key 4 Use the keypad to type in the 3 digit speed dial number and then press the OK key If the number was incorrectly entered press the Reset key an...

Страница 85: ...506 3 17 5 Press the Start key Scanning and transmission begin To stop the transmission press the Clear Stop key and then select YES in the screen that appeared AAA OASAKA Memory 100 QUALITY STD TEXT OTHER SETTING ...

Страница 86: ...t to be faxed Refer to Positioning the document on page 3 6 2 If necessary select the Quality setting For details on selecting the Quality setting refer to Selecting the fax quality on page 3 10 3 Press the one touch dial key 01 through 32 programmed with the group of fax numbers where the fax is to be sent If a one touch dial key was incorrectly pressed press the Clear Stop key to clear the speci...

Страница 87: ...K 506 3 19 4 Press the Start key Scanning and transmission begin To stop the transmission press the Clear Stop key and then select YES in the screen that appeared Memory 100 QUALITY STD TEXT NAGOYA OTHER SETTING ...

Страница 88: ...document to be faxed Refer to Positioning the document on page 3 6 For polling reception this step can be skipped 2 If necessary select the Quality setting For details on selecting the Quality setting refer to Selecting the fax quality on page 3 10 For polling reception this step can be skipped 3 Press the one touch dial key 29 through 32 labeled in blue programmed with the desired function When t...

Страница 89: ...cally begins To stop the transmission press the Clear Stop key and then select YES in the screen that appeared Detail To cancel a timer transmission press the Function key and then select CANCEL RESERV For details refer to Canceling deleting a queued transmission on page 3 35 ...

Страница 90: ...ation to be searched for and selected 1 Position the document to be faxed Refer to Positioning the document on page 3 6 2 If necessary select the Quality setting For details on selecting the Quality setting refer to Selecting the fax quality on page 3 10 3 Press the Phone Book key 4 Press the or key until LIST or SEARCH is selected and then press the OK key PHONE BOOK SEARCH LIST ...

Страница 91: ...he destination continue with step 7 If SEARCH was selected A screen appears allowing you to enter the text to be searched for Continue with step 5 5 Use the keypad to type in the first few characters of the name registered for the desired destination and then press the OK key A maximum of 10 characters can be entered A screen appears containing the list of destinations registered with a name begin...

Страница 92: ...ing 3 24 FK 506 6 Press the or key until the desired destination is selected and then press the OK key 7 Press the Start key Scanning and transmission begin PHONE BOOK SEARCH AAA OSAKA AAA NEW YORK AAA TOKYO ...

Страница 93: ...ns Use any of the following methods to specify the destinations Manual dialing One touch dialing Speed dialing Phone book dialing The following procedure describes how to specify destinations using the one touch dial keys then directly typing in the fax number 1 Press the On Hook key The indicator on the Memory TX key goes off and then ON HOOK appears in the display 2 Press the one touch dial key ...

Страница 94: ...nd then position the document to be faxed Refer to Positioning the document on page 3 6 4 Press the Start key The registered function automatically begins To stop the transmission press the Clear Stop key and then select YES in the screen that appeared Memory 100 QUALITY STD TEXT AAA ...

Страница 95: ...p dialing Phone book dialing Destinations can be specified using any combination of the methods listed above Detail A maximum of 255 destinations can be specified for the same transmission When the one touch dial keys are used a maximum of 32 destinations can be specified When the speed dial numbers are used a maximum of 240 destinations can be specified When fax numbers are directly typed in a ma...

Страница 96: ...e in the 3 digit speed dial number of the destination where the fax is to be sent When specified using group dialing Press the one touch dial key programmed with the group of destinations where the fax is to be sent When specified using the phone book Press the Phone Book key and then specify the destination after selecting either LIST or SEARCH Refer to Phone book dialing on page 3 22 When direct...

Страница 97: ...ed recipients have been added 6 Select RETURN and then press the OK key 7 If necessary select the Quality setting For details on selecting the Quality setting refer to Selecting the fax quality on page 3 10 8 Press the Start key Scanning and transmission begin BROADCAST CHECK EDIT ADD RETURN BROADCAST CHECK EDIT ADD RETURN ...

Страница 98: ...ey and then select CANCEL RESERV For details refer to Canceling deleting a queued transmission on page 3 35 Manual redialing Dialing the last destination where a fax was sent is called redialing 1 Position the document to be faxed Refer to Positioning the document on page 3 6 2 If necessary select the Quality setting For details on selecting the Quality setting refer to Selecting the fax quality o...

Страница 99: ...erased If the transmission is to be canceled The data for the scanned pages are erased Wait until all fax transmission or reception operations are finished check the amount of memory that is available and then perform the fax transmission again If the scanned pages are to be sent If the document was scanned from the original glass send the scanned document pages and then finish the operation Check...

Страница 100: ... fax is not sent correctly this machine automatically redials the fax number The document to be sent is treated as a queued fax waiting for redialing until the fax number is redialed If the redialing or fax transmission could not be completed correctly a transmission result report is printed 2 Note For details on the transmission result report refer to Types of reports lists on page 3 42 ...

Страница 101: ...is set to receive faxes automatically automatic reception a beep is sounded without the recipient answering the telephone In this case you cannot talk to the recipient When faxing after completing a telephone call feed the document using the document feeder A manual transmission can be performed when a telephone is connected to the TEL port of this machine Even when pulse dialing is being used typ...

Страница 102: ... of the recipient can also be specified using the keys in the control panel of this machine Refer to page 3 12 5 After finishing talking on the telephone the recipient should press the Start key to start receiving the fax Once the recipient s fax machine is ready a beep is heard 6 Press the Start key Scanning and transmission begin To stop the transmission press the Clear Stop key and then select ...

Страница 103: ...ancel the transmission 1 Press the Function key The FAX FUNCTION menu appears 2 Press the or key until CANCEL RESERV is selected and then press the OK key If a polling transmission job is stored a screen for entering the ID appears If there are no queued transmission jobs in the memory the message NONE appears The details specified transmission time type of transmission destination fax number of t...

Страница 104: ...eleted is selected and then press the OK key 4 Press the or key until YES is selected and then press the OK key The selected transmission job is canceled deleted 5 To delete more queued jobs repeat steps 2 through 4 CANCEL RESERV TIMER TX 01 18 00 0123456 CANCEL RESERV NO YES ...

Страница 105: ... number of pages printed since this machine was installed SIZE COUNT This counter shows the total number of copies printouts printed on the specified paper size The paper size that is counted should be set by the service representative TOTAL SCAN This counter shows the total number of scans made since this ma chine was installed Scans made during copying are not included TX PAGES This counter show...

Страница 106: ...e or key until the counter to be checked is selected 4 Press the OK key The CONFIRM MODE menu appears again 5 Press the Back key The main screen appears again TOTAL PAGE SIZE COUNT TOTAL COUNT TOTAL SCAN TOTAL PAGE RX PAGES TX PAGES ...

Страница 107: ...results 1 Press the Confirm key The CONFIRM MODE menu appears 2 Press the or key until TX RX RESULT is selected and then press the OK key 3 Press the or key until the communication results to be checked are displayed In the TX RX RESULT screen TX indicates sent faxes and RX indicates received faxes CONFIRM MODE TX RX RESULT TOTAL PAGE PRINT REPORT TX RX RESULT AAA TOKYO OK TX REPORT START ...

Страница 108: ...ayed To print the communication results report press the Start key After the communication results report is printed the main screen appears Printing reports lists 1 Press the Confirm key The CONFIRM MODE menu appears 2 Press the or key until PRINT REPORT is selected and then press the OK key CONFIRM MODE TX RX RESULT TOTAL PAGE PRINT REPORT ...

Страница 109: ...n screen appears again 2 Note The reception transmission results reports can be checked in the display For details on viewing the communication results refer to Checking communication results on page 3 39 For details on the available types of reports lists refer to Types of reports lists on page 3 42 PRINT REPORT RX RESULT REPORT TX RESULT REPORT ACTIVITY REPORT ...

Страница 110: ...tarting time of transmission number of document pages time required mode and transmission result are printed RX RESULT REPORT The document number caller name date received starting time of reception number of pages received time required mode and reception result are printed SES SION FUNC TION No DESTINA TION STA TION DATE TIME PAGE DURA TION MODE RE SULT 0001 TX 001 AAA NEWYORK 012345678 APR 19 1...

Страница 111: ...n or polling reception The document number type of operation to be performed time recipient caller name and number of document pages are printed MEMORY IMAGE PRINT A reduced image of the first page of the document stored in the memory and waiting to be sent in addition to the document number type of operation to be performed recipient caller name date time and number of document pages are printed ...

Страница 112: ...gs are printed Configuration Page The list of print settings are printed PCL Font List This option is available only if optional image controller IC 206 is installed The list of PCL fonts are printed OT No DESTINATION STATION DESTINATION NUMBER DETAIL SET DATE OT 01 AAA NEWYORK 012345678 33 6 JAN 20 2001 OT 02 AAA TOKYO 098765432 14 4 JAN 20 2001 OT 03 HEAD OFFICE 024682468 16 00 33 6 FEB 12 2001 ...

Страница 113: ...ssion the document is scanned then stored in the memory for transmission Memory transmission allows transmission of the next document to be specified while a different communication operation is being performed queued transmission 2 Note Memory transmission is selected as the default transmission mode For details on performing a memory transmission refer to General transmission operation on page 3...

Страница 114: ...lt transmission mode set DEFAULT TX in Utility mode to ADF TX For details refer to Selecting the default transmission mode DEFAULT TX parameter on page 6 71 When the real time transmission mode is used the document should be loaded into the document feeder Transmission is not possible by positioning the document on the original glass If a real time transmission job is specified while a fax is bein...

Страница 115: ...r on the Memory TX key lights up 3 If necessary select the Quality setting For details on selecting the Quality setting refer to Selecting the fax quality on page 3 10 4 Specify the fax number of the recipient 5 Press the Start key Scanning and transmission begin When the transmission is finished the machine is reset to the default transmission mode ...

Страница 116: ... specified time Refer to Setting the current date and time DATE TIME parameter on page 2 20 Timer transmission can be combined with broadcast transmission mailbox transmission polling reception or relay initiating transmission The timer transmission function cannot be used together with real time transmission 1 Position the document to be faxed 2 If necessary select the Quality setting 3 Specify t...

Страница 117: ...n press the OK key 7 Press the or key until RETURN is selected and then press the OK key The transmission screen appears again 8 Press the Start key The machine scans the document then enters transmission standby mode FAX OTHER SETTING SUB SID SETTING TIMER SETTING RETURN FAX OTHER SETTING TIMER 18 0_ FAX OTHER SETTING SUB SID SETTING TIMER SETTING RETURN ...

Страница 118: ...3 Faxing 3 50 FK 506 2 Note To cancel the queued transmission refer to Canceling deleting a queued transmission on page 3 35 ...

Страница 119: ...on the document to be faxed Refer to Positioning the document on page 3 6 2 If necessary select the Quality setting For details on selecting the Quality setting refer to Selecting the fax quality on page 3 10 3 Press the one touch dial key programmed with the desired batch transmission settings 4 Press the Start key The machine automatically starts scanning the document then sends it at the specif...

Страница 120: ... Paper sizes for received faxes With this machine received documents can be printed on paper of the following sizes Metric A5 v B5 v A4 w v B4 w A3 w Inch Invoice 8 1 2 e 5 1 2 v Letter w v Legal 8 1 2 e 14 w Ledger 11 e 17 w Automatic reception dedicated fax mode This mode is specified if the telephone line is used only for faxing When the number of rings specified with the NO of RINGS parameter ...

Страница 121: ...ANUAL RX For details refer to Selecting the reception mode RX MODE parameter on page 6 84 1 After the telephone rings pick up the receiver to talk with the caller 2 After talking and long beeps are heard from the caller s fax machine press the Start key If the caller s fax machine is set to send automatically the long beeps may not be sounded The machine starts receiving the fax 3 Return the telep...

Страница 122: ...they pick up their telephone receiver 4 When the conversation is finished return the telephone receiver to its cradle 3 17 Receiving a telephone call The following procedure describes how to receive a telephone call when an external telephone is connected If RX MODE is set to MANUAL RX a telephone call can be received 1 When the telephone rings pick up the receiver to talk with the caller 2 When t...

Страница 123: ...4 Useful transmission and reception functions ...

Страница 124: ......

Страница 125: ... below according to the operation to be performed Detail F code functions can only be used with fax machines equipped with F code functions Before specifying settings check that both machines are compatible with F codes If one touch dial keys or speed dial numbers are programmed with F codes SUB or SID F code communications can be performed Mailbox transmissions receptions can be performed with ma...

Страница 126: ... used to type in the fax number of a recipient 1 Using the keypad type in the fax number of the recipient 2 Press the key The FAX OTHER SETTING menu appears 3 Press the or key until SUB SID SETTING is selected and then press the OK key Memory 100 01234_ QUALITY STD TEXT OTHER SETTING FAX OTHER SETTING SUB SID SETTING TIMER SETTING RETURN ...

Страница 127: ...n type in the correct number To type in the password continue with step 5 If no password is to be entered press the OK key and then continue with step 6 5 Use the keypad to type in the password and then press the OK key To correct the entered number press the Clear Stop key and then type in the correct number 6 Press the Start key Scanning and transmission begin SUB 555_ SUB SID 5555 000_ ...

Страница 128: ...specified when programming one touch dial keys or speed dial numbers 1 Using the keypad type in the fax number of the recipient 2 Press the key 3 Press the or key until SUB SID SETTING is selected and then press the OK key SPEED DIAL 011 0123456_ DESTINATION OTHER SETTING SPEED DIAL 011 MODEM SPEED SUB SID SETTING RETURN ...

Страница 129: ...n type in the correct number To type in the password continue with step 5 If no password is to be entered press the OK key and then continue with step 6 5 Use the keypad to type in the password and then press the OK key To correct the entered number press the Clear Stop key and then type in the correct number 6 Press the OK key Continue specifying other settings SUB 555_ SUB SID 5555 000_ ...

Страница 130: ...box is called a mailbox reception The following procedures describe how to register mailboxes send mailbox transmissions and print a document received in a mailbox Detail A maximum of five mailboxes can be specified on this machine For details refer to Registering mailboxes on page 6 55 If one touch dial keys or speed dial numbers are programmed with the recipient s F codes F code transmissions re...

Страница 131: ...munication Machines compatible with F codes can be specified as recipients for mailbox transmission The recipient and mailbox settings must be specified The mailbox ID must be entered in order for the recipient to view the fax document 1 Position the document to be faxed Refer to Positioning the document on page 3 6 2 If necessary select the Quality setting For details on selecting the Quality set...

Страница 132: ...ient and then press the OK key Refer to Specifying a recipient on page 3 12 6 Use the keypad to type in the mailbox ID and then press the OK key Enter the mailbox ID SUB 20 digits or less registered for the recipient s mailbox The only characters that can be used for the mailbox ID are 0 through 9 and FAX FUNCTION MAILBOX TX BROADCAST PRINT MAILBOX RX MAILBOX TX 01234_ MAILBOX ID 1111_ ...

Страница 133: ...ss the Clear Stop key and then type in the correct number 7 Use the keypad to type in the password and then press the OK key Enter the password 20 digits or less if a password has been specified for the recipient s mailbox The only characters that can be used for the password are 0 through 9 and To correct the entered number press the Clear Stop key and then type in the correct number 8 Press the ...

Страница 134: ...ocument has been received in a mailbox appears in the main screen Detail In order to receive documents in mailboxes the mailboxes must first be registered For details refer to Registering mailboxes on page 6 55 The following procedure describes how to print a document received with the mailbox reception function 1 Press the Function key 2 Press the or key until PRINT MAILBOX RX is selected and the...

Страница 135: ...ion functions 4 FK 506 4 13 3 Use the keypad to type in the mailbox ID four digits and then press the OK key To correct the entered number press the Clear Stop key and then type in the correct number PRINT MAILBOX RX MAILBOX ID 1111 ...

Страница 136: ...mailbox appears in the main screen Detail Polling transmission is compatible with F code communication A maximum of 30 polling transmissions can be programmed If the memory is full polling transmissions cannot be specified With polling transmission the recipient incurs the cost of the call The following procedure describes how to specify a polling transmission using the polling transmission box 1 ...

Страница 137: ...nsmission document to be requested only once then be deleted from the memory select SINGLE To allow the polling transmission document to be requested multiple times select MULTI The document is stored in the memory until it is deleted by selecting CANCEL RESERV 6 Use the keypad to type in the polling ID four digits and then press the OK key FAX FUNCTION POLLING RX POLLING TX RELAY INITIATE POLLING...

Страница 138: ...d to type in the password four digits and then press the OK key The password can be set to any number between 0000 and 9999 To correct the entered number press the Clear Stop key and then type in the correct number 8 Press the Start key If a document for polling is in a mailbox appears in the main screen Scanning begins and then the machine enters a standby mode To stop scanning and registering th...

Страница 139: ...ransmission document 1 Press the Function key 2 Press the or key until POLLING TX is selected and then press the OK key 3 Press the or key until SINGLE or MULTI is selected and then press the OK key FAX FUNCTION POLLING RX POLLING TX RELAY INITIATE POLLING TX MULTI SINGLE RETURN ...

Страница 140: ...nd reception functions 4 18 FK 506 4 Use the keypad to type in the polling ID four digits and then press the OK key 5 Press the or key until DELETE is selected and then press the OK key POLL ID 0000 POLL ID 000 RETURN DELETE ...

Страница 141: ...Detail A maximum of 288 recipients can be specified When the one touch dial keys are used a maximum of 32 destinations can be specified When the speed dial numbers are used a maximum of 240 destinations can be specified When fax numbers are directly typed in a maximum of 16 destinations can be specified Polling reception is compatible with F codes 1 Press the Function key 2 Press the or key until ...

Страница 142: ...on on page 3 27 4 To enter the polling ID and password press the key If there is no need to enter a polling ID and password press the OK key and then continue with step 7 5 Use the keypad to type in the polling ID no more than 20 digits and then press the OK key To correct the entered number press the Clear Stop key and then type in the correct number POLLING RX POLL ID SETTING DESTINATION 0123456...

Страница 143: ... press the OK key To correct the entered number press the Clear Stop key and then type in the correct number 7 To specify multiple recipients select ADD and then repeat steps 3 through 6 If no more recipients are to be specified continue with step 8 8 Press the Start key POLL ID PASSWORD 0000 1111 POLLING RX CHECK EDIT ADD RETURN ...

Страница 144: ...uced by grouping relay stations and relay destinations Detail Relay initiating transmission is compatible with F code communication Specify a model compatible with F code communications for the relay station This machine can be specified as a relay station The relay initiating transmission function cannot be used together with mailbox transmission In order to specify a relay initiating transmissio...

Страница 145: ...g the document on page 3 6 2 If necessary select the Quality setting For details on selecting the Quality setting refer to Selecting the fax quality on page 3 10 3 Press the Function key 4 Press the or key until RELAY INITIATE is selected and then press the OK key FAX FUNCTION POLLING RX POLLING TX RELAY INITIATE ...

Страница 146: ...ipient on page 3 12 6 Use the keypad to type in the relay box ID and then press the OK key Enter the relay box ID 20 digits or less programmed at the relay station The only characters that can be used for the relay box ID are 0 through 9 and To correct the entered number press the Clear Stop key and then type in the correct number RELAY INITIATE DESTINATION 0123456_ RELAY BOX ID 1111_ ...

Страница 147: ...e password 20 digits or less if a password has been specified at the relay station The only characters that can be used for the password are 0 through 9 and To correct the entered number press the Clear Stop key and then type in the correct number 8 Press the Start key Scanning and transmission begin RELAY BOX ID 1111 PASSWORD 1111_ ...

Страница 148: ...ment sent from another fax machine relay initiating station then transmit it to multiple recipients receiving stations Detail Relay broadcast transmission is compatible with F code communication A relay box ID cannot be the same as a mailbox ID When destinations are specified using the one touch dial keys speed dial numbers and group dialing a maximum of 50 destinations can be specified The receiv...

Страница 149: ...m of 10 relay boxes can be registered For details on registering relay boxes refer to Registering a relay box on page 6 60 2 Note In order to perform a relay broadcast transmission as a relay station the relay box ID four digits and the receiving stations final destinations must first be registered For details refer to Registering a relay box on page 6 60 ...

Страница 150: ...ing settings FORWARD parameter on page 6 85 A received Internet fax cannot be forwarded to a fax number In addition if the received data exceeds the conditions specified with the BASIC ADVANCED settings it cannot be forwarded even if the forwarding destination is an e mail address For details on the BASIC ADVANCED settings refer to Selecting BASIC ADVANCED settings on page 5 10 In order to forward...

Страница 151: ...et portal utility Detail In order to perform a direct fax transmission optional image controller IC 206 or optional network interface card NC 503 must be installed on the machine The settings for receiving direct fax result notifications for unimessage pro I Net portal cannot be used STEP 1 Specify the fax number of the recipient specify the recipient after specifying printing from the application...

Страница 152: ...ITY menu Detail For details on the network settings refer to the user manual for image controller IC 206 or network interface card NC 503 Parameters that must be specified for direct faxing Parameter Description IP ADDRESS SETTING Specify the network settings for this machine SUBNET MASK GATEWAY GATEWAY TX To allow use of the direct fax transmission function select ENABLE To prohibit use of the di...

Страница 153: ...5 Internet faxing ...

Страница 154: ......

Страница 155: ... are not specified correctly a communication error will occur and the transmission cannot be completed correctly IP ADDRESS SETTING SUBNET MASK GATEWAY SENDER NAME E MAIL ADDRESS SMTP SERVER ADDRESS SMTP PORT NO SMTP TIMEOUT TEXT INSERT DEFAULT SUBJECT POP BEFORE SMTP Detail For details on the settings refer to the user manual for optional image controller IC 206 or network interface card NC 503 ...

Страница 156: ... screen appears 2 Position the document to be faxed For details on positioning the document refer to Positioning the document on page 3 6 3 If necessary select the Quality setting 4 Press the 123 ABC key For details on selecting the Quality setting refer to Specifying the image quality and density when scanning on page 5 18 ...

Страница 157: ...ess the Clear Stop key and then select YES in the screen that appeared If the document is placed on the original glass continue with step 7 With Internet fax communication the following functions can be used in the same way as with fax communications using a telephone line Broadcast transmission page 3 27 Timer transmission page 3 48 Queued transmission page 3 45 Forwarding page 4 28 Relay broadca...

Страница 158: ...ize of paper to be scanned press the key and then specify the size 9 To continue scanning document pages position the next document page and then press the OK key Repeat this step until all document pages have been scanned BOOK SCAN MANUAL AUTO DETECTION SCAN BOOK AUTO SCAN OK SIZE Memory 100 QUALITY STD TEXT NEXT PAGE AUTO SCAN OK TX START Memory 100 QUALITY STD TEXT ...

Страница 159: ...telephone line Broadcast transmission page 3 27 Timer transmission page 3 48 Queued transmission page 3 45 Forwarding page 4 28 Relay broadcast transmissions page 4 26 Transmission begins When the transmission is finished a beep is sounded Detail For details on canceling the transmission of a scanned document refer to Canceling deleting a queued transmission on page 3 35 If the fax could not be se...

Страница 160: ...ed by selecting TIMER SETTING and settings for MAX TX SIZE MAX QUALITY and CODING METHOD can be specified by selecting BASIC ADVANCED Specifying the transmission time 1 Position the document to be faxed and then specify the recipient Refer to General transmission operation on page 5 4 2 Press the key 3 Press the or key until TIMER SETTING is selected and then press the OK key Memory 100 st test lo...

Страница 161: ...nternet faxing 5 FK 506 5 9 4 Use the keypad to type in the transmission time and then press the OK key 5 Press the Back key The screen for entering the e mail address appears again TIMER TX TIMER 18 00 ...

Страница 162: ...ation on page 5 4 2 Press the key 3 Press the or key until BASIC ADVANCED is selected and then press the OK key 4 Press the or key until BASIC or ADVANCED is selected and then press the OK key If BASIC was selected the FAX OTHER SETTING menu appears again Memory 100 st test local_ QUALITY STD TEXT OTHER SETTING FAX OTHER SETTING BASIC ADVANCED TIMER SETTING RETURN ...

Страница 163: ...llowing settings are specified MAX TX SIZE A4 MAX QUALITY FINE CODING METHOD MH If ADVANCED was selected continue with the procedures on page 5 12 through page 5 16 for the parameters to be specified BASIC ADVANCED ADVANCED BASIC BASIC ADVANCED ADVANCED BASIC ...

Страница 164: ...d then press the OK key For details on displaying the BASIC ADVANCED menu refer to steps 1 through 3 in Selecting BASIC ADVANCED settings on page 5 10 The ADVANCED menu appears 2 Press the or key until MAX TX SIZE is selected and then press the OK key BASIC ADVANCED ADVANCED BASIC ADVANCED MAX QUALITY MAX TX SIZE CODING METHOD ...

Страница 165: ...5 FK 506 5 13 3 Press the or key until A3 B4 or A4 is selected and then press the OK key 4 Select RETURN in the next two screens that appear The screen for entering the e mail address appears again MAX TX SIZE B4 A3 A4 ...

Страница 166: ...d then press the OK key For details on displaying the BASIC ADVANCED menu refer to steps 1 through 3 in Selecting BASIC ADVANCED settings on page 5 10 The ADVANCED menu appears 2 Press the or key until MAX QUALITY is selected and then press the OK key BASIC ADVANCED ADVANCED BASIC ADVANCED MAX QUALITY MAX TX SIZE CODING METHOD ...

Страница 167: ...K 506 5 15 3 Press the or key until FINE or S FINE is selected and then press the OK key 4 Select RETURN in the next two screens that appear The screen for entering the e mail address appears again MAX QUALITY S FINE FINE ...

Страница 168: ...d then press the OK key For details on displaying the BASIC ADVANCED menu refer to steps 1 through 3 in Selecting BASIC ADVANCED settings on page 5 10 The ADVANCED menu appears 2 Press the or key until CODING METHOD is selected and then press the OK key BASIC ADVANCED ADVANCED BASIC ADVANCED MAX QUALITY MAX TX SIZE CODING METHOD ...

Страница 169: ...FK 506 5 17 3 Press the or key until MH MR or MMR is selected and then press the OK key 4 Select RETURN in the next two screens that appear The screen for entering the e mail address appears again CODING METHOD MR MH MMR ...

Страница 170: ...e desired image quality setting is selected and then press the OK key To fax using the S FINE image quality select ADVANCED in the BASIC ADVANCED menu select MAX QUALITY and then select S FINE For details on specifying the setting refer to Selecting the setting for MAX QUALITY on page 5 14 The main screen appears again QUALITY FINE TEXT STD TEXT S FINE TEXT ...

Страница 171: ...ternet faxing 5 FK 506 5 19 Density settings 1 Press the Density key 2 Press the or key until one of the five density levels is selected and then press the OK key The main screen appears again DENSITY OK ...

Страница 172: ...TY MODE menu appears 2 Press the or key until ADMIN MANAGEMENT is selected and then press the OK key 3 Use the keypad to type in the administrator access code and then press the OK key The default administrator access code is 000000 To correct the entered number press the Clear Stop key and then type in the correct number UTILITY MODE ADMIN MANAGEMENT USER MANAGEMENT COPY SETTING 1 ADMIN MANAGEMEN...

Страница 173: ...nd then press the OK key 5 Press the or key until DEFAULT SUBJECT is selected and then press the OK key 6 Use the keypad to type in the subject and then press the OK key ADMIN MANAGEMENT NETWORK SETTING REMOTE MONITOR E MAIL SETTING 1 E MAIL SETTING 1 POP BEFORE SMTP DEFAULT SUBJECT E MAIL MODE DEFAULT SUBJECT Informa_ ...

Страница 174: ...appears 2 Press the or key until ADMIN MANAGEMENT is selected and then press the OK key 3 Use the keypad to type in the administrator access code and then press the OK key The default administrator access code is 000000 To correct the entered number press the Clear Stop key and then type in the correct number The ADMIN MANAGEMENT menu appears UTILITY MODE ADMIN MANAGEMENT USER MANAGEMENT COPY SETT...

Страница 175: ...the or key until REPLY ADDRESS is selected and then press the OK key 6 Use the keypad to type in the reply address and then press the OK key The E MAIL SETTING 2 menu appears again ADMIN MANAGEMENT E MAIL SETTING 2 COMM SETTING USER SETTING E MAIL SETTING 2 HEADER PRINT REPLY ADDRESS RETURN REPLY ADDRESS TOKYO 01 test ...

Страница 176: ... selected and then press the OK key 3 Use the keypad to type in the administrator access code and then press the OK key The default administrator access code is 000000 To correct the entered number press the Clear Stop key and then type in the correct number The ADMIN MANAGEMENT menu appears UTILITY MODE ADMIN MANAGEMENT USER MANAGEMENT COPY SETTING 1 ADMIN MANAGEMENT ADMIN NO ...

Страница 177: ...ess the or key until HEADER PRINT is selected and then press the OK key 6 Press the or key until OFF or ON is selected and then press the OK key The E MAIL SETTING 2 menu appears again ADMIN MANAGEMENT E MAIL SETTING 2 COMM SETTING USER SETTING E MAIL SETTING 2 HEADER PRINT REPLY ADDRESS RETURN HEADER PRINT ON OFF ...

Страница 178: ...munication error will occur and the reception cannot be completed correctly IP ADDRESS SETTING SUBNET MASK GATEWAY POP3 SERVER ADDRESS POP3 PORT NO POP3 TIMEOUT POP3 ACCOUNT POP3 PASSWORD AUTO RECEPTION REPLY ADDRESS HEADER PRINT Detail For details on the settings refer to the user manual for image controller IC 206 or network interface card NC 503 Data that can be received Data in the following f...

Страница 179: ...cted and then press the OK key 3 Use the keypad to type in the administrator access code and then press the OK key The default administrator access code is 000000 To correct the entered number press the Clear Stop key and then type in the correct number The ADMIN MANAGEMENT menu appears UTILITY MODE ADMIN MANAGEMENT USER MANAGEMENT COPY SETTING 1 ADMIN MANAGEMENT ADMIN NO ...

Страница 180: ...hen press the OK key 5 Press the or key until AUTO RECEPTION is selected and then press the OK key 6 Press the or key until ON is selected ADMIN MANAGEMENT E MAIL SETTING 2 COMM SETTING USER SETTING E MAIL SETTING 2 POP3 PASSWORD POP3 ACCOUNT AUTO RECEPTION AUTO RECEPTION min 1 60min ON OFF ...

Страница 181: ... specify the time interval for automatically checking for received Internet faxes and then press the OK key The time interval for automatically checking for received Internet faxes can be set between 1 and 60 minutes AUTO RECEPTION min 1 60min ON OFF ...

Страница 182: ...s the or key until INTERNET FAX RX is selected and then press the OK key 3 Press the or key until RECEIVE E MAIL is selected and then press the OK key If an e mail message was sent it is received then printed FAX FUNCTION INTERNET FAX RX CANCEL RESERV RETURN INTERNET FAX RX RETURN RECEIVE E MAIL ...

Страница 183: ...6 Utility mode Fax mode parameters ...

Страница 184: ......

Страница 185: ...he 1st paper drawer In addition settings can be specified for the paper drawers that are selected during the auto matic tray switching operation 3 CUSTOM SIZE MEM ORY Used to register up to two custom paper sizes 4 USER MANAGEMENT Used to perform maintenance operations in order to maintain the machine s efficiency 5 ADMIN MANAGE MENT Used by the administrator to specify set tings for managing the ...

Страница 186: ... specified from the network tool Web Connection The settings that can be specified are for menu parameters for items 8 and 10 through 12 For details refer to the user manual for the corresponding option 12 REPORTING Used to specify the default settings for the various report operations p 6 91 13 SCAN SETTING Settings can be specified for the parame ters on this menu only if optional image controll...

Страница 187: ...NSITY ADF This parameter can be used to specify the image quality level when the optional document feeder is used MODE1 Select this setting to lighten the copy density and re duce spots in the copy MODE2 Select this setting to produce copies at the same density as that of the document The manufacturer s default setting is MODE1 5 DENSITY BOOK This parameter can be used to specify the density level...

Страница 188: ...und produced when a key is pressed The manufacturer s default setting is LOW 11 INITIAL MODE This parameter can be used to select the mode Copy mode or Fax mode that the machine enters when it is turned on or when the auto panel reset operation is performed The manufacturer s default setting is COPY 12 SCAN THRESHOLD This parameter can be used to specify the amount of memory that is available befo...

Страница 189: ...and then press the OK key 3 Press the or key until the desired MACHINE SETTING parameter is selected The following MACHINE SETTING parameters are available AUTO PANEL RESET ENERGY SAVE MODE AUTO SHUT OFF DENSITY ADF DENSITY BOOK PRINT DENSITY LCD CONTRAST KEY SPEED SETTING LANGUAGE BUZZER VOLUME INITIAL MODE SCAN THRESHOLD UTILITY MODE PAPER SOURCE SETUP MACHINE SETTING CUSTOM SIZE MEMORY ...

Страница 190: ...TTING menu on page 6 7 2 Press the or key until BUZZER VOLUME is selected and then press the OK key 3 Press the or key until OFF LOW or HIGH is selected and then press the OK key The MACHINE SETTING menu appears again UTILITY MODE PAPER SOURCE SETUP MACHINE SETTING CUSTOM SIZE MEMORY MACHINE SETTING INITIAL MODE BUZZER VOLUME SCAN THRESHOLD BUZZER VOLUME LOW OFF HIGH ...

Страница 191: ... SETTING menu on page 6 7 2 Press the or key until INITIAL MODE is selected and then press the OK key 3 Press the or key until COPY or FAX is selected and then press the OK key The MACHINE SETTING menu appears again UTILITY MODE PAPER SOURCE SETUP MACHINE SETTING CUSTOM SIZE MEMORY MACHINE SETTING INITIAL MODE BUZZER VOLUME SCAN THRESHOLD INITIAL MODE FAX COPY ...

Страница 192: ... on page 6 7 2 Press the or key until SCAN THRESHOLD is selected and then press the OK key 3 Press the or key until the desired threshold is selected and then press the OK key The MACHINE SETTING menu appears again UTILITY MODE PAPER SOURCE SETUP MACHINE SETTING CUSTOM SIZE MEMORY MACHINE SETTING INITIAL MODE BUZZER VOLUME SCAN THRESHOLD SCAN THRESHOLD 512 Kbyte 256 Kbyte 1024KByte ...

Страница 193: ... code in a safe place ADMIN MANAGEMENT menu items No ADMIN MANAGEMENT Description 1 ADMINISTRATOR NO This parameter can be used to change the currently speci fied administrator access code to a different number 2 AUTO SHUT OFF This parameter can be used to select whether ENABLE or not DISABLE the AUTO SHUT OFF parameter in the MACHINE SETTING menu can be set to OFF The manufacturer s default setti...

Страница 194: ...ears only when optional image controller IC 206 or network interface card NC 503 is installed Settings for sending Internet faxes and for useful functions such as adding subjects can be specified from this menu For details refer to the user manual for the corresponding option 7 E MAIL SETTING 2 This menu appears only when optional image controller IC 206 or network interface card NC 503 is install...

Страница 195: ...is selected and then press the OK key 3 Use the keypad to type in the administrator access code and then press the OK key The default administrator access code is 000000 To correct the entered number press the Clear Stop key and then type in the correct number The ADMIN MANAGEMENT menu appears UTILITY MODE ADMIN MANAGEMENT USER MANAGEMENT COPY SETTING 1 ADMIN MANAGEMENT ADMIN NO ...

Страница 196: ...ey The following are available from the ADMIN MANAGEMENT menu ADMINISTRATOR NO AUTO SHUT OFF ACCOUNT TRACK REMOTE MONITOR NETWORK SETTING E MAIL SETTING 1 E MAIL SETTING 2 COMM SETTING USER SETTING 2 Note NETWORK SETTING E MAIL SETTING 1 and E MAIL SETTING 2 appear only when optional image controller IC 206 or network interface card NC 503 is installed ...

Страница 197: ...ing the ADMIN MANAGEMENT menu on page 6 13 2 Press the or key until REMOTE MONITOR is selected and then press the OK key 3 Press the or key until OFF LIMITED or FULL is selected and then press the OK key UTILITY MODE ADMIN MANAGEMENT USER MANAGEMENT COPY SETTING 1 ADMIN MANAGEMENT COMM SETTING REMOTE MONITOR USER SETTING REMOTE MONITOR LIMITED OFF FULL ...

Страница 198: ...6 Utility mode Fax mode parameters 6 16 FK 506 If FULL was selected type in the password The ADMIN MANAGEMENT menu appears again REMOTE MONITOR PASSWORD 0000 FULL ACCESS ...

Страница 199: ...parameter 1 Display the ADMIN MANAGEMENT menu Refer to Displaying the ADMIN MANAGEMENT menu on page 6 13 2 Press the or key until COMM SETTING is selected and then press the OK key UTILITY MODE ADMIN MANAGEMENT USER MANAGEMENT COPY SETTING 1 ADMIN MANAGEMENT COMM SETTING REMOTE MONITOR USER SETTING ...

Страница 200: ...PULSE and PSTN PBX parameters refer to Selecting the telephone dialing system TONE PULSE parameter on page 2 28 and Selecting the telephone wiring system PSTN PBX parameter on page 2 31 4 Press the or key until OFF LOW or HIGH is selected and then press the OK key The COMM SETTING menu appears again COMM SETTING LINE MONITOR TONE PULSE PSTN PBX LINE MONITOR LOW OFF HIGH ...

Страница 201: ...ammed with fax numbers the recipient can be specified easily and accurately without the need to manually enter the number using the keypad A max imum of 32 one touch dial keys can be programmed This di aling method is convenient for programming numbers where faxes are frequently sent 2 SPEED DIAL If speed dial numbers are programmed with fax numbers the recipient can be specified easily and accura...

Страница 202: ...GISTRATION is selected and then press the OK key The DIAL REGISTRATION menu appears 3 Press the or key until the desired item in the DIAL REGISTRATION menu is selected and then press the OK key The following items are available from the DIAL REGISTRATION menu ONE TOUCH DIAL SPEED DIAL GROUP DIAL PROGRAM DIAL UTILITY MODE DIAL REGISTRATION COPY SETTING 2 FAX REGISTRATION ...

Страница 203: ...nations registered with the one touch dial keys can be printed For details refer to Printing reports lists on page 3 40 2 Note If optional image controller IC 206 or network interface card NC 503 is installed an e mail address can be entered as the destination 1 Display the DIAL REGISTRATION menu Refer to Displaying the DIAL REGISTRATION menu on page 6 20 2 Press the or key until ONE TOUCH DIAL is...

Страница 204: ...efer to Entering text on page 2 12 A maximum of 20 characters can be entered for the name of the recipient 5 Using the keypad type in the fax number of the recipient A maximum of 30 digits can be entered for the fax number For details on entering text refer to Entering text on page 2 12 ONE TOUCH DIAL SELECT REGIST KEY ONE TOUCH DIAL 01 AAA TOKYO_ NAME ONE TOUCH DIAL 01 0123456 DESTINATION OTHER S...

Страница 205: ...des SUB address and password refer to Using F codes on page 4 3 If an e mail address is entered for the destination and the key is pressed the BASIC ADVANCED settings can be specified For details on the BASIC ADVANCED settings refer to Selecting BASIC ADVANCED settings on page 5 10 6 Press the or key until the parameter to be set is selected and then press the OK key If SUB SID SETTING was selecte...

Страница 206: ... was selected Using the keypad type in the transmission time Repeat this step until all necessary settings have been specified 7 Press the Back key The screen for entering the fax number appears again 8 Press the OK key The settings are registered and the DIAL REGISTRATION menu appears again MODEM SPEED 14 4Kbps 33 6Kbps 9 6Kbps BATCH TIME TIMER 18 00 ...

Страница 207: ...r to Displaying the DIAL REGISTRATION menu on page 6 20 2 Press the or key until ONE TOUCH DIAL is selected and then press the OK key 3 Press the one touch dial key to be changed or canceled UTILITY MODE DIAL REGISTRATION COPY SETTING 2 FAX REGISTRATION DIAL REGISTRATION SPEED DIAL ONE TOUCH DIAL GROUP DIAL ONE TOUCH DIAL SELECT REGIST KEY ...

Страница 208: ... dial key are deleted and the DIAL REGISTRATION menu appears again 5 Change the name of the recipient fax number F code settings SUB address and password and communication speed For details on changing the settings refer to steps 4 through 6 of Registering one touch dial destinations on page 6 21 When all settings have been specified the DIAL REGISTRATION menu appears again ONE TOUCH DIAL DELETE E...

Страница 209: ...bers 001 through 240 can be programmed with destinations 2 Note If optional image controller IC 206 or network interface card NC 503 is installed an e mail address can be entered as the destination 1 Display the DIAL REGISTRATION menu Refer to Displaying the DIAL REGISTRATION menu on page 6 20 2 Press the or key until SPEED DIAL is selected and then press the OK key UTILITY MODE DIAL REGISTRATION ...

Страница 210: ...or details on entering text refer to Entering text on page 2 12 A maximum of 20 characters can be entered for the name of the recipient 5 Using the keypad type in the fax number of the recipient A maximum of 30 digits can be entered for the fax number For details on entering text refer to Entering text on page 2 12 SPEED DIAL SPEED DIAL 011 PRESS OK KEY SPEED DIAL 011 AAA OSAKA NAME SPEED DIAL 011...

Страница 211: ...er to Using F codes on page 4 3 If an e mail address is entered for the destination and the key is pressed the BASIC ADVANCED settings can be specified For details on the BASIC ADVANCED settings refer to Selecting BASIC ADVANCED settings on page 5 10 6 Press the or key until the parameter to be set is selected and then press the OK key If SUB SID SETTING was selected Type in the SUB address and pa...

Страница 212: ...or 9 6Kbps is selected and then press the OK key Repeat this step until all necessary settings have been specified 7 Press the Back key The screen for entering the fax number appears again 8 Press the OK key The settings are registered and the DIAL REGISTRATION menu appears again MODEM SPEED 14 4Kbps 33 6Kbps 9 6Kbps ...

Страница 213: ...ISTRATION menu on page 6 20 2 Press the or key until SPEED DIAL is selected and then press the OK key 3 Use the keypad to type in three digit speed dial number to be changed or canceled and then press the OK key UTILITY MODE DIAL REGISTRATION COPY SETTING 2 FAX REGISTRATION DIAL REGISTRATION SPEED DIAL ONE TOUCH DIAL GROUP DIAL SPEED DIAL SPEED DIAL 011 PRESS OK KEY ...

Страница 214: ...al number are deleted and the DIAL REGISTRATION menu appears again 5 Change the name of the recipient fax number F code settings SUB address and password and communication speed For details on changing the settings refer to steps 4 through 6 of Registering one touch dial destinations on page 6 21 When all settings have been specified the DIAL REGISTRATION menu appears again SPEED DIAL 011 DELETE E...

Страница 215: ...al key with a group of fax numbers is convenient when documents are frequently sent to the same group of multiple recipients 1 Display the DIAL REGISTRATION menu Refer to Displaying the DIAL REGISTRATION menu on page 6 20 2 Press the or key until GROUP DIAL is selected and then press the OK key UTILITY MODE DIAL REGISTRATION COPY SETTING 2 FAX REGISTRATION DIAL REGISTRATION SPEED DIAL ONE TOUCH DI...

Страница 216: ...ext refer to Entering text on page 2 12 A maximum of 20 characters can be entered for the name of the group 5 Use a one touch dial key or speed dial number to specify a recipient and then press the OK key To cancel the currently displayed selection press the Clear Stop key and then specify the correct recipient GROUP DIAL SELECT REGIST KEY GROUP DIAL 05 GROUP 1_ NAME GROUP DIAL 05 _ DESTINATION ...

Страница 217: ...ents can be specified as one group A one touch dial key programmed with a group can be specified as a recipient when programming a one touch dial key for group dialing In that case all fax numbers registered with the specified one touch dial key group dialing are added 7 After specifying the recipients select RETURN and then press the OK key The settings are registered and the DIAL REGISTRATION me...

Страница 218: ...Refer to Displaying the DIAL REGISTRATION menu on page 6 20 2 Press the or key until GROUP DIAL is selected and then press the OK key 3 Press the one touch dial key to be changed or canceled UTILITY MODE DIAL REGISTRATION COPY SETTING 2 FAX REGISTRATION DIAL REGISTRATION SPEED DIAL ONE TOUCH DIAL GROUP DIAL GROUP DIAL SELECT REGIST KEY ...

Страница 219: ...LETE was selected the registered group dial settings are deleted and the DIAL REGISTRATION menu appears again 5 Use the keypad to type in the name of the group and then press the OK key The DIAL REGISTRATION menu appears again 6 To add a recipient select ADD and then press the OK key GROUP DIAL 05 DELETE EDIT RETURN GROUP DIAL 05 GROUP 1 NAME GROUP DIAL 05 CHECK EDIT ADD RETURN ...

Страница 220: ...urrently registered recipients in the screen that appeared Press the OK key to display detailed information for the selected recipient To delete a recipient press the Clear Stop key while the screen for checking recipients or detailed information is displayed and then select YES in the screen that appears 8 After the desired settings are specified select RETURN GROUP DIAL 05 CHECK EDIT ADD RETURN ...

Страница 221: ...ch dial key Transmission reception functions that can be registered Broadcast transmission Timer transmission Mailbox transmission Polling reception Relay initiating transmission 1 Display the DIAL REGISTRATION menu Refer to Displaying the DIAL REGISTRATION menu on page 6 20 2 Press the or key until PROGRAM DIAL is selected and then press the OK key UTILITY MODE DIAL REGISTRATION COPY SETTING 2 FA...

Страница 222: ...en press the OK key 5 Follow the instructions for the selected function Specifying multiple destinations broadcast transmission on page 3 27 Sending a fax at a specified time on page 3 48 Mailbox transmission on page 4 9 Relay initiating transmission on page 4 22 Polling reception on page 4 19 The settings are registered 6 Press the or key until RETURN is selected and then press the OK key The set...

Страница 223: ...r to Displaying the DIAL REGISTRATION menu on page 6 20 2 Press the or key until PROGRAM DIAL is selected and then press the OK key 3 Press the one touch dial key programmed with the broadcast transmission settings to be changed or deleted UTILITY MODE DIAL REGISTRATION COPY SETTING 2 FAX REGISTRATION DIAL REGISTRATION RETURN PROGRAM DIAL ...

Страница 224: ...K key If EDIT was selected continue with the next step If DELETE was selected the registered program settings are deleted and the DIAL REGISTRATION menu appears again 5 Press the or key until ADD or CHECK EDIT is selected and then press the OK key If ADD was selected specify the recipient If CHECK EDIT was selected continue with the next step PROGRAM DIAL 32 DELETE EDIT RETURN BROADCAST CHECK EDIT...

Страница 225: ... the screen that appears To delete the displayed recipient press the Clear Stop key and then select YES in the screen that appeared Repeat this step to finish checking editing the recipients 7 Press the Back key and then select RETURN in the screen that appeared The settings are registered and the DIAL REGISTRATION menu appears again BROADCAST AAA OSAKA AAA NAGOYA AAA TOKYO DELETE NO YES BROADCAST...

Страница 226: ...r to Displaying the DIAL REGISTRATION menu on page 6 20 2 Press the or key until PROGRAM DIAL is selected and then press the OK key 3 Press the one touch dial key programmed with the timer transmission settings to be changed or deleted UTILITY MODE DIAL REGISTRATION COPY SETTING 2 FAX REGISTRATION DIAL REGISTRATION RETURN PROGRAM DIAL ...

Страница 227: ...as selected continue with the next step If DELETE was selected the registered program settings are deleted and the DIAL REGISTRATION menu appears again 5 Use the keypad to type in the transmission time and then press the OK key 6 If necessary change the recipient settings and then press the OK key The settings are registered and the DIAL REGISTRATION menu appears again PROGRAM DIAL 32 DELETE EDIT ...

Страница 228: ...r to Displaying the DIAL REGISTRATION menu on page 6 20 2 Press the or key until PROGRAM DIAL is selected and then press the OK key 3 Press the one touch dial key programmed with the mailbox transmission settings to be changed or deleted UTILITY MODE DIAL REGISTRATION COPY SETTING 2 FAX REGISTRATION DIAL REGISTRATION RETURN PROGRAM DIAL ...

Страница 229: ...f DELETE was selected the registered program settings are deleted and the DIAL REGISTRATION menu appears again 5 If necessary use the one touch dial keys speed dial numbers or keypad to specify the recipients and then press the OK key 6 If necessary use the keypad to change the mailbox ID and password and then press the OK key The settings are registered and the DIAL REGISTRATION menu appears agai...

Страница 230: ...r to Displaying the DIAL REGISTRATION menu on page 6 20 2 Press the or key until PROGRAM DIAL is selected and then press the OK key 3 Press the one touch dial key programmed with the polling reception settings to be changed or deleted UTILITY MODE DIAL REGISTRATION COPY SETTING 2 FAX REGISTRATION DIAL REGISTRATION RETURN PROGRAM DIAL ...

Страница 231: ...u appears again 5 Press the or key until ADD or CHECK EDIT is selected and then press the OK key If ADD was selected specify the recipient If CHECK EDIT was selected continue with the next step 6 If necessary change the recipient settings Repeat steps 5 and 6 until all changes have been specified To return to the screen where ADD or CHECK EDIT can be selected press the Back key 7 Select RETURN and...

Страница 232: ...r to Displaying the DIAL REGISTRATION menu on page 6 20 2 Press the or key until PROGRAM DIAL is selected and then press the OK key 3 Press the one touch dial key programmed with the relay initiating transmission settings to be changed or deleted UTILITY MODE DIAL REGISTRATION COPY SETTING 2 FAX REGISTRATION DIAL REGISTRATION RETURN PROGRAM DIAL ...

Страница 233: ...ected and then press the OK key If EDIT was selected continue with the next step If DELETE was selected the registered program settings are deleted and the DIAL REGISTRATION menu appears again 5 If necessary use the one touch dial keys speed dial numbers or keypad to specify the recipients and then press the OK key PROGRAM DIAL 32 DELETE EDIT RETURN RELAY INITIATE 0123456 DESTINATION ...

Страница 234: ...rs 6 52 FK 506 6 If necessary use the keypad to change the relay box ID and password and then press the OK key The settings are registered and the DIAL REGISTRATION menu appears again RELAY BOX ID PASSWORD 0000 RELAY BOX ID 0000 0000 ...

Страница 235: ...ption 1 MAILBOX Specify the mailbox ID in order to use mailbox reception or polling transmission Mailbox reception or polling transmis sion can be used if the sender specifies the mailbox ID spec ified here 2 RELAY BOX Specify the relay box ID in order for this machine to be used as a relay station If the sender specifies the box ID specified here a document from the sender can be received then se...

Страница 236: ... key until FAX REGISTRATION is selected and then press the OK key The FAX REGISTRATION menu appears 3 Press the or key until the desired item in the FAX REGISTRATION menu is selected and then press the OK key The following items are available from the FAX REGISTRATION menu MAILBOX RELAY BOX UTILITY MODE DIAL REGISTRATION COPY SETTING 2 FAX REGISTRATION ...

Страница 237: ...by the caller matches the mailbox ID set on this machine 2 Note A mailbox ID cannot be the same as a relay box ID 1 Display the FAX REGISTRATION menu Refer to Displaying the FAX REGISTRATION menu on page 6 54 2 Press the or key until MAILBOX is selected and then press the OK key UTILITY MODE DIAL REGISTRATION COPY SETTING 2 FAX REGISTRATION FAX REGISTRATION RELAY BOX MAILBOX RETURN ...

Страница 238: ...y The mailbox number can be set to any number between 1 and 5 4 Use the keypad to type in the box ID four digits and then press the OK key The box ID can be set to any number between 0000 and 9999 To correct the entered box ID press the Clear Stop key and then type in the correct number MAILBOX NO 1 5 MAILBOX 1 ID 0000 ...

Страница 239: ...ss the OK key The password can be set to any number between 0000 and 9999 To correct the entered number press the Clear Stop key and then type in the correct number If no password is to be specified press the OK key without entering anything The FAX REGISTRATION menu appears again MAILBOX 1 ID PASSWORD 0000 0000 ...

Страница 240: ...REGISTRATION menu on page 6 54 2 Press the or key until MAILBOX is selected and then press the OK key 3 Use the keypad to type in the number of the mailbox to be deleted and then press the OK key UTILITY MODE DIAL REGISTRATION COPY SETTING 2 FAX REGISTRATION dummy dummy dummy dummy FAX REGISTRATION RELAY BOX MAILBOX RETURN MAILBOX NO 1 5 ...

Страница 241: ...ress the OK key 5 Use the keypad to type in the registered box ID four digits and then press the OK key To correct the entered number press the Clear Stop key and then type in the correct number The FAX REGISTRATION menu appears again MAILBOX RETURN DELETE MAILBOX 1 ID 0000 ...

Страница 242: ...ing as a relay station can be set to send back a relay result report The fax number of the recipient of the report either the relay initiating station or any other recipient must be specified using either a one touch dial key speed dial number or the keypad Therefore if the recipient is to be specified using a one touch dial key or speed dial number be sure that the one touch dial key or speed dia...

Страница 243: ...elected and then press the OK key Refer to Displaying the FAX REGISTRATION menu on page 6 54 3 Use the keypad to type in the relay box number and then press the OK key The relay box number can be set to any number between 0 and 9 FAX REGISTRATION RELAY BOX MAILBOX RETURN RELAY BOX NO 0 9 ...

Страница 244: ... the Clear Stop key and then type in the correct number 5 Use the keypad to type in the password four digits and then press the OK key The password can be set to any number between 0000 and 9999 To correct the entered password press the Clear Stop key and then type in the correct number If no password is to be specified press the OK key without entering anything RELAY BOX 1 ID 0000 RELAY BOX 1 ID ...

Страница 245: ...report is to be sent back continue with step 8 7 Use the one touch dial keys speed dial numbers or keypad to specify the recipient of the report and then press the OK key 8 Select DESTINATION and then press the OK key RELAY BOX 1 DESTINATION REPORT RELAY BOX 1 SPEED DIAL 011 DESTINATION PRESS OK KEY RELAY BOX 1 DESTINATION REPORT ...

Страница 246: ... key To specify an additional receiving station select ADD in the next screen that appeared and then repeat this step 10 After specifying all receiving stations select RETURN and then press the OK key The FAX REGISTRATION menu appears again RELAY BOX 1 AAA TOKYO DESTINATION 0123456 RELAY BOX 1 ADD RETURN CHECK EDIT RELAY BOX 1 ADD RETURN CHECK EDIT ...

Страница 247: ...g the FAX REGISTRATION menu on page 6 54 2 Press the or key until RELAY BOX is selected and then press the OK key 3 Use the keypad to type in the number of the relay box to be deleted and then press the OK key UTILITY MODE DIAL REGISTRATION COPY SETTING 2 FAX REGISTRATION FAX REGISTRATION RELAY BOX MAILBOX RETURN RELAY BOX NO 0 9 ...

Страница 248: ...6 Utility mode Fax mode parameters 6 66 FK 506 4 Select DELETE and then press the OK key The FAX REGISTRATION menu appears again RELAY BOX RETURN DELETE ...

Страница 249: ...tion 1 DENSITY LEVEL This parameter can be used to set the default scanning den sity to one of five levels For paper with a dark color back ground select a setting towards For faint or colored text select a setting toward 2 QUALITY PRIORITY This parameter can be used to select STD TEXT FINE TEXT S FINE TEXT STD PHOTO FINE PHO TO or S FINE PHOTO as the default image quality resolu tion for scanning...

Страница 250: ...until FAX TX OPERATION is selected and then press the OK key The FAX TX OPERATION menu appears 3 Press the or key until the desired FAX TX OPERATION parameter is selected and then press the OK key The following FAX TX OPERATION parameters are available DENSITY LEVEL QUALITY PRIORITY DEFAULT TX HEADER UTILITY MODE FAX RX OPERATION FAX TX OPERATION REPORTING ...

Страница 251: ...AX TX OPERATION menu on page 6 68 2 Press the or key until DENSITY LEVEL is selected and then press the OK key 3 Press the or key until the desired density level is selected and then press the OK key The FAX TX OPERATION menu appears again UTILITY MODE FAX RX OPERATION FAX TX OPERATION REPORTING FAX TX OPERATION QUALITY PRIORITY DENSITY LEVEL DEFAULT TX DENSITY LEVEL OK ...

Страница 252: ...enu on page 6 68 2 Press the or key until QUALITY PRIORITY is selected and then press the OK key 3 Press the or key until the desired image quality is selected and then press the OK key The FAX TX OPERATION menu appears again UTILITY MODE FAX RX OPERATION FAX TX OPERATION REPORTING FAX TX OPERATION QUALITY PRIORITY DENSITY LEVEL DEFAULT TX QUALITY PRIORITY FINE TEXT STD TEXT S FINE TEXT ...

Страница 253: ... TX OPERATION menu on page 6 68 2 Press the or key until DEFAULT TX is selected and then press the OK key 3 Press the or key until MEMORY TX or ADF TX is selected and then press the OK key The FAX TX OPERATION menu appears again UTILITY MODE FAX RX OPERATION FAX TX OPERATION REPORTING FAX TX OPERATION QUALITY PRIORITY DENSITY LEVEL DEFAULT TX DEFAULT TX ADF TX MEMORY TX ...

Страница 254: ... Displaying the FAX TX OPERATION menu on page 6 68 2 Press the or key until HEADER is selected and then press the OK key 3 Press the or key until OFF or ON is selected and then press the OK key The FAX TX OPERATION menu appears again UTILITY MODE FAX RX OPERATION FAX TX OPERATION REPORTING FAX TX OPERATION RETURN HEADER HEADER ON OFF ...

Страница 255: ...urer s default setting is ON 4 RX PRINT This parameter can be used to select whether printing of the fax begins only after all document pages have been received MEMORY RX or printing begins as soon as the first page of the document is received PRINT RX The manufacturer s default setting is MEMORY RX 5 RX MODE This parameter can be used to set the reception mode to au tomatic reception AUTO RX or m...

Страница 256: ... or not the re ception information date received number of pages etc is printed at the bottom of each received document The manufacturer s default setting is OFF 8 SELECT TRAY This parameter can be used to select which paper drawer can be used to supply paper when printing received documents or communication reports A paper drawer that cannot be used for supplying paper can be specified The manufa...

Страница 257: ... selected and then press the OK key The FAX RX OPERATION menu appears 3 Press the or key until the desired FAX RX OPERATION parameter is selected and then press the OK key The following FAX RX OPERATION parameters are available MEMORY RX MODE NO of RINGS REDUCTION RX RX PRINT RX MODE FORWARD FOOTER SELECT TRAY CLOSED NETWORK UTILITY MODE FAX RX OPERATION FAX TX OPERATION REPORTING ...

Страница 258: ...enu Refer to Displaying the FAX RX OPERATION menu on page 6 75 2 Press the or key until MEMORY RX MODE is selected and then press the OK key 3 Press the or key until ON is selected and then press the OK key UTILITY MODE FAX RX OPERATION FAX TX OPERATION REPORTING FAX RX OPERATION NO of RINGS MEMORY RX MODE REDUCTION RX MEMORY RX MODE ON OFF ...

Страница 259: ... 5 Use the keypad to type in the ending time and then press the OK key 6 Use the keypad to type in the password four digits and then press the OK key The FAX RX OPERATION menu appears again MEMORY RX MODE ON TIME 18 00 OFF TIME 21 00 MEMORY RX MODE ON TIME 18 00 PASSWORD 0000 OFF TIME 21 00 MEMORY RX MODE ON TIME 18 00 ...

Страница 260: ...e has been set or if you wish to cancel memory reception before the ending time follow the procedure described below 1 Display the FAX RX OPERATION menu Refer to Displaying the FAX RX OPERATION menu on page 6 75 2 Press the or key until MEMORY RX MODE is selected and then press the OK key UTILITY MODE FAX RX OPERATION FAX TX OPERATION REPORTING FAX RX OPERATION NO of RINGS MEMORY RX MODE REDUCTION...

Страница 261: ...cified continue with the next step If a password was not specified all received documents stored in the memory are printed and the FAX RX OPERATION menu appears again 4 Use the keypad to type in the password four digits and then press the OK key The FAX RX OPERATION menu appears again MEMORY RX MODE ON OFF MEMORY RX MODE PASSWORD 0000 ...

Страница 262: ...arameter 1 Display the FAX RX OPERATION menu Refer to Displaying the FAX RX OPERATION menu on page 6 75 2 Press the or key until NO of RINGS is selected and then press the OK key UTILITY MODE FAX RX OPERATION FAX TX OPERATION REPORTING FAX RX OPERATION NO of RINGS MEMORY RX MODE REDUCTION RX ...

Страница 263: ...Fax mode parameters 6 FK 506 6 81 3 Use the keypad to type in the number of rings and then press the OK key The number of rings can be set between 1 and 16 The FAX RX OPERATION menu appears again NO of RINGS 2 1 16 ...

Страница 264: ...he FAX RX OPERATION menu on page 6 75 2 Press the or key until REDUCTION RX is selected and then press the OK key 3 Press the or key until OFF ON or CUT is selected and then press the OK key The FAX RX OPERATION menu appears again UTILITY MODE FAX RX OPERATION FAX TX OPERATION REPORTING FAX RX OPERATION NO of RINGS MEMORY RX MODE REDUCTION RX REDUCTION RX ON OFF CUT ...

Страница 265: ...ng the FAX RX OPERATION menu on page 6 75 2 Press the or key until RX PRINT is selected and then press the OK key 3 Press the or key until MEMORY RX or PRINT RX is selected and then press the OK key The FAX RX OPERATION menu appears again UTILITY MODE FAX RX OPERATION FAX TX OPERATION REPORTING FAX RX OPERATION RX MODE RX PRINT FORWARD RX PRINT PRINT RX MEMORY RX ...

Страница 266: ... FAX RX OPERATION menu on page 6 75 2 Press the or key until RX MODE is selected and then press the OK key 3 Press the or key until AUTO RX or MANUAL RX is selected and then press the OK key The FAX RX OPERATION menu appears again UTILITY MODE FAX RX OPERATION FAX TX OPERATION REPORTING FAX RX OPERATION RX MODE RX PRINT FORWARD RX MODE MANUAL RX AUTO RX ...

Страница 267: ...FAX RX OPERATION menu on page 6 75 2 Press the or key until FORWARD is selected and then press the OK key 3 Press the or key until OFF ON or ON PRINT is selected and then press the OK key If ON or ON PRINT was selected continue with step 4 UTILITY MODE FAX RX OPERATION FAX TX OPERATION REPORTING FAX RX OPERATION RX MODE RX PRINT FORWARD FORWARD ON OFF ON PRINT ...

Страница 268: ...te When optional image controller IC 206 or network interface card NC 503 is installed on the machine an e mail address can be specified as the forwarding destination For details refer to the user manual for the corresponding option If an e mail address is entered for the destination and the key is pressed the BASIC ADVANCED settings can be specified For details on the BASIC ADVANCED settings refe...

Страница 269: ...g the FAX RX OPERATION menu on page 6 75 2 Press the or key until FOOTER is selected and then press the OK key 3 Press the or key until OFF or ON is selected and then press the OK key The FAX RX OPERATION menu appears again UTILITY MODE FAX RX OPERATION FAX TX OPERATION REPORTING FAX RX OPERATION SELECT TRAY FOOTER CLOSED NETWORK FOOTER ON OFF ...

Страница 270: ...laying the FAX RX OPERATION menu on page 6 75 2 Press the or key until SELECT TRAY is selected and then press the OK key 3 Press the or key until the desired paper drawer is selected and then press the OK key UTILITY MODE FAX RX OPERATION FAX TX OPERATION REPORTING FAX RX OPERATION SELECT TRAY FOOTER CLOSED NETWORK SELECT TRAY TRAY2 TRAY1 TRAY3 ...

Страница 271: ...Utility mode Fax mode parameters 6 FK 506 6 89 4 Press the or key until DISABLE or ENABLE is selected and then press the OK key The FAX RX OPERATION menu appears again TRAY1 ENABLE DISABLE ...

Страница 272: ...ing the FAX RX OPERATION menu on page 6 75 2 Press the or key until CLOSED NETWORK is selected and then press the OK key 3 Press the or key until OFF or ON is selected and then press the OK key The FAX RX OPERATION menu appears again UTILITY MODE FAX RX OPERATION FAX TX OPERATION REPORTING FAX RX OPERATION SELECT TRAY FOOTER CLOSED NETWORK CLOSED NETWORK ON OFF ...

Страница 273: ...ter can be used to select whether the report is printed automatically when the 60th transmission reception is reached The manufacturer s default setting is ON 2 RESERVATION REPORT If multiple recipients are specified for transmission such as with broadcast transmission and polling reception a report containing the specified settings can be printed before trans mission begins This parameter can be ...

Страница 274: ... until REPORTING is selected and then press the OK key The REPORTING menu appears 3 Press the or key until the desired REPORTING parameter is selected and then press the OK key The following REPORTING parameters are available ACTIVITY REPORT RESERVATION REPORT TX RESULT REPORT RX RESULT REPORT UTILITY MODE FAX RX OPERATION FAX TX OPERATION REPORTING ...

Страница 275: ...splaying the REPORTING menu on page 6 92 2 Press the or key until ACTIVITY REPORT is selected and then press the OK key 3 Press the or key until OFF or ON is selected and then press the OK key The REPORTING menu appears again UTILITY MODE FAX RX OPERATION FAX TX OPERATION REPORTING REPORTING RESERVATION REPORT ACTIVITY REPORT TX RESULT REPORT ACTIVITY REPORT ON OFF ...

Страница 276: ...splaying the REPORTING menu on page 6 92 2 Press the or key until RESERVATION REPORT is selected and then press the OK key 3 Press the or key until OFF or ON is selected and then press the OK key The REPORTING menu appears again UTILITY MODE FAX RX OPERATION FAX TX OPERATION REPORTING REPORTING RESERVATION REPORT ACTIVITY REPORT TX RESULT REPORT RESERVATION REPORT ON OFF ...

Страница 277: ...to Displaying the REPORTING menu on page 6 92 2 Press the or key until TX RESULT REPORT is selected and then press the OK key 3 Press the or key until OFF or ON is selected and then press the OK key The REPORTING menu appears again UTILITY MODE FAX RX OPERATION FAX TX OPERATION REPORTING REPORTING RESERVATION REPORT ACTIVITY REPORT TX RESULT REPORT TX RESULT REPORT ON OFF ...

Страница 278: ...G menu Refer to Displaying the REPORTING menu on page 6 92 2 Press the or key until RX RESULT REPORT is selected and then press the OK key 3 Press the or key until OFF or ON is selected and then press the OK key The REPORTING menu appears again UTILITY MODE FAX RX OPERATION FAX TX OPERATION REPORTING REPORTING RETURN RX RESULT REPORT RX RESULT REPORT ON OFF ...

Страница 279: ...7 Troubleshooting ...

Страница 280: ......

Страница 281: ... F Ask the sender to send a TIFF F file or text in the correct format MEM FULL TX CAN CEL When sending a fax the size of the image data exceeded the ca pacity of the memory Retrieve the reception data stored in the memory Send the fax by direct trans mission MEM FULL RX CAN CEL When receiving e mail the size of the image data exceeded the ca pacity of the memory Retrieve the reception data stored ...

Страница 282: ...correct ly See p 3 6 Is the original glass dirty Wipe the original glass with a soft dry cloth Is the text in the document too faint Adjust the scanning density See p 6 69 Is there a problem with the tele phone connection or with the re cipient s fax machine Check that this machine can make clean copies If it can try sending the fax again The fax received by the recipient is blank The document was...

Страница 283: ...blank Is the toner empty Replace the toner bottle with a new one Did the caller load the pages up side down Have the caller check their fax machine Faxes cannot be received automatically Has the machine been set to re ceive faxes manually Set the machine to automatic reception See p 6 84 Is the memory full Load paper if it is empty and then print the faxes stored in the memory Is the machine perfo...

Страница 284: ... to the machine A communication is being per formed Check again after the communi cation is finished After dialing the ringing cannot be heard Has the telephone dialing sys tem been set correctly Correctly set the telephone dial ing system See p 2 28 After on hook dialing it is difficult to hear the recipi ent caller s voice Has the monitoring volume been set too low Increase the monitoring volume...

Страница 285: ...8 Appendix ...

Страница 286: ......

Страница 287: ...ifications Transmission mode G3 Compatible wiring General subscriber telephone line NCC each line Connection method Direct connection using a modular jack Transmission speed 33 6 31 2 28 8 26 4 24 0 21 6 19 2 16 8 14 4 12 0 9 6 7 2 4 8 2 4 kbps automatic switching Transmission time 3 seconds Scanning density 8dots mme3 85 7 7 15 4lines mm 200dpie100 200 400lpi 16 dots mm e 15 4 lines mm 400 dpi e ...

Страница 288: ...Check the counters Check the configuration page LSD operating environment The following environment is required in order to install LSD onto a computer Interface used for connecting USB interface with a USB cable 2 Note Use a USB cable 4 pin male USB type A male 4 pin male USB type B male It is recommended that the USB cable be no more than 3 meters long Operating environment Operating system Wind...

Страница 289: ...t this machine to the computer 2 Install the TWAIN driver and printer driver included with this machine For details on the installation procedure refer to the corresponding user manual for the GDI printer controller image controller or the TWAIN driver 3 Install LSD onto the computer For details on the installation procedure refer to Installing LSD on page 8 6 ...

Страница 290: ...8 Appendix 8 6 FK 506 Installing LSD 1 Double click LSD Setup exe in the LSD folder 2 The installer starts up 3 Click the Next button and then follow the on screen instructions ...

Страница 291: ...pears indicating that the installation of LSD is finished click the Finish button The installation of LSD is finished Starting up LSD Click the Start button point to All Programs and then click Develop model_name The main window of LSD appears ...

Страница 292: ...end the settings file to the ma chine 4 Download button Click this button to send the machine settings to the computer 5 Open button Click this button to open the settings file 6 Save button Click this button to save the settings file 7 New button Click this button to create a new file 8 Utility Settings button Click this button to display the Utility Setting dialog box 9 Machine icon Click beside...

Страница 293: ...n LSD the machine cannot be operated from its control panel Downloading registered information from the machine Click A connection can also be created by clicking Download on the Machine menu Creating a new settings file Click A connection can also be created by clicking New on the File menu Detail A new file cannot be created if LSD is connect to this machine Click the Disconnect button to cut th...

Страница 294: ...ng one touch dialing settings 1 Click beside the machine icon and then click One Touch 2 From the list that is displayed double click the one touch dial number to be programmed A maximum of 32 one touch dial numbers can be programmed ...

Страница 295: ...cted number specify the desired settings The text entered in the Name box appears in the display as the name of the destination In addition this name appears as the destination when reports are printed 4 Click the OK button Programming of the one touch dial number is finished ...

Страница 296: ...uch dialing settings Click beside the machine icon and then click One Touch Select a programmed one touch dial number to change the settings When editing the settings the Cut Copy Paste and Delete commands on the Edit menu can be selected ...

Страница 297: ...stering speed dialing settings 1 Click beside the machine icon and then click Speed Dial 2 From the list that is displayed double click the speed dial number to be programmed A maximum of 240 speed dial numbers can be programmed ...

Страница 298: ...lected number specify the desired settings The text entered in the Name box appears in the display as the name of the destination In addition this name appears as the destination when reports are printed 4 Click the OK button Programming of the speed dial number is finished ...

Страница 299: ...eed dialing settings Click beside the machine icon and then click Speed Dial Select a programmed speed dial number to change the settings When editing the settings the Cut Copy Paste and Delete commands on the Edit menu can be selected ...

Страница 300: ...rogram group dialing after programming one touch dial and speed dial numbers 1 Click beside the machine icon and then click Group 2 From the list that is displayed double click the group dial number to be programmed A maximum of 32 group dial numbers can be programmed ...

Страница 301: ...stination to be registered in the group and then click or The text entered in the Name box appears in the display as the name of the destination In addition this name appears as the destination when reports are printed 4 Type in the name of the group 5 Click the OK button Programming of the group is finished ...

Страница 302: ... 18 FK 506 Editing group dialing settings Display the list of group dial numbers and then double click the group dial number of the settings to be edited Select a programmed group dial number to change the settings ...

Страница 303: ...be printed and then click the OK button Saving settings to a computer 1 Click 2 Specify the folder where the file is to be saved and then type in the name of the file 3 Click the Save button The settings can also be saved by clicking Save on the File menu Saving settings to this machine Click to send the settings to this machine The settings can also be saved to this machine by clicking Upload on ...

Страница 304: ...control panel can be specified from the Utility Setting dialog box of LSD Click This dialog box can also be displayed by clicking Utility Setting on the Machine menu The Utility Setting dialog box appears Detail While operations are being performed in LSD the machine cannot be operated from its control panel ...

Страница 305: ...ensity Language Key Speed Setting Scan Threshold Paper Source Inch Metric Setting Paper Type Tray1 Paper Copy Setting 1 Paper Priority Quality Priority Density Priority Density Level A Density Level M Page Margin Setting Small Original Binding Position Erase Setting Copy Setting 2 Mixed Original Copy Priority Output Priority 4 IN 1 Copy Order Crisscross Mode Duplex Copy FAX TX Operation Density Le...

Страница 306: ...X Mode Reduction RX RX Print RX Mode Forward Mode No of Rings Select Tray Footer Closed Network Scan Setting Quality Priority Image Format Coding Method Report Setting Activity Report Reservation Report TX Result Report RX Result Report Tab Parameter ...

Страница 307: ...Appendix 8 FK 506 8 23 Specifying administrator settings 1 On the Machine menu click Admin Management 2 Type in the administrator access code ...

Страница 308: ...ngs for the following parameters can be specified from LSD Tab Parameter Administrator Mode Auto Shut Off Copy Track Remote Monitor Change Admin No Network Setting IP Address Subnet Mask Gateway DNS Configuration Gateway TX Web Setting LPD Setting SLP Setting SNMP Setting ...

Страница 309: ...Timeout TEXT Insert Default Subject POP Before SMTP E Mail Mode E mail Setting 2 POP3 Server Address POP3 Account POP3 Password POP3 Port No POP3 Timeout Auto Reception Reply Address Header Print Communication Setting Tone Pulse Line Monitor PSTN PBX Machine Information Name Telephone number Tab Parameter ...

Страница 310: ...8 Appendix 8 26 FK 506 Checking the counter totals On the Machine menu click Total Counter The Total Counter dialog box appears ...

Страница 311: ...u click Configuration The Machine Status dialog box appears Uninstalling LSD 1 Click the Start button point to Programs then Develop model_name and then click Uninstall 2 Follow the on screen instructions 3 When the following dialog box appears the uninstallation is finished ...

Страница 312: ...scriber line Analog telephone lines public network supported by NTT East NTT West NTT Communications and NCC JBIG coding method New method of data compression decompression standardized by the Joint Bi level Image Expert Working Group a subcommittee of the International Telecommunications Union ITU T Effective for transfer ring large amounts of data or high resolution image data such as half tones...

Страница 313: ...9 Index ...

Страница 314: ......

Страница 315: ...8 G Glossary 8 28 Grounding 1 14 Group dialing 3 18 6 33 I Image quality 3 10 Input mode 2 12 L LSD Local Setup for Diagnostic 8 4 M Machine counters 3 37 Machine settings 6 5 Mailbox reception 4 12 Mailbox transmission 4 9 Mailboxes 4 8 6 55 Manual conventions 1 8 Manual reception 3 53 Manual transmission 3 33 Memory reception 3 52 Memory transmission 3 45 Messages 7 3 O One touch dialing 3 14 6 ...

Страница 316: ...ansmission 4 22 Remote monitoring 6 15 S Specifications 8 3 Speed dialing 3 16 6 27 T Telephone wiring system 2 31 Text input example 2 14 Time setting 2 20 Time zone 2 20 Timer transmission 3 48 Tone 2 28 Transmission results 3 39 Transmission source information registration 2 25 U Utility key 2 5 6 3 W Warning and precaution symbols 1 10 ...

Отзывы: