4
If the static pressure is high in the supply duct because of a
large duct system or the addition of a cooling coil, it is
suggested to close down the louvers until the noise or the
vibration is decreased to a normal level. To limit the airflow
or to increase the temperature differential, it is possible to
close down the louvers. Open up the louvers to have the
reverse effect. To adjust the louvers, push green levers and
engage tack to another hole. It is suggested to place both
louvers at the same position to insure uniform air distribution
through the elements.
2.1
POSITIONING THE FURNACE
WARNING
Fire and explosion hazard.
The furnace must be installed in a level position, never
where it will slope toward the front.
Do not store or use gasoline or any other flammable
substances near the furnace.
Non-observance of these instructions will potentially
result in death, bodily injury and/or property damage.
CAUTION
This furnace is not watertight and is not designed for
outdoor installation. It must be installed in such a
manner as to protect its electrical components from
water. Outdoor installation will lead to a hazardous
electrical condition and to premature failure of the
equipment.
If the furnace is installed in a basement or on a dirt floor, in a
crawl space for example, it is recommended to install the
unit on a cement base 2.5 cm to 5.0 cm (1’’ to 2’’) thick.
The unit must be installed in an area where the ambient and
return air temperatures are above 15
˚
C (60
˚
F). In addition,
the heater should also be located close to the center of the
air distribution system.
2.2
CLEARANCES TO COMBUSTIBLE MATERIAL
2.2.1. Heating
unit
The furnace is approved for zero clearance to combustible
material regardless of the heating capacity.
2.2.2.
Supply air ducts
Ducts for furnaces with a heating capacity up to and
including 20 k W, can be installed with a zero clearance to
combustible material.
Ducts for furnaces of 23 kW or more must have a clearance
of 25 mm (1’’) to combustible material for the first 0.9 m (36’’)
of duct. Thereafter the clearance can be zero.
Units of 23 kW and up, installed in the downflow position
must use a DFB-FEM downflow base, which is especially
designed for this purpose. It ensures that the required
clearances are being adhered to.
2.3 CONFIGURATIONS
This furnace requires suitable ductwork.
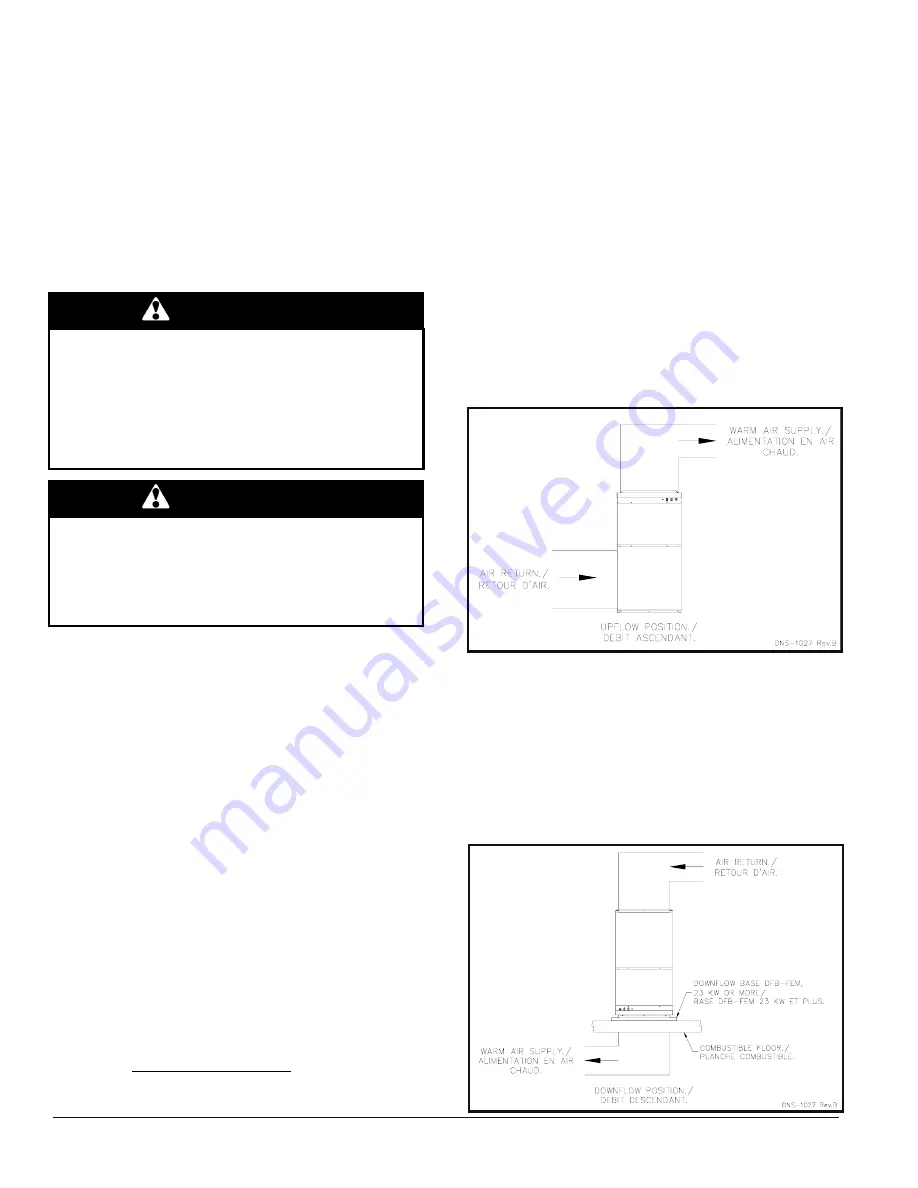
In upflow installation, the return duct may be installed to the
back, on the left, or on the right of the unit.
In downflow or horizontal installation, the return duct may be
installed to the back, on the left side, on the right side or
under the unit.
In all configuration, the supply duct shall be installed on the
top of the unit.
2.3.1. Upflow installation
The return duct may be installed to the back, on the left side
or on the right side of the unit. Care should be taken not to
damage the wires inside, while cutting the opening. Install
the filter rack supplied with the unit according to the
instructions provided with it. It is also recommended to
install the blower door before handling or moving the unit.
Refer to Figure 1 for additional details.
Figure 1: Upflow installation
2.3.2. Downflow
installation
The return duct may be installed to the back, on the left side,
on the right side or under the unit.
When the furnace is installed in the downflow position on a
combustible floor, the clearances from combustibles
materials must be adhered to. The downflow base DFB-
FEM can be used to ensure these clearances. Refer to
Figure 2 and the installation instructions provided with the
base.
Figure 2: Downflow installation
Содержание SUPREME SUP10-M2401A
Страница 11: ...11 Figure 9 Furnace dimensions...
Страница 12: ...12 Figure 10 Wiring diagram 3 wires 10 kW...
Страница 13: ...13 Figure 11 Wiring diagram 3 wires 15 kW...
Страница 14: ...14 Figure 12 Wiring diagram 3 wires 18 20 kW...
Страница 15: ...15 Figure 13 Wiring diagram 3 wires 23 kW...
Страница 16: ...16 Figure 14 Wiring diagram 3 wires 27 kW...
Страница 17: ...17 Figure 15 PARTS LIST Supreme with 1 3 HP and 1 HP motor SUPxx M2401A or SUPxx M2401B B50130A dwg...


