www.dericam.com-
Shenzhen Dericam Technology Co.,Ltd
can go to add your camera into the App by scanning the camera in the LAN or by entering
its UID by manual. We do recommend you to scan and add the camera in your local
network, so you do not need to input the UID which is a long identifie and hard to
remember.
1. Scan for your camera
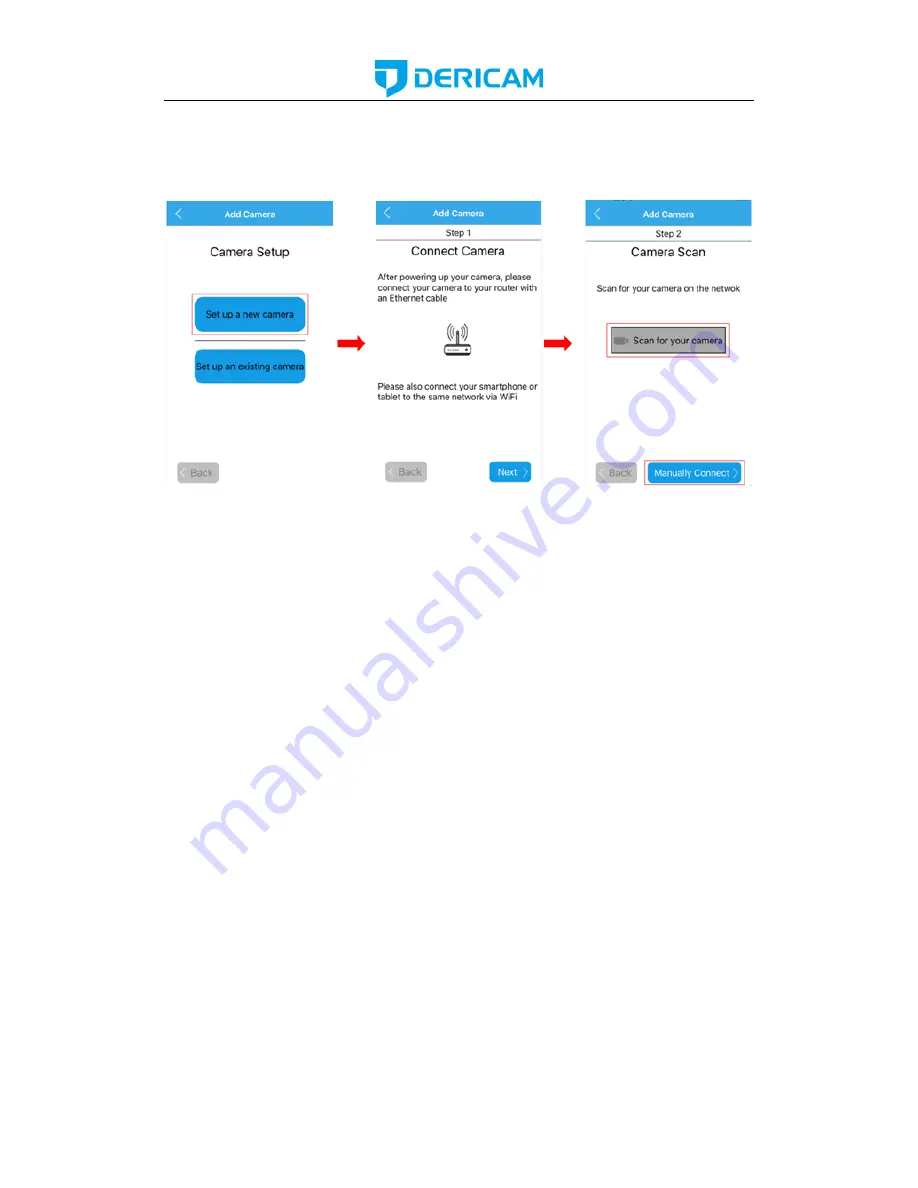
Once you chosen to add the camera by scanning, you can follow the NEXT or text
instructions to complete the process of adding camera. Here are the screenshots to show
how to add the camera by scanning.
-Select the camera you want to set up from the camera list you get by scanning.
-Give your camera a name, and enter right username and password to access it. The
default username/password is admin/admin.
-Change the initial admin/admin username/password for the consideration of account
security. Give your camera a private username and password that known only by you, and
keep it secret.
-If you want to configure the wifi in this set up process, you can choose
YES
to connect it
to your wifi, or you can choose
NO
to start the live view directly. You can also configure
your wifi in the wifi setting page after you added the camera into your App if you do not
want to configure it in this step.
-Please click the refresh icon to search the wifi AP list again if you did not find the wifi
SSID you want.
-Please input the right password of your wifi, and click next to set it into your camera.
-Then you can start live view of your camera and complete this set up process, and you
can access and control your camera now.


