


34
ENGLISH
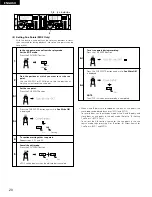
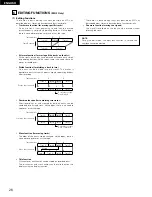
(3) Detailed Description of Preset Functions
(* = Initial setting
K
= MD 2 Only)
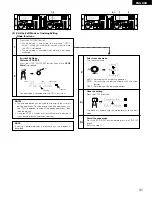
1)
“Play end mode”
Finish Stop
: Stop mode is set after track playing is finished.
Finish Next
: Standby mode is set at next track after track playing is finished.
* Finish Recue
: Standby mode is set at playback start position after track playing is finished.
2)
“Auto Cue”
CueDet. OFF
: Sound is not detected when cueing.
CueDet. (–**) dB
: Sound detection level setting for cueing. (–60/–54/*–48/–42/–36)
3)
K
“Auto increment”
* Auto Inc OFF
: No auto increment of track number.
Auto Inc Dig.
: Track number is automatically incremented during digital recording using subcodes on CDs or MDs (Q codes) or start
IDs on DATs.
Auto Inc Det.
: Track number is automatically incremented during recording when level set in “5) “Inc Det. (–**) dB” setting is
detected.
4)
K
“Auto increment level”
IncDet. (–**) dB
: Sound detection level for auto increment function. (–60/–54/*–48/–42/–36)
5)
K
“Rec start level”
* Rec Lv. OFF
: Recording starts, regardless of the input level.
Rec Lv. (–**) dB
: If the detection level is exceeded, recording starts with no offset. (–36/–42/–48/–54/–60/–66)
6)
K
“Pre UTOC” (Playback is possible up to that point even if power supply is cut off during recording or if recording stops due to some problem.)
* Pre UTOC OFF
: Pre-UTOC function off.
Pre UTOC ON
: Pre-UTOC function on.
7)
K
“Rec Stereo/Mono”
* Rec Stereo
: Record in stereo.
Rec Mono
: Record left channel signal in mono.
8)
K
“Copy managemaent”
SCMS INH
: Record onto disc same code as copy prohibit code in recording source.
* SCMS ENA
: Record copy prohibit code on disc according to SCMS.
9)
“Auto stop”
Sleep. (**) min
: Automatically turn the servo functions off if no button is operated for setted time in the pause, standby. (10/20/*30)
Sleep OFF
: Do not automatically turn the servo functions off.
10) “Program1”
Program1 OFF (ON) : Store the contents of program 1 when on. (Initial setting – “OFF”)
11) “Program2”
Program2 OFF (ON) : Store the contents of program 2 when on. (Initial setting – “OFF”)
12) “Program3”
Program3 OFF (ON) : Store the contents of program 3 when on. (Initial setting – “OFF”)
13) “E.O.M.”
E.O.M. (**) sec
: Set the EOM time. (5/*10/15/20/30/60/90)
E.O.M. OFF
: Do not use the EOM function.
14) “Next track reserve”
* Reserve. OFF
: If a track is selected while another track is playing, the selected track is searched for and played.
Reserve. ON
: When a track is selected while another track is playing, that track is reserved, and when the current track ends the
selected track is searched for and played.
15) “LOOP button Function”
* A – B LOOP
: Seamless playback of A-B section.
1/ALL REPEAT
: 1-track or all-track repeat play mode.
(However, when “POWER ON PLAY” is selected in the presettings, “1/ALL REPEAT” is set automatically.)
16) “Power ON STANDBY (PLAY)”
* Power ON
: The standby mode is set at the beginning of the first track on the disc when the power is turned on.
Power ON PLAY STBY : Loop (repeat) playback of the entire disc begins automatically when the power is turned on.
When “PLAY” is selected, the 1/ALL REPEAT presetting is turned on.
The play mode is set to the continuous mode when the power is turned on.
17) “Preset Clr?”
Preset Clr?
: Clear the presettings (set to the initial factory values).
* Ini. Preset
: Presettings set to initial factory defaults.
18) “SD. xxxx yyyy”
: Display the microprocessor version. (“xxxx: system microprocessor version yyyy: servo microprocessor version”)
19) “R. xxxx”
: Display the microprocessor version (RC-45).


