


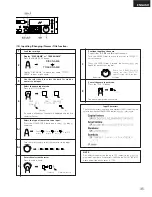

ENGLISH
21
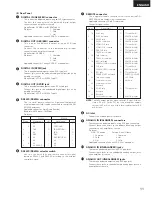
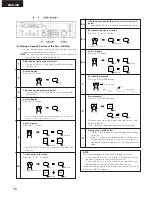
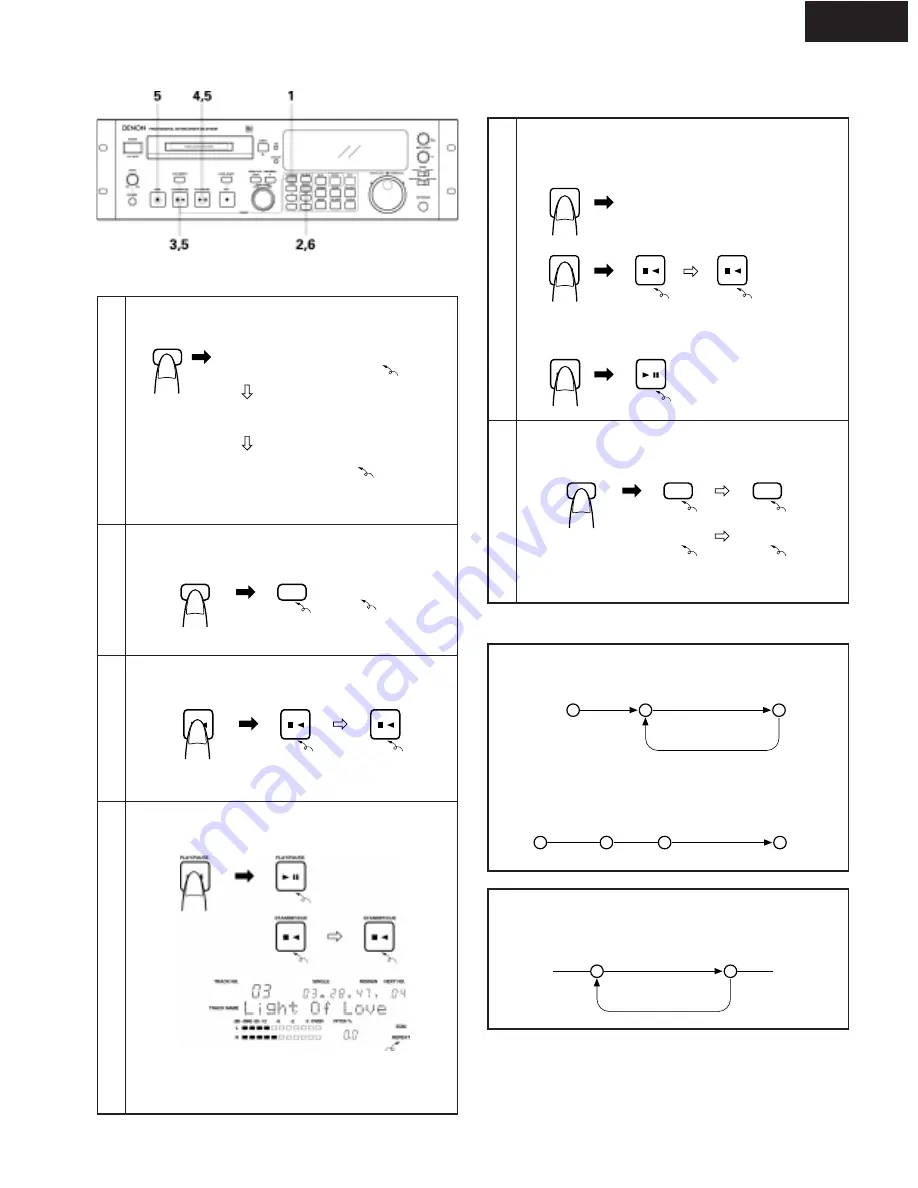
(6) Playing Repeatedly (Repeat)
1
Select the play mode.
Press the PLAY MODE button.
NOTE:
The A-B repeat mode cannot be set unless the A
point, B point or both the A and B points are set.
PLAY MODE
SINGLE
A-B
SINGLE
A-B
SINGLE
A-B
2
Select the repeat mode.
Press the REPEAT button.
The button lights, and the repeat mode is set.
REPEAT
REPEAT
REPEAT
3
Standby at the play start position.
Press the STANDBY/CUE button.
The pickup returns to the play start position and the
standby mode is set.
STANDBY/CUE
STANDBY/CUE
STANDBY/CUE
4
Start playback.
Press the PLAY/PAUSE button.
Repeat playback starts.
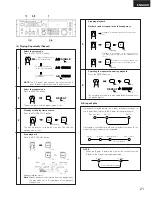
Note:
Repeat playback is performed from the beginning of
the play mode set in
1
, regardless of the playback
start position.
To play the single select-
ed track repeatedly:
To play all the tracks
on the disc repeatedly:
To play the set section
repeatedly:
Lit
Lit
Lit
Lit
Lit
Flashing
Lit
Lit
Lit
Lit
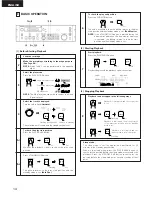
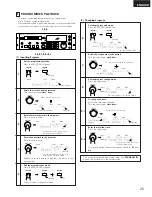
5
Stopping playback
Playback can be stopped in the following ways:
PLAY/PAUSE
PLAY/PAUSE
STANDBY/CUE
STOP
STANDBY/CUE
STANDBY/CUE
6
Canceling the repeat mode during playback
Press the REPEAT button.
The normal play mode resumes and playback continues to
the play end point.
REPEAT
REPEAT
REPEAT
REPEAT
REPEAT
Lit
Flashing
Flashing
Playback is interrupted and the stop mode is
set.
Playback is interrupted, the pickup returns to
the play start position and the standby mode
is set.
Playback is interrupted and the
pause mode is set at that point.
Lit
Off
Lit
Off
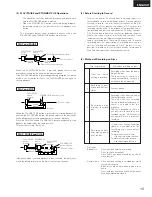
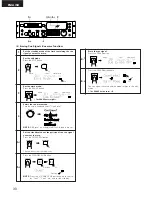
A-B repeat play
If playback is started before the A point, playback continues to
the B point, then returns to the A point for repeat playback.
NOTE:
•
When the B point is before the A point, the section from the
B point to the A point is played repeatedly.
If playback is started after the B point, playback continues to the
end of that track and nothing is repeated.
Play start point
A point
B point
A point
B point
A point
B point
Play start point
End of track
Section played
Section played repeatedly


