background image

ENGLISH

Getting Started

Connections

Troubl

eshooting

Specifications

Press 

[REPEAT]

.


Playback in the respective repeat mode starts.

 1


(Single-track repeat)

 :  Only  1  track  is  played 

repeatedly.

 ALL 

(All-track repeat)

 : All tracks are played repeatedly.

Repeat off (indicator turns off)

 : Normal playback resumes.

Single-track repeat

All-track repeat

Repeat off

(indicator turns off)

n

 Stopping Playback

Press 

2

.

n

 Stopping Playback Temporarily

Press 

<

1

/

3

or 

[

3

]

.

The “

3

” indicator lights.

b

 To resume playback, press 

<

1

/

3

>

 or 

[

1

]

.

n

 Fast-Forwarding and Fast-Reversing (searching)

During playback, press and hold in 

[

6

,


7

]

.

n

 Moving to the Beginning of Tracks (skipping)

During playback, press 

8

,


9

.

b

 The disc is skipped the number of tracks equal to the number of 

times the button is pressed.

b

 When pressed once in the return direction, playback returns to 

the beginning of the currently playing track.

n

 To Play the Desired Track

  (Remote Control Unit Only)

Press


[NUMBER]

 (

0


~


9

,


+10

) to select the track.

G

Example

H

 : Track 4  :

 [4]

G

Example

H

 : Track 12 : 

[+10]

[2]

G

Example

H

 : Track 20 : 

[+10]

[+10]

[0]

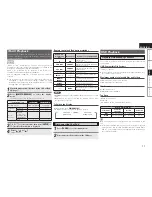
Playing Repeatedly 

<Repeat Playback>

Playing CDs

[Selectable items]

CD Playback

Repeated playback of parts you want to 

play 

<A-B repeat play>

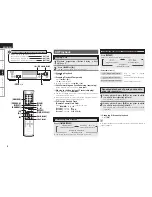
1


During  playback,  press 

[A-B]

  at  the  point  at  which 

you want to start repeating (point A).


The “REPEAT A-” display flashes.

2


During  playback,  press 

[A-B]

  at  the  point  at  which 

you want to stop repeating (point B).


The  “REPEAT  A-B”  is  displayed  and  the  A-B  section  is  played 
repeatedly.

n

  Stopping A-B repeat playback

Press 

[A-B]

.

A-B repeat playback is not possible during programmed playback or 
random playback.

Press 

[TIME/DISPLAY]

.

b

 The display switches each time the button is pressed.

Elapsed time of 

currently playing track

Remaining  time  of 
currently playing track

Switching the Display

Remaining time for all 

remaining tracks

<

1

/

3

>

2

<PITCH +/->

8

,

9

[

1

]

[NUMBER]

[TIME/DISPLAY]

[CLEAR]

[CALL]

[PROGRAM

     /DIRECT]

[RANDOM]

[A - B]

[REPEAT]

[

3

]

[

8

,

9

]

2

[

6

,

7

]

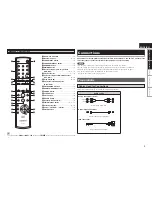
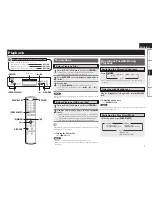
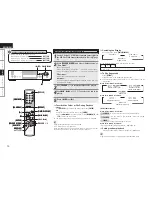
Button located on both the main unit 


and the remote control unit 


BUTTON

Button only on the main unit


<BUTTON>

Button only on the remote control unit


[BUTTON]

Symbols used to indicate buttons in this manual

Pl

ayback

1

Playback  preparation  (“Before  Playing  a  Disc” 

v

page 7).

2

Press 

<

1

/

3

>


or


[

1

]

.

The “

1

” indicator lights and playback begins.

Содержание DCD-710AE

Страница 1: ...COMPACT DISC PLAYER DCD 710AE Owner s Manual Bedienungsanleitung Manuel de l Utilisateur Manuale delle istruzioni Manual del usuario Gebruiksaanwijzing Bruksanvisning ...

Страница 2: ...producto de la alimentación eléctrica desconecte el enchufe del enchufe de la pared El enchufe de la alimentación eléctrica se utiliza para interrumpir por completo el suministro de alimentación eléctrica a la unidad y debe de encontrarse en un lugar al que el usuario tenga fácil acceso CLASS 1 LASER PRODUCT LUOKAN 1 LASERLAITE KLASS 1 LASERAPPARAT 44 4 3 130 6 5 ADVARSEL USYNLIG LASERSTRÅLING VED...

Страница 3: ...l calor cuando está instalado en la consola Vermijd hoge temperaturen Zorg er bij installatie in een audiorack voor dat de door het toestel geproduceerde warmte goed kan worden afgevoerd Undvik höga temperaturer Se till att det finns möjlighet till god värmeavledning vid montering i ett rack Handle the power cord carefully Hold the plug when unplugging the cord Gehen Sie vorsichtig mit dem Netzkab...

Страница 4: ... om zich van elk afvalmateriaal te ontdoen volgens de plaatselijke voorschriften Volg voor het wegdoen van de speler de voorschriften voor de verwijdering van wit en bruingoed op Batterijen mogen nooit worden weggegooid of verbrand maar moeten volgens de plaatselijke voorschriften betreffende chemisch afval worden verwijderd Op dit product en de meegeleverde accessoires m u v de batterijen is de r...

Страница 5: ...in Features 1 Accessories 2 Cautions on Handling 2 Discs 2 Discs Usable on the DCD 710AE 2 Holding Discs 2 Loading Discs 2 Cautions on Loading Discs 2 Cautions on Handling 3 Cautions on Storing Discs 3 Cleaning Discs 3 About the Remote Control Unit 3 Inserting the Batteries 3 Operating Range of the Remote Control Unit 3 Part Names and Functions 4 Front Panel 4 Rear Panel 4 Display 4 Remote Control...

Страница 6: ...in this unit w CD R CD RW NOTE Discs with special shapes heart shaped discs octagonal discs etc cannot be played Do not attempt to play them as doing so can damage the product Some discs and some recording formats may not be playable Non finalized discs cannot be played b What is finalization Finalization is the process that makes recorded CD R CD RW discs playable on compatible players Do not tou...

Страница 7: ...ner or other solvents Inserting the Batteries q Remove the remote control unit s rear cover w Set two R03 AAA batteries in the battery compartment in the indicated direction e Put the rear cover back on NOTE Replace the batteries with new ones if the set does not operate even when the remote control unit is operated close to the unit The supplied batteries are only for verifying operation When ins...

Страница 8: ...wer indicator 7 Power ON Green Standby Red Power OFF Off Display q w e t y r q Information display Variousinformationisdisplayedhere depending on the operation mode w Playback mode indicators 1 During Playback 3 During pause e Playback media indicators r Total time indicator Lights when the total number of tracks and total time of the CD are displayed t Random Playback indicators y Repeat mode ind...

Страница 9: ...so can result in humming or noise Connections for all compatible audio signal formats are described in this owner s manual Please select the types of connections suited for the equipment you are connecting Select the cables according to the equipment being connected Preparations Cables Used for Connections Connections Connections Getting Started q OPEN CLOSE button 7 w Number buttons 8 10 e PURE D...

Страница 10: ...n the generation of noise Do not unplug the power cord while the set is operating Turning the Power On vpage 7 Once Connections are Completed Connections USB Port Connections USB NOTE It is not possible to connect and use a computer via the DCD 710AE s USB port using a USB cable For details about USB memory devices see Playable USB Memory Formats vpage 11 iPod To connect an iPod to the DCD 710AE u...

Страница 11: ...evel excessively when using headphones Listening with Headphones Switching the Display s Brightness Dim Dark OFF n Adjusting the Volume Turn PHONES LEVEL Disc tray Playback 1 Turn the DCD 710AE power on Press POWER When a disc is loaded playback starts automatically If no disc is loaded NO DISC is displayed 2 Press DISC USB to set the playback media mode to DISC 3 Insert a disc Press OPEN CLOSE 5 ...

Страница 12: ...2 GExampleH Track 20 10 10 0 Playing Repeatedly Repeat Playback Playing CDs Selectable items CD Playback Repeated playback of parts you want to play A B repeat play 1During playback press A B at the point at which you want to start repeating point A The REPEAT A display flashes 2During playback press A B at the point at which you want to stop repeating point B The REPEAT A B is displayed and the A...

Страница 13: ...e MP3 and WMA Formats That Can be Played CD R and CD RW discs created in the format described below can be played Writing software format ISO9660 level 1 b When written in other formats it may not be possible to play the disc properly Maximum number of playable files and folders Total number of folders and files 512 Number of folders 256 Tag data ID3 Tag Ver 1 x and 2 x META Tag Compatible with ti...

Страница 14: ...aded n Switching the Display During playback press TIME DISPLAY b The characters that can be displayed are as follows A Z a z 0 9 l _ space n To Play Repeatedly Press REPEAT Playback starts in the respective repeat mode b The selectable repeat modes differ in the Folder Mode and the Disc Mode When Folder Mode is selected When Disc Mode is selected File name Title name Artist name Single track repe...

Страница 15: ...witches each time the button is pressed Title name Artist name 1 Press POWER to set the standby mode 2 Disconnect the iPod cable from the USB port Playable USB Memory Formats Files stored on USB memory devices created in the formats below can be played File Format MPEG 1 Audio Layer 3 WMA Windows Media Audio USB Compatible File Systems FAT16 or FAT32 b If the USB memory device is divided into mult...

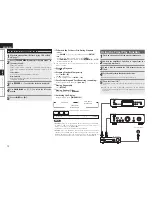
Страница 16: ...me is reached the power of the different components automatically turns on and playback starts from the first track Amplifier AC outlet Wall n To Switch the Folder or File During Playback Folder Use FOLDER to select the folder then press ENTER File Use o p to select the file then press ENTER Use 8 9 to select the file or use NUMBER 0 9 10 to select the file number b The file numbers are set automa...

Страница 17: ...disc then play it Use a properly recorded disc 2 2 Symptom Cause Countermeasure Page Set does not operate properly when remote control unit is operated The batteries are spent The remote control unit is too far from the set Replace the batteries with new ones Move the remote control unit closer to the set 3 3 Not Support is displayed when playing files recorded in MP3 or WMA format You have select...

Страница 18: ...06 g including batteries b For purposes of improvement specifications and design are subject to change without notice Specifications Specifications Index A A B repeat play 8 All track repeat 8 Analog Connections 6 Audio cable 5 B Batteries 3 C Cables Used for Connections 5 CD R CD RW 2 D Digital Connections 6 Display 4 Display s Brightness 7 E Extension 9 11 F Fast Forwarding 8 12 Fast Reversing 8...

Страница 19: ...Denon Brand Company D M Holdings Inc Printed in China 5411 10314 008D www denon com ...

Отзывы: