0
Get
ting Star
ted
Connections
Set
up
Remot
e Contr
ol
Multi-z
one
Inf
or
mation
Tr
oubleshooting
ENGLISH
Specifi
cations
Listening to Music
1
Use
ui
to select the menu, then press
ENTER
or
p
to select the music fi le to be played.
2
Press
ENTER
or
p
.
Playback starts.
n
Stopping playback temporarily
During playback, press
ENTER
or
[
1
]
.
Press again to resume playback.
n
Fast-forwarding or fast-reversing
During playback, either press and hold
[
6
]
(to fast-reverse) or
[
7
]
(to fast-forward).
n
To cue to the beginning of a track
During playback, either press
[
8
]
(to cue to the previous track) or
[
9
]
(to cue to the next track).
n
To stop
During playback, either press and hold
ENTER
or press
[
2
]
.
n
Playing repeatedly
Press
[TUNING –]
.
[Selectable items]
All
One
OFF
MENU
:
”Input Setup”
–
”iPod”
–
“Repeat Mode”
(
v
page 42)
n
Shuffl ing playback
Press
[]
.
•
When DENON control dock for iPod ASD-1R or ASD-
11R is connected
[Selectable items]
Albums
Songs
OFF
•
When DENON control dock for iPod ASD-3N or ASD-
3W is connected
[Selectable items]
ON
OFF
MENU
:
”Input Setup”
–
”iPod”
–
“Shuffl e Mode”
(
v
page 43)
• To check the name of the title, the artist or the album when playing
in browse mode, press
<STATUS>
.
• The folder name and the fi le name can be displayed in browse
mode. Only alphanumeric characters and certain symbols can be
displayed. Any characters that cannot be displayed are replaced with
“ . (period)”.
• The time (default : 30 sec) for which the on-screen display are
displayed can be set at menu “Manual Setup” – “Option Setup”
– “On-Screen Display” – “iPod Information” (
v
page 36).
Press
uio
p
to return to the original screen.
Viewing Still Pictures or Videos on the
iPod
Photo and video data on the iPod can be viewed on the monitor.
Only for iPod equipped with slideshow or video functions. (When
using an ASD-1R or ASD-11R)
• “TV Out” at the iPod’s “Slideshow Settings” or “Video Settings”
must be set to “On” in order to display the iPod’s photo data or videos
on the monitor. For details, see the iPod’s operating instructions.
• When viewing an iPod video fi le, select “iPod” - “Video” in browse
mode. (When using an ASD-3N or ASD-3W)
• With the default settings, the iPod can be used connected to the
VCR (iPod) connector.
• Use the RESTORER mode to expand the low and high frequency
components of compressed audio fi les and achieve a richer sound.
The default setting is “Mode3” (
v
page 51).
• Press
<ON/STANDBY>
or
[OFF]
and set the AVR-1909’s power to
the standby mode before disconnecting the iPod. Also switch the
input source to one to which the menu “iPod dock” is not assigned
before disconnecting the iPod.
• When using an ASD-3N or ASD-3W control dock for iPod, refer to
the respective manual to operate.
0
Get
ting Star
ted
Connections
Set
up
Remot
e Contr
ol
Multi-z
one
Inf
or
mation
Tr
oubleshooting
ENGLISH
4
Press
[MODE]
and hold it down for a 2 seconds or
more to select the display mode.
To switch between modes, press and hold down the button.
When remote mode is active, “Remote” is displayed.
[Selectable mode]
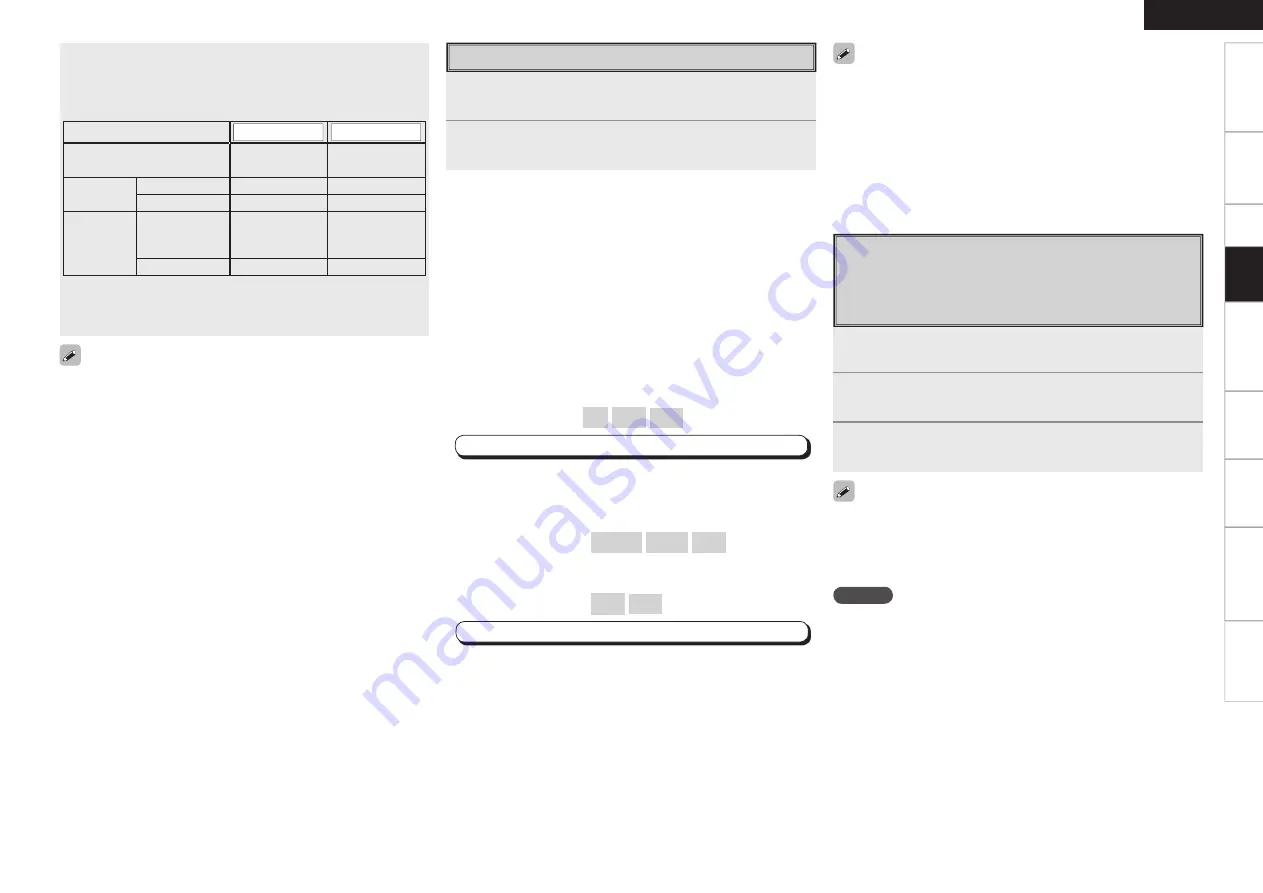
Browse mode
Remote mode
Display location
Main unit display
iPod display
Playable
files
Audio file
S
S
Video file
S
z
1
S
z
2
Active
buttons
Remote
control unit
(AVR-1909)
S
S
iPod
A
S
z
1 : When using an ASD-3N or ASD-3W control dock for iPod
.
z
2 : Video may not be output, depending on the combination of
ASD-1R or ASD-11R and iPod.
NOTE
• Depending on the type of iPod and the software version,
somefunctions may not operate.
• DENON will accept no responsibility whatsoever for any loss of iPod
data.
Pla
ybac
k
1
Press and hold
[MODE]
to set the Remote mode.
“Remote iPod” is displayed on the AVR-1909’s display.
2
Watching the iPod’s screen, use
ui
to select
“Photos” or “Videos”.
3
Press
[ENTER]
until the image you want to view is
displayed.


