


Page 8
TB20061
Important Notice!
Be sure towed vehicle is suitable or adaptable for towing.
A few models are not towable!
Be sure to check if towed vehicle requires additional equipment such as a transmission lube pump, free-wheel hubs,
driveline disconnect or axle locks. Failure to properly equip towed vehicle will result in severe damage to towed vehicle’s
transmission.
Be sure that towed vehicle’s steering wheel is unlocked and free to turn. Check manufacturer’s specifications for the proper
way to unlock steering wheel.
Be sure to check that receiver on towing vehicle is not inset to far. When attaching a Demco towing product it is important
that turning clearance is adequate. A receiver that is inset to far on a towing vehicle will shorten turning radius. Failure
to check this may result in towing or towed vehicle to be damaged. It may be necessary to install a receiver extension to
allow for proper turning clearance.
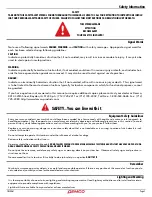
WARNING:
ADDITIONAL SAFETY ITEMS
Safety is of utmost importance at all times. To prevent personal
injury or property damage, observe the following.
• Before allowing anyone to hook up or operate the Excalibar 3, be
sure they have read and understand the proper operating procedure.
• This unit must be used with a Class III, 5,000 lb. Hitch or higher.
• Be sure the steering components of the towed vehicle are properly
aligned.
• The male receiver tube must fit snugly in the hitch receiver and the
safety pin must be in position to lock the receiver and tube together.
• NOTE:
Any severe backwards cornering could result in damage to the
Excalibar 3
and/or towed vehicle chassis.
• For automatic transmissions:
Consult your vehicle owners manual
for towing suitability with the drive shaft connected. Otherwise, the
towed vehicle will have to be equipped with a transmission pump or
drive shaft disconnect.
• Be sure the
SAFETY CABLES w/retainers
are hooked to both the towing
and towed vehicles using the crisscross method.
• Do not load the towed vehicle with anything as you may exceed the
towing capacity of the tow bar.
• Check to make sure that all lights are in proper working order.
• Make sure the optional light bar is fastened securely at the rear of
the towed vehicle.
• Do not use coiled safety cables with this tow bar, always use straight
Demco safety cables.
WARNING:
FAILURE TO FOLLOW THESE INSTRUCTIONS CAN RESULT IN LOSS OF TOWING VEHICLE CONTROL, SEPARATION OF THE TOW BAR FROM THE
TOWING VEHICLE, SEPARATION OF THE TOWED VEHICLE FROM THE TOW BAR, CAUSING SEVERE PERSONAL INJURY, DEATH, OR PROPERTY DAMAGE.
MAINTENANCE
Periodically check all bolts and nuts to ensure proper tension
or torque.
Check all pivot points for wear or breakage.
Replace any worn or damaged parts with O.E.M. parts only.
An occasional spray of lubricant may be required inside the
latch trigger area of the extending legs.
DO NOT
lubricate any of the pivot points of the Excalibar 3
These are self-lubricating washers and your tow bar could
lose its self-supporting ability.
Keep the Excalibar 3 covered when stored on or off the tow-
ing vehicle.
If the Excalibar 3 needs servicing, only an authorized dealer
can service it or it can sent to Demco for servicing.
Make sure all bolts are properly tightened and those requir-
ing a set torque are up to specifications.
CAUTION:
Tow Bar must be inserted directly into tow vehicle
receiver hitch or into an approved rise drop receiver only!
Tow Bar should never be inserted into a receiver extension,
bike rack, storage rack, motorcycle rack, or any other device
that extends the tow bar away from the tow vehicle.
Thank you for Purchasing
Products.
Tow Bar positioning
should be parallel to
road surface or within 3”
in either direction
Must have cable anchors or
a place to connect cable to
frame
TOW BAR
Important Notice
Содержание Excalibar 3
Страница 1: ...TB20061 Rev 2 09 19 SELF ALIGNING TOW BAR Excalibar 3...
Страница 19: ...TB20061 Page 19...
Страница 20: ......


