


18
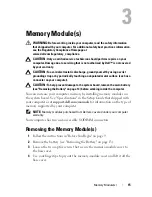
Memory Module(s)
3
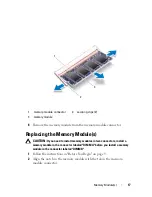
Slide the memory module firmly into the memory-module connector at a
45-degree angle, and press the memory module down until it clicks into
place. If you do not hear the click, remove the memory module and
reinstall it.
NOTE:
If the memory module is not installed properly, the computer may not
boot.
4
Align the tabs on the memory-module cover with the slots on the base
cover and snap the memory-module cover into place.
5
Tighten the two captive screws that secure the memory-module cover to
the base cover.
6
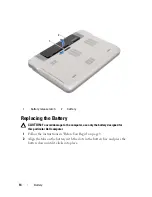
Replace the battery (see "Replacing the Battery" on page 14).
7
Connect the AC adapter to your computer and an electrical outlet.
8
Turn on the computer.
As the computer boots, it detects the additional memory and automatically
updates the system configuration information.
To confirm the amount of memory installed in the computer:
1
tab
2 notch
3
memory-module connector
3
1
2
Содержание XPS L401X
Страница 1: ...Dell XPS L401X Service Manual Regulatory model P12G series Regulatory type P12G001 ...
Страница 8: ...8 Contents ...
Страница 12: ...12 Before You Begin ...
Страница 20: ...20 Memory Module s ...
Страница 26: ...26 Wireless Mini Card s ...
Страница 30: ...30 Hard Drive ...
Страница 40: ...40 Palm Rest Assembly ...
Страница 48: ...48 Power Button Board ...
Страница 52: ...52 Coin Cell Battery ...
Страница 64: ...64 Display ...
Страница 68: ...68 Camera Module ...
Страница 74: ...74 Top Cover ...
Страница 78: ...78 Speakers ...
Страница 83: ...Processor Fan and Heat Sink Assembly 83 ...
Страница 84: ...84 Processor Fan and Heat Sink Assembly ...
Страница 92: ...92 Daughter Board ...
Страница 96: ...96 Internal Card With Bluetooth Wireless Technology ...
Страница 100: ...100 AC Adapter Connector ...
Страница 106: ...106 System Board ...
Страница 108: ...108 Flashing the BIOS 8 Double click the file icon on the desktop and follow the instructions on the screen ...


