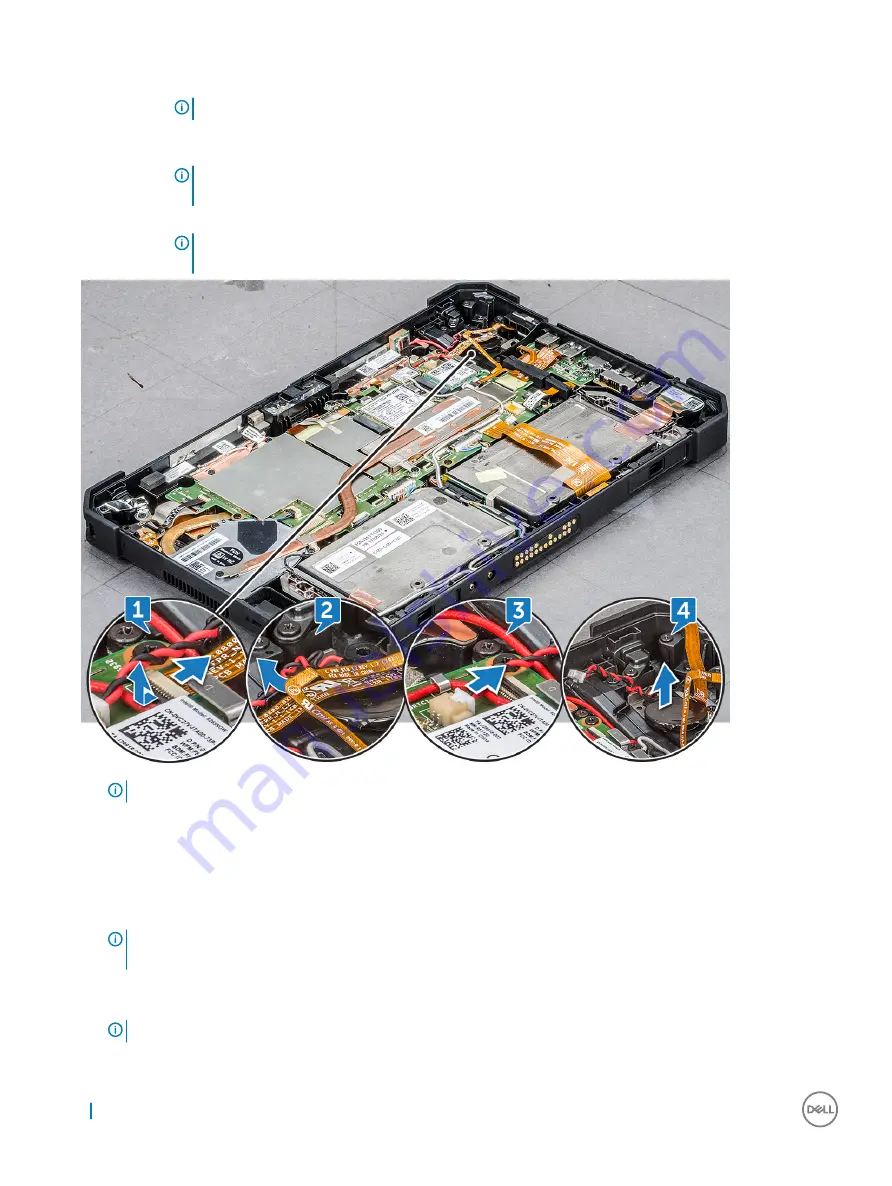
b Locate the CMOS battery.
c Lift the power button cable latch by a plastic scribe and push the cable gently from the latch [1].
NOTE:
Ensure to unlock the power button assembly cable to release the CMOS battery.
d Remove the CMOS cable form the routing clip on the system board [2].
e Push the pin connected to the system board CMOS slot by a plastic scribe [3].
NOTE:
Push the cable pin head with a plastic scribe at an angle not more than 30°. DO NOT push too hard,
as it may damage the cable pin head.
f
Lift the CMOS battery from the adhesive tape [4].
NOTE:
Ensure not to pull the CMOS battery upwards as it is positioned beneath the power assembly button
cable. Gently release the battery from the adhesive tape.
NOTE:
Replace the CMOS battery when checksum error is displayed in booting.
Installing CMOS battery
1
Align the CMOS battery on the rubber pad next to the power assembly button.
2
Press the CMOS battery on the adhesive tape.
NOTE:
CMOS battery for the tablet is insulated in a protective shield. To avoid poor connection of the wire with battery,
NEVER tear the protective shield.
3
Connect the CMOS battery cable to the slot on the system board.
4
Slide the power button cable beneath the latch and release the latch.
NOTE:
Install the CMOS battery cable, and then connect the power button cable.
5
Install the:
22
Removing and installing components


