


NOTE:
The heat sink may become hot during normal operation. Allow sufficient time for the heat sink to cool before you
touch it.
2. Remove the
.
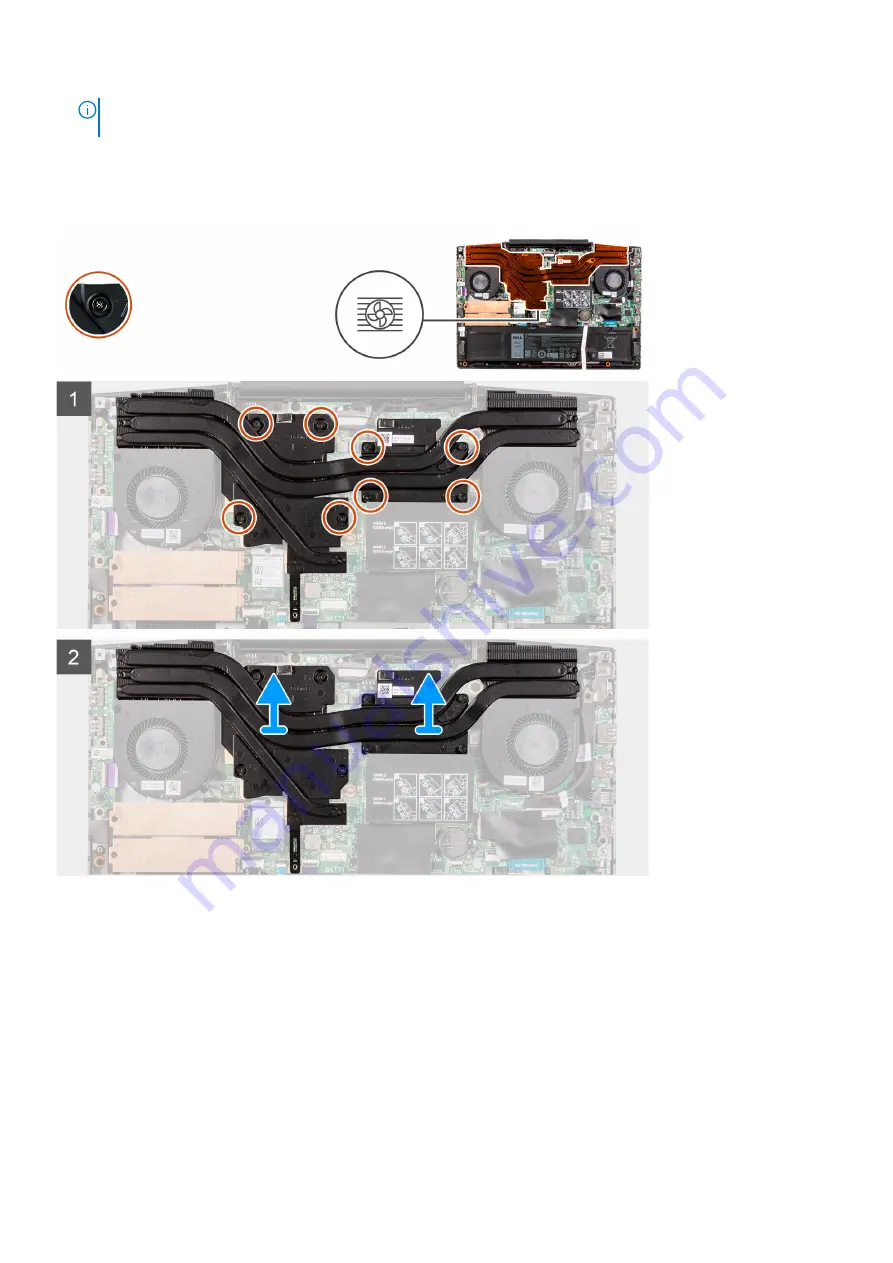
About this task
The following image indicates the location of the heat sink and provides a visual representation of the removal procedure.
Steps
1. In the sequential order (1>2>3>4>5>6>7>8), loosen the eight captive screws that secure the heat sink to the system board.
2. Lift the heat sink off the system board.
Installing the heat sink
Prerequisites
If your are replacing a component, remove the existing component before performing the installation procedure.
About this task
The following image indicates the location of the heat sink and provides a visual representation of the installation procedure.
Removing and installing components
41
Содержание G3 15 3500
Страница 1: ...Dell G3 15 3500 Service Manual Regulatory Model P89F Regulatory Type P89F002 August 2021 Rev A02 ...
Страница 15: ...Steps 1 Connect the battery cable to the system board if applicable Removing and installing components 15 ...
Страница 26: ...26 Removing and installing components ...
Страница 49: ...Removing and installing components 49 ...


