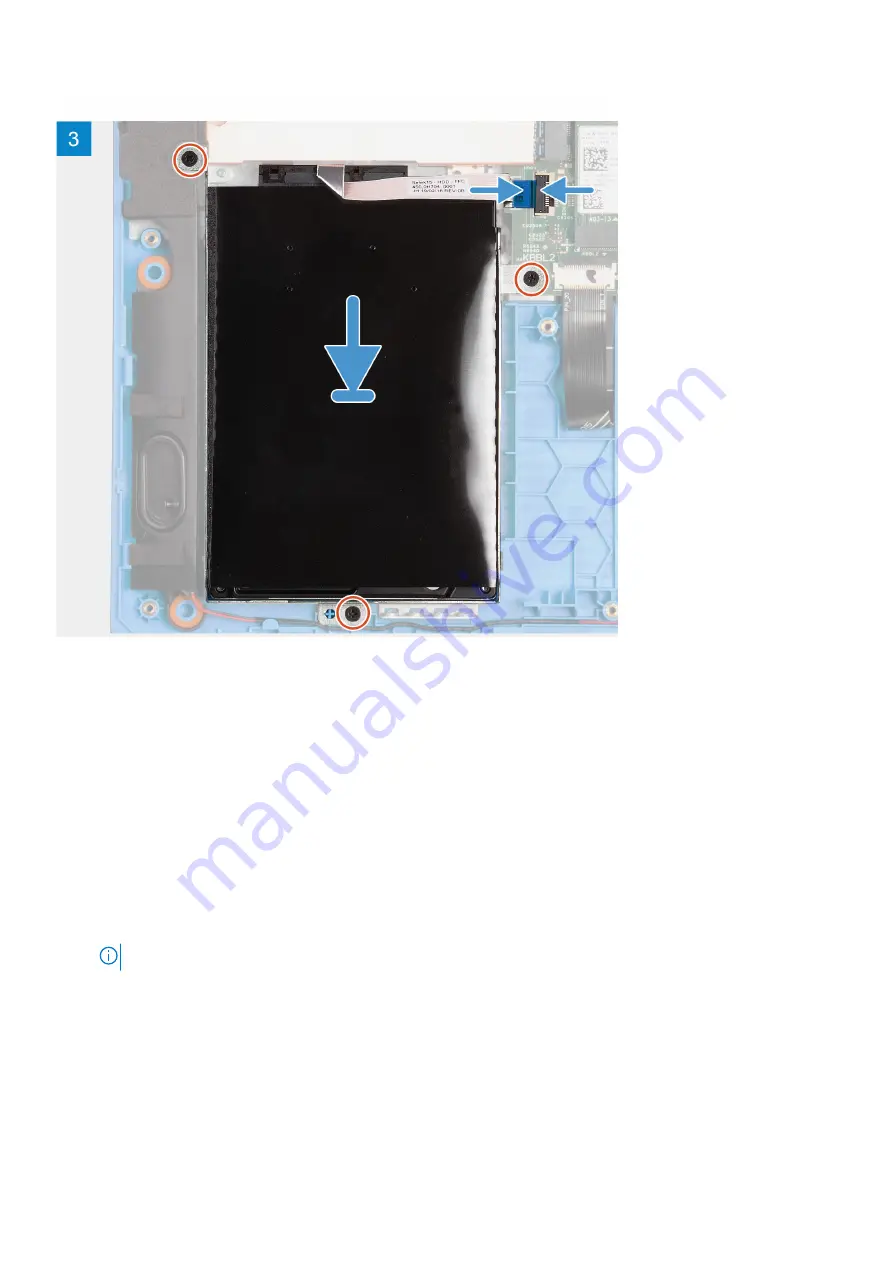
Steps
1. Align the screw holes on the hard-drive bracket with the screw holes on the hard drive.
2. Replace the four screws (M3x3) that secure the hard-drive bracket to the hard drive.
3. Connect the interposer to the hard-drive assembly.
4. Align the screw holes on the hard-drive assembly with the screw holes on the palm-rest and keyboard assembly.
5. Replace the three screws (M2x3) that secure the hard-drive assembly to the palm-rest and keyboard assembly.
6. Connect the hard-drive cable to the system board and close the latch to secure the cable.
Next steps
1. Install the
.
After working inside your computer
.
3. Verify if the storage device is installed correctly:
a. Turn on or restart your computer.
b. Press F2 when the Dell logo is displayed on the screen to enter the BIOS setup program.
NOTE:
Alist of storage devices are displayed under the
System Information
in the
General
group.
c. If you have replaced the primary storage device that had the operating system installed, see
Reinstall Windows 10 to
the Dell factory image using recovery media
in the knowledge base article
.
Removing and installing components
27
Содержание G3 15 3500
Страница 1: ...Dell G3 15 3500 Service Manual Regulatory Model P89F Regulatory Type P89F002 August 2021 Rev A02 ...
Страница 15: ...Steps 1 Connect the battery cable to the system board if applicable Removing and installing components 15 ...
Страница 26: ...26 Removing and installing components ...
Страница 49: ...Removing and installing components 49 ...


