8.
NOTE:
Net-internals events viewer and related functionality has been removed. Please use Chrome://net-export to
save netlogs and the external
chrome://net-internals
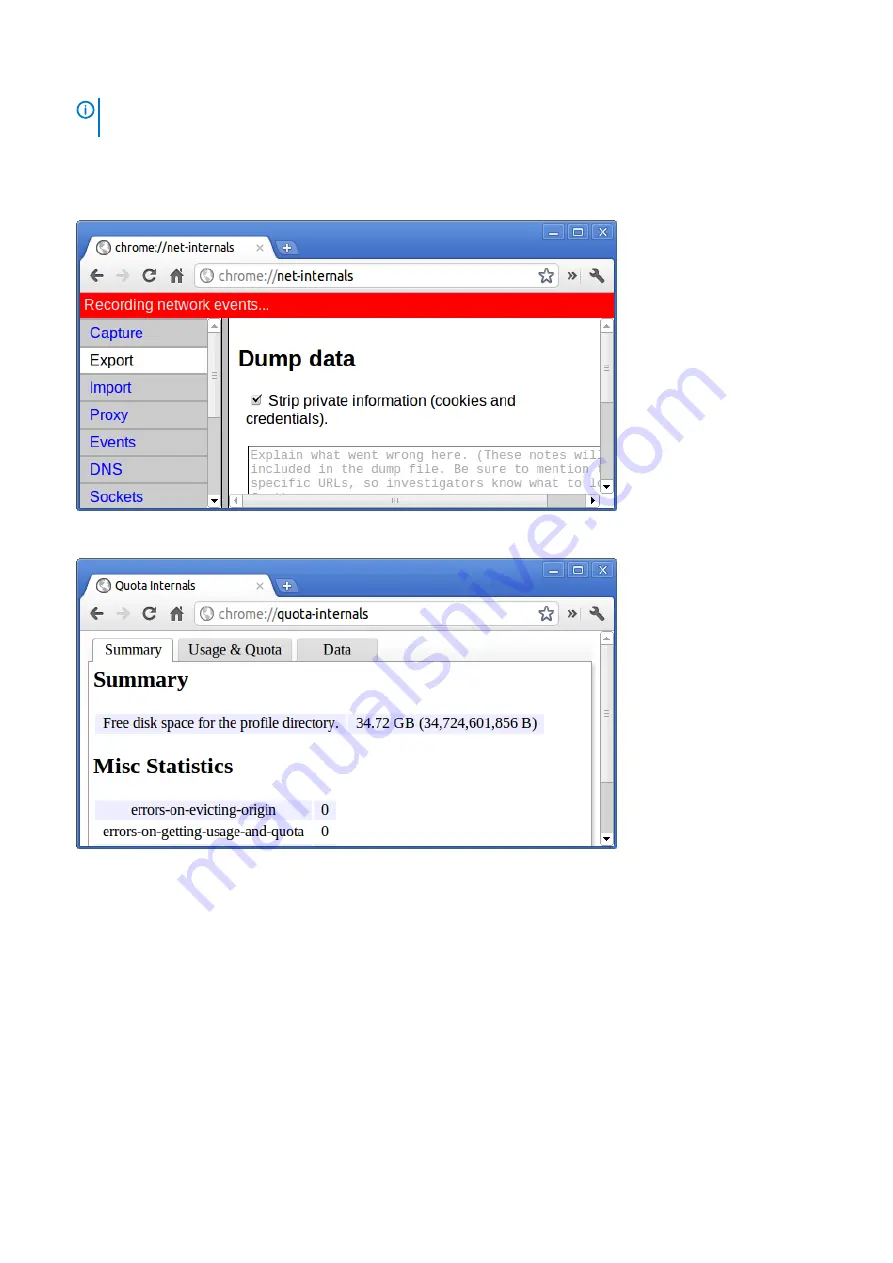
: This displays all networking related information. Use this to capture network events generated by the
browser. You can also export this data. You can view DNS host resolver cache. One of the important features in this feature is “Test”.
If a URL failed to load, you can go to “chrome://net-internals” > click on “Tests” tab > type that URL which failed, and click on “Start
Test”, which does some test and report you why that URL failed. chrome://plugins/.
9.
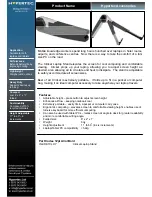
chrome://quota-internals
: This gives information about the disk space quote used by the browser, including the breakdown of how
much space the individual websites took under temporary files.
10.
chrome://sessions
: This displays the number of sessions and magic list that are currently running.
82
Troubleshooting
Содержание Chromebook 3100 2-in-1
Страница 1: ...Dell Chromebook 3100 2 in 1 Service Manual Regulatory Model P30T Regulatory Type P30T001 ...
Страница 12: ...Major components of your system 1 Base cover 2 System board 3 12 Major components of your system ...
Страница 16: ...2 Pry the base cover from the edge using a plastic scribe 1 2 16 Removing and Installing ...
Страница 18: ...2 Tighten the nine captive screws to secure the base cover to the computer 18 Removing and Installing ...
Страница 21: ...9 Pry the battery from the bottom edge 1 and remove the battery from the computer 2 Removing and Installing 21 ...
Страница 23: ...3 Replace the three M2 0x4 0 screws to secure the battery to the palmrest 1 Removing and Installing 23 ...
Страница 26: ...5 Lift the speakers away from the computer 26 Removing and Installing ...
Страница 27: ...Installing the speakers Steps 1 Place the speakers into the slots on the computer Removing and Installing 27 ...
Страница 28: ...2 Reroute the speaker cable through the retention clips in the routing channel 28 Removing and Installing ...
Страница 41: ...7 Lift the system board bracket away from the computer Removing and Installing 41 ...
Страница 44: ...3 Place the IO board bracket in its place on the system board 44 Removing and Installing ...
Страница 65: ...Removing and Installing 65 ...
Страница 69: ...3 Reroute the display cable and the rubber stopper back into the hinge cap Removing and Installing 69 ...
Страница 87: ...3 Press CTRL ALT T to open CROSH 4 Type memory_test into CROSH and then press Enter Troubleshooting 87 ...


