background image

Faxing

5 9

14

Click to select the Store a copy in a folder check box if you want to create an archive copy 
of each fax. When you select this check box, you are able to specify the storage location for 
the fax copy.

15

Click Next.

16

Confirm the configuration settings in the Configuration Summary list, and then click 
Finish.

You are now ready to send or receive faxes.

Faxing a Paper Document Using the Operator 
Panel

1

Turn on your printer and computer, and make sure they are connected. Make sure your 
computer modem is connected to an active analog phone line. If you have DSL broadband 
service on the same phone line that you are using to fax, you must also have a DSL filter 
installed. Contact your Internet Service Provider for information.

2

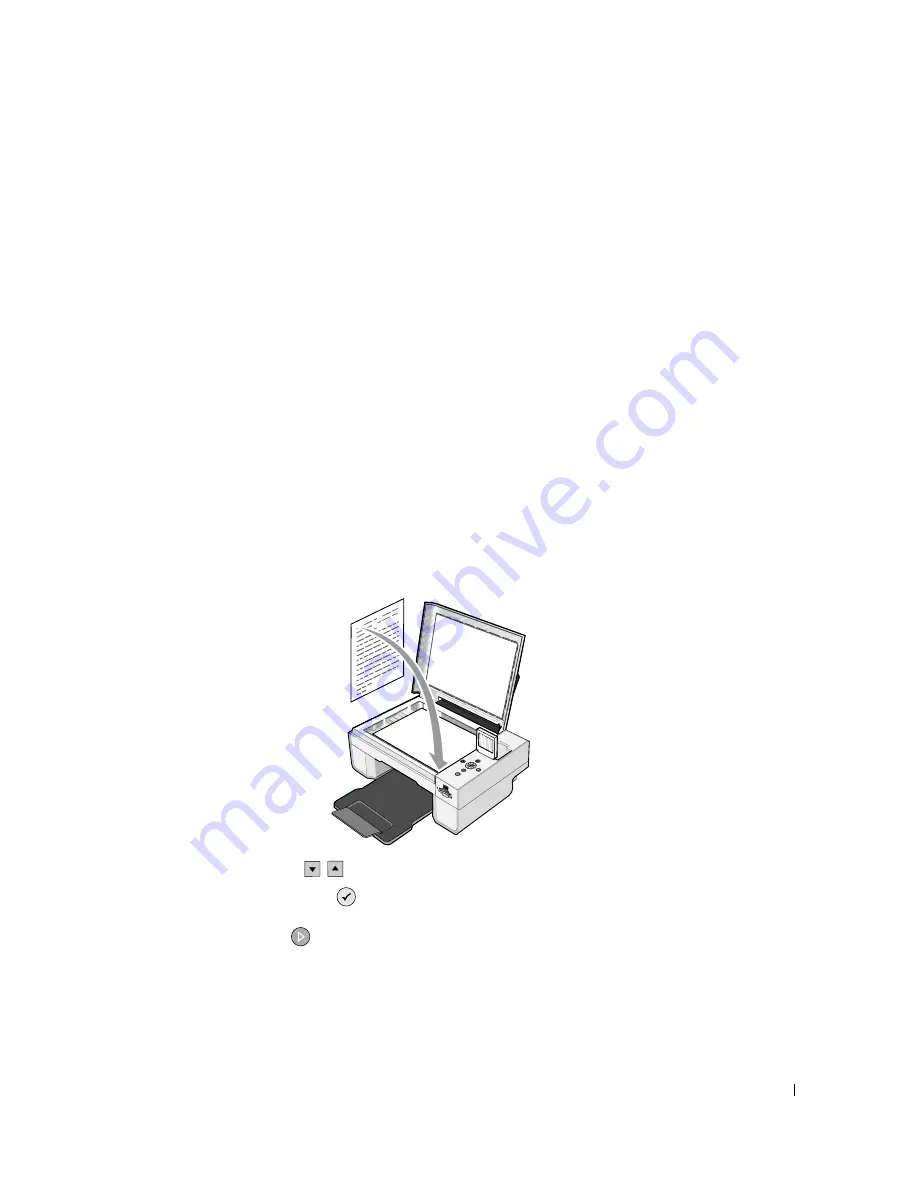
Place your document on the scanner glass, and make sure the upper left corner aligns with 
the arrow on the printer. 

3

Press the Arrow buttons 

 on the operator panel until Fax Mode is highlighted, and 

then press the Select button 

.

4

Press the Start button 

. The printer will scan the document to your computer, and the 

document will open in Microsoft Fax.

5

Follow the instructions on your screen to fax your document.

Содержание 944

Страница 1: ... p p l i e s s u p p o r t d e l l c o m Dell Photo All In One Printer 944 Owner s Manual Look Inside For Ordering Supplies Getting Started Using the Printer Understanding the Printer Software Maintenance and Troubleshooting ...

Страница 2: ...anada 877 501 4803 Netherlands 020 674 4881 Chile 1230 020 3947 800 202874 Norway 231622 64 Portugal 21 4220710 Colombia 01800 9 155676 PRC 800 858 2425 Czech 420 225 372 711 Poland 022 579 59 65 Denmark 3287 5215 Puerto Rico 866 851 1760 Finland 09 2533 1411 Singapore 1800 394 7245 France 825387247 South Africa 0860 102 591 Germany 0800 2873355 Spain 902120385 Ireland 1850 707 407 Sweden 08 587 7...

Страница 3: ...ll the DELL logo Dell Picture Studio and Dell Ink Management System are trademarks of Dell Inc Microsoft and Windows are registered trademarks of Microsoft Corporation Other trademarks and trade names may be used in this document to refer to either the entities claiming the marks and names or their products Dell Inc disclaims any proprietary interest in trademarks and trade names other than its ow...

Страница 4: ...w w w d e l l c o m s u p p o r t d e l l c o m ...

Страница 5: ... Understanding the Automatic Paper Type Sensor 25 2 Printing Printing a Document 27 Printing Photos 28 Printing Borderless Photos 29 Printing Envelopes 30 Printing Photos From a PictBridge Enabled Camera 31 Printing Photos From a Memory Card or USB Key 32 Viewing or Printing Photos 34 Saving Photos to Your Computer 34 Viewing a Slide Show 34 Printing All Photos on Memory Card or USB Memory Key 34 ...

Страница 6: ...or Images 49 Scanning a Photo or Document Across a Network 50 Editing Scanned Text Using Optical Character Recognition OCR 52 Saving an Image on Your Computer 53 E mailing a Scanned Image or Document 53 Enlarging or Reducing Images or Documents 54 5 Faxing Installing Microsoft Fax Console in Windows XP 57 Configuring Microsoft Fax Console Windows XP or Fax Service Management Windows 2000 58 Faxing...

Страница 7: ...nagement 62 Changing the Fax Configuration 62 6 Understanding the Software Using the Dell All In One Center 63 Using Printing Preferences 65 Using Dell Picture Studio 67 Using Memory Card Manager 68 Dell Ink Management System 68 Removing and Reinstalling the Software 70 7 Ink Cartridge Maintenance Replacing Ink Cartridges 71 Aligning Ink Cartridges 74 Cleaning the Ink Cartridge Nozzles 76 8 Troubl...

Страница 8: ...r Status Service 86 Contacting Dell 86 10 Appendix U S Terms and Conditions of Sale 105 Limited Warranties and Return Policy 108 Limited Warranty for Dell Branded Hardware Products U S Only 108 Total Satisfaction Return Policy U S Only 111 Dell Printer Consumables Limited Warranties 112 Export Regulations 112 Dell Software License Agreement 113 Regulatory Notices 114 Index 117 ...

Страница 9: ...wer cable provided with this product or the manufacturer s authorized replacement power cable CAUTION If your product is not marked with this symbol it must be connected to an electrical outlet that is properly grounded Connect the power cable to an electrical outlet that is near the product and easily accessible To completely turn off the product the power cable must be removed from the power sou...

Страница 10: ...10 CAUTION SAFETY INSTRUCTIONS w w w d e l l c o m s u p p o r t d e l l c o m ...

Страница 11: ...rinter is connected to a computer you can use either the printer operator panel or the printer software to create your projects You do need to connect your printer to a computer to scan print and fax You do not need to connect your printer to a computer to copy a document or print from memory cards USB memory keys or PictBridge enabled digital cameras ...

Страница 12: ...ding the Printer Parts Number Part Description 1 Paper support Part that supports loaded paper 2 Paper guide Guide that helps the paper feed into the printer properly 3 Top cover Top of printer that holds your document or photo flat while you scan it 1 4 3 2 11 7 6 5 9 10 8 12 13 ...

Страница 13: ...ain body of the printer 8 USB connector Slot into which you plug the USB cable sold separately The other end of the USB cable plugs into your computer 9 Power connector Slot into which you plug the power cable NOTE Insert the power cable into the printer before connecting the power cable into the wall outlet 10 Memory card slots Slots into which you insert a media card containing digital pictures ...

Страница 14: ...Your Printer To set the language on your printer initially 1 When you first power on your printer press the Arrow buttons to find your language 2 Press the Select button to select your language Resetting the Language on Your Printer If you need to change the default language used on the operator panel complete the following steps 1 Press the Power button to turn on your printer 2 Press the Arrow b...

Страница 15: ...er is on when the Power button is illuminated Number Use the To 1 LCD display Display scanning copying faxing and printing options as well as status and error messages For more information see Using the Operator Panel on page 15 2 Menu button Enter or exit a menu 3 Back button Return to the previous menu or screen 1 2 4 3 6 7 8 5 ...

Страница 16: ...us and menu items Decrease increase number of copies Change the selected mode Navigate photos on photo card or digital camera 5 Power button Turn your printer on or off 6 Cancel button Cancel a scan print or copy job in progress Cancel a copy job using only the printer and eject a page Exit a menu and return to the default settings 7 Start button Initiate a copy scan or fax 8 Select button Select ...

Страница 17: ...x 4 Poster 2 x 3 in 3 x 5 in 3 x 5 in 4 x 6 in 5 x 7 in 8 x 10 in 8 x 11 in 8 x 14 in A6 A5 B5 A4 L 2L Hagaki 10 x 15 cm 13 x 18 cm Copy Quality Draft Normal Photo Automatic Brightness Press the Select button and then use the Arrow buttons to adjust the brightness setting Copy menu item Settings ...

Страница 18: ... r t d e l l c o m Blank Paper Size 3 x 5 in 3 x 5 in 4 x 6 in 10 x 15 cm 5 x 7 in 13 x 18 cm 8 x 11 in 8 x 14 in A6 A5 B5 A4 L 2L Hagaki 6 x 8 cm Paper Type Auto Detect Plain Coated Glossy Transparency Repeat Image 1X 4X 9X 16X Copy menu item Settings ...

Страница 19: ...oto menu item Settings View Photos or Print Press the Select button For more information see Printing Photos From a Memory Card or USB Key on page 32 Save to Computer Press the Select button For more information see Printing Photos From a Memory Card or USB Key on page 32 View Slideshow Press the Select button For more information see Printing Photos From a Memory Card or USB Key on page 32 Print ...

Страница 20: ...menu items Photo menu item Settings Color Color Black and White Photo Size 2 x 3 in 3 x 5 in 4 x 6 in 5 x 7 in 8 x 10 in L 2L 6 x 8 cm 10 x 15 cm 13 x 18 cm 8 x 11 in A4 A5 B5 A6 Hagaki Quality Draft Normal Photo Automatic Brightness Press the Select button and then use the Arrow buttons to adjust the brightness setting ...

Страница 21: ... Type Auto Detect Plain Coated Glossy Transparency Crop Press the Select button and then use the Arrow buttons to adjust the image for cropping Rotate 90 Degrees Press the Select button Preview Press the Select button Red Eye Reduction On Off Automatic Image Enhancement On Off Sepia Tone Print On Off Factory default setting Photo menu item Settings ...

Страница 22: ...enu button selects the currently displayed computer name NOTE If your printer is connected locally the Scan submenu does not appear the host computer is automatically selected Setup Mode Scan menu item Settings Color Color Black and White Application Use the Arrow buttons to select the application in which you want your scanned document to open Factory default setting Setup menu item Settings Rest...

Страница 23: ...th paper guides simultaneously When one paper guide is moved the other adjusts accordingly Clear Settings When Never After 2 minutes Factory default setting Maintenance menu item Settings Ink Levels Press the Select button Change Cartridge Press the Select button Align Cartridges Press the Select button Clean Cartridges Press the Select button Print Test Page Press the Select button Setup menu ite...

Страница 24: ... t d e l l c o m NOTE Do not force paper into the printer The paper should be flat against the paper support surface and the edges should be flush against both paper guides Photo paper should be loaded short edge first with the glossy photo side facing up ...

Страница 25: ...or Properties depending on your program or operating system The Printing Preferences dialog box opens 3 On the Print Setup tab select the paper size 4 Click OK Unless you turn off the automatic paper type sensor it always remains on To turn off the automatic paper type sensor for a specific print job 1 With your document open click File Print 2 In the Print dialog box click Preferences or Properti...

Страница 26: ... turn off the automatic paper type sensor for all print jobs 1 In Windows XP click Start Control Panel Printers and Other Hardware Printers and Faxes In Windows 2000 click Start Settings Printers 2 Right click the Dell Photo AIO Printer 944 icon 3 Click Printing Preferences 4 Click the Print Setup tab 5 Select the paper type from the Media Type drop down menu 6 Click OK ...

Страница 27: ...etup depending on the program or operating system The Printing Preferences dialog box opens b On the Print Setup tab select the print quality speed paper size black and white or color printing borderless printing orientation and number of copies c On the Advanced tab select 2 sided printing layout and the use of Automatic Image Sharpening d After making the changes in Printing Preferences click OK...

Страница 28: ...sing Dell Picture Studio select View All Printer Settings to view Print Properties 5 On the Print Setup tab select Photo and then select the dpi settings for the photo from the drop down menu 6 Select the paper size orientation and the number of copies NOTE Photo glossy paper is recommended for printing photos 7 When you are finished customizing your print settings click OK 8 Click OK or Print dep...

Страница 29: ...e and a photo cartridge for printing photos For more information see Replacing Ink Cartridges on page 71 3 With your document open click File Print 4 To customize your print settings click Preferences Properties Options or Setup depending on the program or operating system The Printing Preferences dialog box opens 5 On the Print Setup tab select Photo and then select the dpi settings for the photo...

Страница 30: ... Print 4 Click Preferences Properties Options or Setup depending on the program or operating system The Printing Preferences dialog box opens 5 On the Print Setup tab select the print quality speed paper size black and white or color printing orientation and number of copies NOTE For Japanese customers If you are mailing within Japan the envelope can be printed with portrait orientation with the s...

Страница 31: ...nctions of your printer s operator panel buttons are unavailable These functions become available after you disconnect the PictBridge camera from your printer 3 Turn on your digital camera Refer to the instructions included with your camera for selection of the appropriate camera USB settings and PictBridge connection and usage information NOTE For many digital cameras there are two USB mode selec...

Страница 32: ...ype I CompactFlash Type II MicroDrive Memory Stick Memory Stick PRO SmartMedia Secure Digital MultiMediaCard xD Picture Card Memory cards should be inserted with the label facing up The card reader has two slots to accommodate these media and a small light that blinks indicating the card is being read or is transmitting data NOTE Do not remove the card while it is being read Data corruption can oc...

Страница 33: ...DELL 256 MB High Speed USB 2 0 Memory Key Part Number 311 4341 DELL 128 MB High Speed USB 2 0 Memory Key Part Number 311 4340 DELL 64 MB High Speed USB 2 0 Memory Key Part Number 311 4339 When you insert a memory card or USB memory key the Photo Mode menu is displayed NOTE Do not insert more than one memory card or USB memory key at a time Photo Mode View Photos or Print Save to Computer View Slid...

Страница 34: ...e display scroll to Save to Computer and then press the Select button on the operator panel All photos on the memory card or USB memory key are transfered to your computer and are opened in the Memory Card Manager For more information on Memory Card Manager see Using Memory Card Manager Viewing a Slide Show From the Photo Mode menu on the display scroll to Slide Show and then press the Select butt...

Страница 35: ...row buttons until you see Crop 6 Press the Select button 7 Press the left or right Arrow buttons to resize the image and then press the Select button 8 Press the Arrow buttons to adjust the section of the image to be cropped then press the Select button 9 Press the up or down Arrow buttons to select the number of copies you want to print and then press the Start button to preview the image 10 Pres...

Страница 36: ...ght Arrow buttons until you see On for all photos and then press the Select button Red Eye Reduction will be used for all images you select to print from the memory card or USB key until you turn it off To turn Red Eye Reduction off 1 Insert a memory card or USB memory key into the printer 2 Press the Menu button 3 Press the up or down Arrow buttons until you see Red Eye Reduction 4 Press the left...

Страница 37: ...n press the Select button Printing Photos in Sepia Tone 1 Insert a memory card or USB memory key into the printer 2 Press the Menu button 3 Press the up or down Arrow buttons until you see Sepia Tone Print 4 Press the left or right Arrow buttons until you see On for all photos and then press the Select button Sepia Tone Printing will be used for all images you select to print from the memory card ...

Страница 38: ...38 Printing w w w d e l l c o m s u p p o r t d e l l c o m ...

Страница 39: ...Copying 39 3 Copying Copying Documents Using the Operator Panel 1 Turn on your printer 2 Load the paper For more information see Loading Paper on page 23 3 Open the top cover ...

Страница 40: ...Menu button to change copy settings For more information see Operator Panel Menus on page 16 7 On the operator panel press the Start button The copy is made in the currently specified copy selection Color or Black Copying appears on the display NOTE If you press the Start button without specifying a copy selection the copy is printed in color by default Copying Documents Using Your Computer 1 Turn...

Страница 41: ...e scanner glass Make sure the upper left corner of the front of the document aligns with the arrow on the printer 5 Close the top cover 6 Click Start Programs or All Programs Dell Printers Dell Photo AIO Printer 944 Dell All In One Center The Dell All In One Center opens 7 Select the number of copies 1 99 and color setting from the Copy drop down menus ...

Страница 42: ...ct the original document size Lighten or darken your document Reduce or enlarge your document 9 When you are finished customizing your settings click Copy Now Copying Photos Using the Operator Panel 1 Turn on your printer 2 Load photo paper with the print glossy side facing up For more information see Loading Paper on page 23 3 Open the top cover ...

Страница 43: ...printer 5 Close the top cover 6 From the Copy Quality submenu select Photo For more information see Operator Panel Menus on page 16 7 Press the Start button Copying Photos Using Your Computer 1 Turn on your computer and printer and make sure they are connected 2 Load photo paper with the print glossy side facing up For more information see Loading Paper on page 23 ...

Страница 44: ...oto AIO Printer 944 Dell All In One Center The Dell All In One Center opens 7 Click Preview Now 8 Adjust the dotted lines to fit around the portion of the image you want to print 9 In the Copy section select a quantity and choose a photo option Color Photo or Black and White Photo 10 Click See More Copy Settings to Choose a copy quality Select the blank paper size Select the original document size...

Страница 45: ...hanges click the following tabs 6 When you finish customizing your copy settings click OK and then click Copy Now Click this tab To Print Select the paper size and type Select borderless printing options Select the print quality Scan Select the color depth and scan resolution Auto crop the scanned image Image Enhancements Straighten images after scan deskew Sharpen your blurry images Adjust the br...

Страница 46: ...46 Copying w w w d e l l c o m s u p p o r t d e l l c o m ...

Страница 47: ...e sure the upper left corner of the front of the document aligns with the arrow on the printer 4 Close the top cover 5 Open the Dell All In One Center by clicking Start Programs or All Programs Dell Printers Dell Photo AIO Printer 944 Dell All In One Center The Dell All In One Center opens NOTE You can also open the Dell All In One Center from the operator panel on your printer When your printer i...

Страница 48: ...r scan Scanning Photos 1 Turn on your computer and printer and make sure they are connected 2 Open top cover 3 Place the photo you want to scan face down on the scanner glass Make sure the upper left corner of the front of the photo aligns with the arrow on the printer 4 Close the top cover 5 Open the Dell All In One Center by clicking Start Programs or All Programs Dell Printers Dell Photo AIO Pr...

Страница 49: ...See More Scan Settings to Select what type of document is being scanned Select the scan quality 10 When you finish customizing your image click Scan Now When your document has finished processing the selected program opens Scanning Multiple Pages or Images 1 Turn on your computer and printer and make sure they are connected 2 Open the top cover 3 Place the first sheet of the document you want to s...

Страница 50: ... Scan Settings to Select what type of document is being scanned Select the scan quality 8 Click the Advanced button 9 On the Scan tab click the Scan multiple items before output box 10 Click OK 11 When you finish customizing your settings click Scan Now After you scan the first page a prompt appears requesting the next page 12 Place the next sheet on the scanner glass and click Yes Repeat until yo...

Страница 51: ... to send your photo or document to and then press the Select button NOTE If your printer is connected locally the Scan submenu does not appear and the host computer is automatically selected 7 Enter the PIN number for the computer if one is required Use the up and down Arrow buttons to select a number 0 9 and the left and right Arrow buttons to proceed to the next field 8 Use the Arrow buttons to ...

Страница 52: ...left corner of the front of the document aligns with the arrow on the printer 3 Close the top cover 4 Open the Dell All In One Center by clicking Start Programs or All Programs Dell Printers Dell Photo AIO Printer 944 Dell All In One Center The Dell All In One Center opens NOTE You can also open the Dell All In One Center from the operator panel on your printer When your printer is in Scan mode pr...

Страница 53: ... or All Programs Dell Printers Dell Photo AIO Printer 944 Dell All In One Center The Dell All In One Center opens 2 In the Productivity Tools section click Save an image on my computer 3 Follow the instructions on your screen E mailing a Scanned Image or Document To send scanned images or documents through e mail 1 Open the top cover 2 Place the document or photo face down on the scanner glass Mak...

Страница 54: ...ake a selection 8 Follow the instructions on the screen to prepare the photograph for e mail 9 Click Next 10 Open your e mail program write a note to accompany the attached photo and then send it NOTE If you have questions about attaching documents to e mail consult the Help for your e mail program Enlarging or Reducing Images or Documents You can enlarge or reduce your document between 25 400 per...

Страница 55: ...e the top cover 5 Click Start Programs or All Programs Dell Printers Dell Photo AIO Printer 944 Dell All In One Center The Dell All In One Center opens 6 Click Preview Now 7 In the Productivity Tools section select Enlarge or reduce an image 8 Follow the instructions on the screen to select the size of your new image 9 When you finish customizing your image click Print Now ...

Страница 56: ...56 Scanning w w w d e l l c o m s u p p o r t d e l l c o m ...

Страница 57: ...onfiguring Microsoft Fax Console Windows XP or Fax Service Management Windows 2000 on page 58 If you do not see Fax in the list that appears continue with Installing Microsoft Fax Console in Windows XP on page 57 For Windows 2000 Fax Service Management is automatically installed Installing Microsoft Fax Console in Windows XP 1 Click Start Settings Control Panel Under Pick a Category click Add or R...

Страница 58: ...Receive check box allows you to receive faxes but may cause the computer modem to answer all phone calls in which case you may not receive voice mail 8 Click Next 9 On the Transmitting Subscriber Identification TSID screen type the identification information usually your fax number and your name or business name in the TSID box This information will appear in the header area of the faxes you send ...

Страница 59: ...onnected Make sure your computer modem is connected to an active analog phone line If you have DSL broadband service on the same phone line that you are using to fax you must also have a DSL filter installed Contact your Internet Service Provider for information 2 Place your document on the scanner glass and make sure the upper left corner aligns with the arrow on the printer 3 Press the Arrow but...

Страница 60: ...on the printer 3 Click Start Programs or All Programs Dell Printers Dell Photo AIO Printer 944 Dell All In One Center The Dell All In One Center opens 4 In the Dell All In One Center you can either In the Scan or Fax section you can send a single or multiple page fax First customize your fax job by answering the questions that appear on your screen To send a single page fax click Fax Now To send a...

Страница 61: ...ment If you selected the Enable Receive check box when configuring Fax Console or Fax Service Management you are now ready to receive a fax NOTE Selecting the Enable Receive check box allows you to receive faxes but may cause the computer modem to answer all phone calls in which case you may not receive voice mail Viewing Sent and Received Faxes Using Fax Console or Fax Service Management NOTE Onl...

Страница 62: ...ve been received Outbox faxes scheduled to be sent Sent Items faxes successfully sent 4 Click the folder of your choice 5 Click the fax in the right pane for which you want to view the status and then click Preferences or Properties 6 Click the General tab and view the Status line 7 Click Close when you are finished Changing the Fax Configuration 1 Click Start Programs or All Programs Accessories ...

Страница 63: ...reviously saved documents and images Printing Preferences Allows you to adjust printer settings Dell Picture Studio Allows you to manage edit display print and convert photos and other types of images Dell Ink Management System Warns you when your printer is running low on ink Memory Card Manager Allows you to display manage edit print and save photos to your computer Using the Dell All In One Cen...

Страница 64: ...er The Dell All In One Center includes four main sections Preview Now Scan and Fax Copy and Productivity Tools In this section You can Preview Now Select a portion of the preview image to scan View an image of what will be printed or copied Scan and Fax Select the program where you want to send the scanned image Select the type of image being scanned Select how you will use the scan Select Fax Now...

Страница 65: ... type of project you want to create To access Printing Preferences when a document is open 1 Click File Print The Print dialog box opens Productivity Tools Enlarge or reduce an image Repeat an image several times on one page Print an image as a multi page poster Fax using your computer s modem E mail an image Save an image on your computer Edit text found in a scanned document Optical Character Re...

Страница 66: ...d if you have a photo cartridge installed Media Type Allows you to set the paper type manually or have the printer sensor detect the paper type automatically Paper Size Select the size and type of paper Print in black and white Print your color images in black and white to save the ink in your color ink cartridge NOTE You cannot select this setting if you have selected Color Cartridge for all Blac...

Страница 67: ...hop Photo Album 5 Paint Shop Photo Album Paint Shop Pro Studio Click Start Programs or All Programs Dell Picture Studio 3 Paint Shop Pro Studio Dell Shutterfly com Online Print Service Click Start Programs or All Programs Dell Picture Studio 3 Dell Shutterfly com Online Print Service NOTE Depending on your operating system some or all of these programs may not be available to you Maintenance Insta...

Страница 68: ...ter 944 Memory Card Manager Dell Ink Management System Each time you print a job a printing progress screen appears which shows the progress of the print job as well as the amount of ink remaining and the approximate number of pages remaining in the cartridge The page counter is hidden during the first 50 pages of cartridge use until printing habits are learned and a more accurate count can be giv...

Страница 69: ...ting Preferences The Reserve Tank dialog does not display again until after the low ink cartridge has been replaced The Complete A Print check box is automatically reset when a new or different cartridge is installed If your color ink cartridge is out of ink you can choose to print color documents in grayscale by selecting Complete A Print before clicking the Continue Printing button If you select...

Страница 70: ...ll Photo AIO Printer 944 2 Follow the instructions on the screen 3 Restart your computer 4 Insert the Drivers and Utilities CD and then follow the instructions on the screen If the installation screen does not appear a In Windows XP click Start My Computer In Windows 2000 double click My Computer from your desktop b Double click the CD ROM drive icon If necessary double click setup exe c When the ...

Страница 71: ...an order more ink online at www dell com supplies or by phone To order by phone see Ordering Supplies on page 2 Dell recommends Dell ink cartridges for your printer Dell does not provide warranty coverage for problems caused by using accessories parts or components not supplied by Dell 1 Turn on your printer 2 Lift the printer unit and position the scanner support between the tabs to hold it open ...

Страница 72: ... each ink cartridge lid 4 Remove the old ink cartridges 5 Store the cartridges in an air tight container such as the storage unit you received with your photo cartridge or dispose of them properly 6 If you are installing new ink cartridges remove the sticker and transparent tape from the back and bottom of each ink cartridge ...

Страница 73: ...or cartridge used for normal printing For photo printing use a photo cartridge and a color cartridge 7 Insert the new ink cartridges Make sure the black or photo ink cartridge is secure in the left ink cartridge carrier and the color ink cartridge is secure in the right ink cartridge carrier ...

Страница 74: ...rinter unit until it is completely closed Aligning Ink Cartridges Your printer automatically prompts you to align the ink cartridges when they are installed or replaced To verify your ink cartridges are aligned you can print an alignment page 1 Press the Arrow buttons until you see Maintenance 2 Press the Select button 3 Press the Arrow buttons until you see Align Cartridges ...

Страница 75: ...argin or when vertical or straight lines appear wavy To align the ink cartridges 1 Load plain paper For more information see Loading Paper on page 23 2 In Windows XP click Start Control Panel Printers and Other Hardware Printers and Faxes In Windows 2000 click Start Settings Printers 3 Right click the Dell Photo AIO Printer 944 icon 4 Click Printing Preferences The Printing Preferences dialog box ...

Страница 76: ...on see Loading Paper on page 23 2 In Windows XP click Start Control Panel Printers and Other Hardware Printers and Faxes In Windows 2000 click Start Settings Printers 3 Right click the Dell Photo AIO Printer 944 icon 4 Click Printing Preferences The Printing Preferences dialog box opens 5 Click the Maintenance tab 6 Click Clean Print Cartridges 7 If the print quality has not improved click Print A...

Страница 77: ...NTER AND YOUR COMPUTER CHECK THE USB CABLE Ensure that the USB cable is firmly connected to your printer and your computer Shut down the computer reconnect the USB cable as shown on the setup diagram for your printer and then restart the computer IF THE SOFTWARE INSTALLATION SCREEN DOES NOT APPEAR AUTOMATICALLY INSTALL THE SOFTWARE MANUALLY 1 Insert the Drivers and Utilities CD 2 In Windows XP cli...

Страница 78: ...lick Start Settings Printers 2 Right click Dell Photo AIO Printer 944 and select Set as Default PRINTER WON T PRINT AND PRINT JOBS ARE STUCK IN PRINT QUEUE Check for multiple instances of the printer installed on your computer 1 In Windows XP click Start Control Panel Printers and Other Hardware Printers and Faxes In Windows 2000 click Start Settings Printers 2 Check for multiple printer objects f...

Страница 79: ... Printer 3 Make sure a check mark is not next to Pause Printing If a check mark is next to Pause Printing click it to clear the option CHECK FOR FLASHING LIGHTS ON THE PRINTER For more information see Error Messages and Lights on page 82 ENSURE YOU INSTALLED THE INK CARTRIDGES CORRECTLY AND REMOVED THE STICKER AND TAPE FROM EACH CARTRIDGE MAKE SURE YOU LOADED THE PAPER CORRECTLY For more informati...

Страница 80: ...e Provider for more information Make sure your computer is not connected to the Internet via dial up modem when trying to fax WHEN USING AN EXTERNAL MODEM MAKE SURE IT IS TURNED ON AND IT IS CORRECTLY CONNECTED TO YOUR COMPUTER MAKE SURE YOU LOADED THE PAPER CORRECTLY For more information see Loading Paper on page 23 USE ONLY PAPER RECOMMENDED FOR YOUR PRINTER For more information see Loading Pape...

Страница 81: ...r support 1 Turn off your printer 2 Firmly grasp the paper and gently pull it from the printer 3 Turn on your printer and print the document again If the paper jam is not visible 1 Turn off your printer 2 Lift the printer unit and position the scanner support between the tabs to keep it open 3 Gently pull the paper from the printer 4 Close the printer unit turn on the printer and print the documen...

Страница 82: ...ue A printhead carrier jam exists in the printer Clear the carrier jam and then press the Select button Cartridge Error Insert print cartridges in the correct positions Left Black or Photo Right Color The ink cartridges are installed in the wrong position Remove and reinstall the ink cartridges in the correct position For more information see Replacing Ink Cartridges on page 71 Cartridge Missing I...

Страница 83: ...memory card PictBridge Port The attached camera or device does not support PictBridge Please disconnect it The attached device is not supported or the PictBridge enabled digital camera is not set to the correct USB mode Please disconnect the device or check the USB mode setup Refer to the documentation that came with your digital camera for more information Size Warning The paper inserted is small...

Страница 84: ...Print The Print dialog box appears 2 Click Preferences Properties or Options depending on your program or operating system 3 On the Quality Copies tab select Quality Speed and select a higher quality setting 4 Print your document again 5 If the print quality does not improve try aligning or cleaning the ink cartridges For more information on aligning see Aligning Ink Cartridges on page 74 For more...

Страница 85: ...and on the back panel of the printer NOTE Dell s Express Service Code system may not be available in all countries 2 In the U S Business customers should call 1 877 459 7298 and Consumer Home and Home Office customers should call 1 800 624 9896 If you are calling from a different country or are in a different Service area see Contacting Dell on page 86 for your local telephone number 3 Follow the ...

Страница 86: ...cally you can access the following websites www dell com support dell com technical support premiersupport dell com technical support for educational government healthcare and medium large business customers including Premier Platinum and Gold customers For specific web addresses for your country find the appropriate country section in the table below NOTE Toll free numbers are for use within the ...

Страница 87: ... toll free 0 800 444 0730 Tech Support toll free 0 800 444 0733 Tech Support Services toll free 0 800 444 0724 Sales 0 810 444 3355 Aruba General Support toll free 800 1578 Australia Sydney International Access Code 0011 Country Code 61 City Code 2 E mail Australia au_tech_support dell com E mail New Zealand nz_tech_support dell com Home and Small Business 1 300 655 533 Government and Business tol...

Страница 88: ...mail for French speaking Customers support euro dell com be fr emaildell Technical Support 02 481 92 88 Technical Support Fax 02 481 92 95 Customer Care 02 713 15 65 Corporate Sales 02 481 91 00 Fax 02 481 92 99 Switchboard 02 481 91 00 Bermuda General Support 1 800 342 0671 Bolivia General Support toll free 800 10 0238 Brazil International Access Code 00 Country Code 55 City Code 51 Website www d...

Страница 89: ... 847 4096 Technical Support med large bus government toll free 1 800 387 5757 Sales Home Sales Small Business toll free 1 800 387 5752 Sales med large bus government toll free 1 800 387 5755 Spare Parts Sales Extended Service Sales 1 866 440 3355 Cayman Islands General Support 1 800 805 7541 Chile Santiago Country Code 56 City Code 2 Sales Customer Support and Technical Support toll free 1230 020 ...

Страница 90: ...ess toll free 800 858 2222 Preferred Accounts Division toll free 800 858 2557 Large Corporate Accounts GCP toll free 800 858 2055 Large Corporate Accounts Key Accounts toll free 800 858 2628 Large Corporate Accounts North toll free 800 858 2999 Large Corporate Accounts North Government and Education toll free 800 858 2955 Large Corporate Accounts East toll free 800 858 2020 Large Corporate Account...

Страница 91: ...0 Switchboard Fax Relational 3287 1201 Switchboard Home Small Business 3287 5000 Switchboard Fax Home Small Business 3287 5001 Dominica General Support toll free 1 866 278 6821 Dominican Republic General Support 1 800 148 0530 Ecuador General Support toll free 999 119 El Salvador General Support 01 899 753 0777 Finland Helsinki International Access Code 990 Country Code 358 City Code 9 Website sup...

Страница 92: ... 004 719 Customer Care 0825 338 339 Switchboard 01 55 94 71 00 Sales 01 55 94 71 00 Fax 01 55 94 71 01 Germany Langen International Access Code 00 Country Code 49 City Code 6103 Website support euro dell com E mail tech_support_central_europe dell com Technical Support 06103 766 7200 Home Small Business Customer Care 0180 5 224400 Global Segment Customer Care 06103 766 9570 Preferred Accounts Cust...

Страница 93: ...ite support ap dell com Technical Support E mail apsupport dell com Technical Support Dimension and Inspiron 2969 3188 Technical Support OptiPlex Latitude and Dell Precision 2969 3191 Technical Support PowerApp PowerEdge PowerConnect and PowerVault 2969 3196 Customer Care 3416 0910 Large Corporate Accounts 3416 0907 Global Customer Programs 3416 0908 Medium Business Division 3416 0912 Home and Sma...

Страница 94: ...Sales 01 204 4444 U K Sales dial within U K only 0870 907 4000 Fax Sales Fax 01 204 0103 Switchboard 01 204 4444 Italy Milan International Access Code 00 Country Code 39 City Code 02 Website support euro dell com E mail support euro dell com it it emaildell Home and Small Business Technical Support 02 577 826 90 Customer Care 02 696 821 14 Fax 02 696 821 13 Switchboard 02 696 821 12 Corporate Tech...

Страница 95: ...56 3490 24 Hour Automated Order Service 044 556 3801 Customer Care 044 556 4240 Business Sales Division up to 400 employees 044 556 1465 Preferred Accounts Division Sales over 400 employees 044 556 3433 Large Corporate Accounts Sales over 3500 employees 044 556 3430 Public Sales government agencies educational institutions and medical institutions 044 556 1469 Global Segment Japan 044 556 3469 Ind...

Страница 96: ...ls Belgium 02 481 91 19 Fax Brussels Belgium 02 481 92 99 Switchboard Brussels Belgium 02 481 91 00 Macao Country Code 853 Technical Support toll free 0800 105 Customer Service Xiamen China 34 160 910 Transaction Sales Xiamen China 29 693 115 Malaysia Penang International Access Code 00 Country Code 60 City Code 4 Website support ap dell com Technical Support Dell Precision OptiPlex and Latitude t...

Страница 97: ...74 43 25 Home Small Business Sales 020 674 55 00 Relational Sales 020 674 50 00 Home Small Business Sales Fax 020 674 47 75 Relational Sales Fax 020 674 47 50 Switchboard 020 674 50 00 Switchboard Fax 020 674 47 50 New Zealand International Access Code 00 Country Code 64 E mail New Zealand nz_tech_support dell com E mail Australia au_tech_support dell com Technical Support for desktop and portable...

Страница 98: ...ce Phone 57 95 700 Customer Care 57 95 999 Sales 57 95 999 Customer Service Fax 57 95 806 Reception Desk Fax 57 95 998 Switchboard 57 95 999 Portugal International Access Code 00 Country Code 351 Website support euro dell com E mail support euro dell com pt en emaildell Technical Support 707200149 Customer Care 800 300 413 Sales 800 300 410 800 300 411 800 300 412 or 21 422 07 10 Fax 21 424 01 12 ...

Страница 99: ...om E mail czech_dell dell com Technical Support 02 5441 5727 Customer Care 420 22537 2707 Fax 02 5441 8328 Tech Fax 02 5441 8328 Switchboard Sales 02 5441 7585 South Africa Johannesburg International Access Code 09 091 Country Code 27 City Code 11 Website support euro dell com E mail dell_za_support dell com Gold Queue 011 709 7713 Technical Support 011 709 7710 Customer Care 011 709 7707 Sales 01...

Страница 100: ...05 199 Relational Customer Care 08 590 05 642 Home Small Business Customer Care 08 587 70 527 Employee Purchase Program EPP Support 20 140 14 44 Technical Support Fax 08 590 05 594 Sales 08 590 05 185 Switzerland Geneva International Access Code 00 Country Code 41 City Code 22 Website support euro dell com E mail Tech_support_central_Europe dell com E mail for French speaking HSB and Corporate Cus...

Страница 101: ...l Access Code 001 Country Code 66 Website support ap dell com Technical Support OptiPlex Latitude and Dell Precision toll free 1800 0060 07 Technical Support PowerApp PowerEdge PowerConnect and PowerVault toll free 1800 0600 09 Customer Service Penang Malaysia 604 633 4949 Corporate Sales toll free 1800 006 009 Transaction Sales toll free 1800 006 006 Trinidad Tobago General Support 1 800 805 8035...

Страница 102: ...73 186 Home and Small Business Customer Care 0870 906 0010 Corporate Customer Care 01344 373 185 Preferred Accounts 500 5000 employees Customer Care 0870 906 0010 Central Government Customer Care 01344 373 193 Local Government Education Customer Care 01344 373 199 Health Customer Care 01344 373 194 Home and Small Business Sales 0870 907 4000 Corporate Public Sector Sales 01344 860 456 Home and Sma...

Страница 103: ...mers toll free 1 800 695 8133 Printers and Projectors Technical Support toll free 1 877 459 7298 Public government education and healthcare Customer Service and Technical Support toll free 1 800 456 3355 Employee Purchase Program EPP Customers toll free 1 800 234 1490 Dell Sales toll free 1 800 289 3355 or toll free 1 800 879 3355 Dell Outlet Store Dell refurbished computers toll free 1 888 798 75...

Страница 104: ...104 Contacting Dell w w w d e l l c o m s u p p o r t d e l l c o m ...

Страница 105: ...her prearranged payment method Dell may invoice parts of an order separately Your order is subject to cancellation by Dell at Dell s sole discretion Unless you and Dell have agreed to a different discount Dell s standard pricing policy for Dell branded systems which include both hardware and services in one discounted price allocates the discount off list price applicable to the service portion of...

Страница 106: ... returning all components in an order you will be credited the full amount paid for the order At Dell s discretion credit for partial returns may be less than invoice or individual component prices due to bundled or promotional pricing 7 Changed or Discontinued Product Dell s policy is one of ongoing update and revision Dell may revise and discontinue Product at any time without notice to you and ...

Страница 107: ...igns affiliates collectively for purposes of this paragraph Dell arising from or relating to this Agreement its interpretation or the breach termination or validity thereof the relationships which result from this Agreement including to the full extent permitted by applicable law relationships with third parties who are not signatories to this Agreement Dell s advertising or any related purchase S...

Страница 108: ...not supplied by Dell Products with missing or altered Service Tags or serial numbers Products for which Dell has not received payment THIS WARRANTY GIVES YOU SPECIFIC LEGAL RIGHTS AND YOU MAY ALSO HAVE OTHER RIGHTS WHICH VARY FROM STATE TO STATE OR JURISDICTION TO JURISDICTION DELL S RESPONSIBILITY FOR MALFUNCTIONS AND DEFECTS IN HARDWARE IS LIMITED TO REPAIR AND REPLACEMENT AS SET FORTH IN THIS W...

Страница 109: ...ll not be retroactive What do I do if I need warranty service Before the warranty expires please call us at the relevant number listed in the following table Please also have your Dell Service Tag or order number available What will Dell do During the 90 days of the 90 day limited warranty and the first year of all other limited warranties During the 90 days of the 90 day limited warranty and the ...

Страница 110: ...ions and territories Otherwise we will ship the part freight collect We will also include a prepaid shipping container with each replacement part for your use in returning the replaced part to us NOTE Before you replace parts make sure to back up the data on the hard drive s and any other storage device s in the product s We are not responsible for lost or corrupted data What if I purchased a serv...

Страница 111: ...gers un preinstalled third party software wireless cards access points routers including but not limited to those sold by or through Dell s Software Peripherals or Electronics Accessories groups may be returned within twenty one 21 days from the date on the packing slip or invoice but a fifteen percent 15 return fee may be deducted from any refund or credit Dell EMC storage products EMC branded pr...

Страница 112: ...ISCLAIMS ALL OTHER WARRANTIES AND CONDITIONS EXPRESS OR IMPLIED STATUTORY OR OTHERWISE FOR THE PRODUCT FOR U S CUSTOMERS ALL EXPRESS AND IMPLIED WARRANTIES FOR THE PRODUCT INCLUDING BUT NOT LIMITED TO ANY IMPLIED WARRANTIES AND CONDITIONS OF MERCHANTABILITY AND FITNESS FOR A PARTICULAR PURPOSE ARE LIMITED IN TIME TO THE TERM OF THIS LIMITED WARRANTY NO WARRANTIES WHETHER EXPRESS OR IMPLIED WILL AP...

Страница 113: ...rcial customer of Dell or a Dell affiliate you hereby grant Dell or an agent selected by Dell the right to perform an audit of your use of the Software during normal business hours you agree to cooperate with Dell in such audit and you agree to provide Dell with all records reasonably related to your use of the Software The audit will be limited to verification of your compliance with the terms of...

Страница 114: ...ion you agree that the Software and accompanying materials and all copies thereof will be destroyed This agreement is governed by the laws of the State of Texas Each provision of this agreement is severable If a provision is found to be unenforceable this finding does not affect the enforceability of the remaining provisions terms or conditions of this agreement This agreement is binding on succes...

Страница 115: ...match the electromagnetic environment classification of the product A Notice About Shielded Signal Cables Use only shielded cables for connecting devices to any Dell device to reduce the possibility of interference with radio communications services Using shielded cables ensures that you maintain the appropriate Electromagnetic Compatibility classification for the intended environment For parallel...

Страница 116: ...116 Appendix w w w d e l l c o m s u p p o r t d e l l c o m ...

Страница 117: ...ity Tools 65 Scan section 64 using 63 E e mail document 53 scanned image 53 error messages and flashing lights 82 F faxing 57 I ink cartridges aligning 74 cleaning 76 replacing 71 M Maintenance tab 67 multiple copies 66 N nozzles ink cartridge cleaning 76 O operator panel copying with 39 using 15 P paper exit tray 12 paper type sensor 25 turning off 25 photos printing 28 PictBridge 31 Print Setup ...

Страница 118: ...118 Index S software Dell All In One Center 63 Printing Preferences 65 reinstalling 70 uninstalling 70 support contacting Dell 85 W warranty 108 114 ...

Отзывы: