background image

8

16 1-Gigabit Ethernet Ports

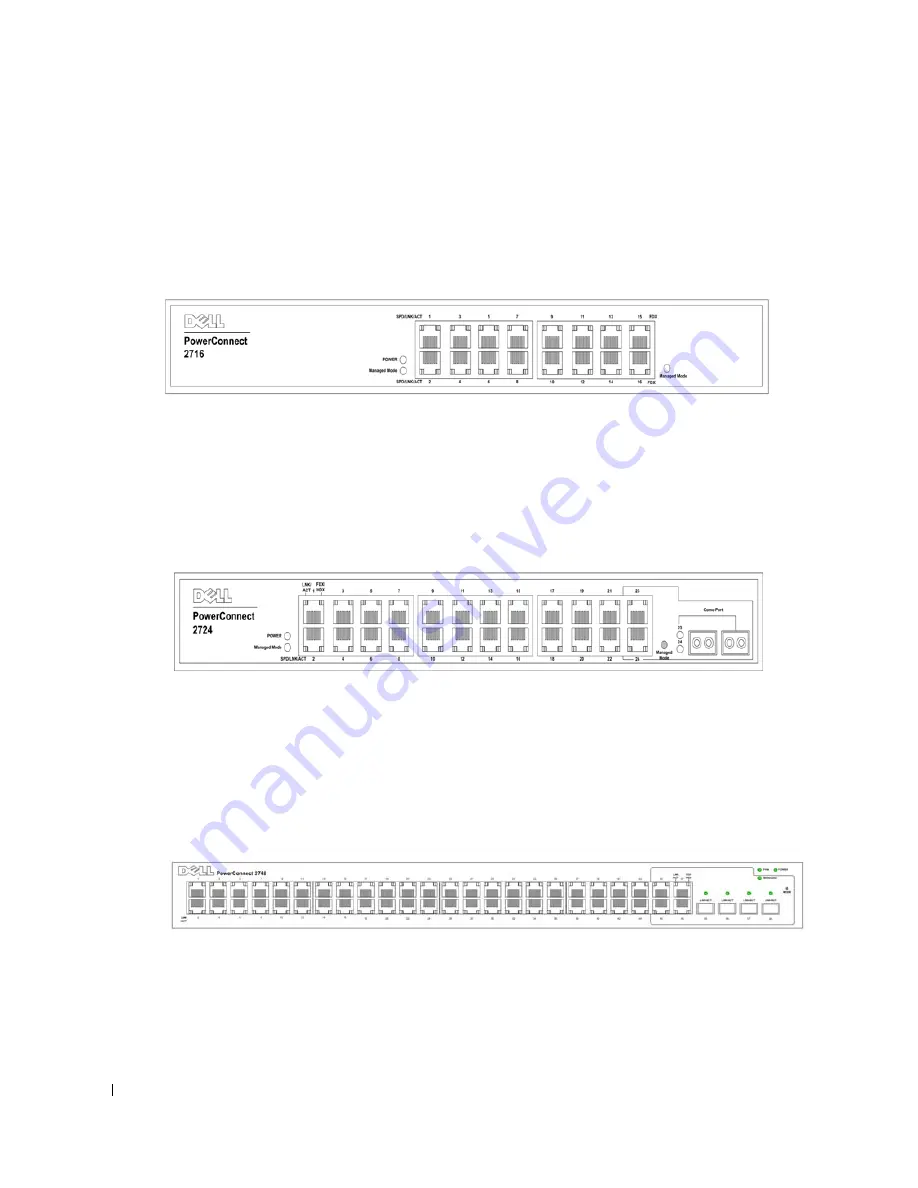
The following figure illustrates the PowerConnect 2716 front panel.

Figure 1-2. PowerConnect 2716 Front Panel

The PowerConnect 2716 switch supports 16 GbE copper ports.

24 1-Gigabit Ethernet Ports + 2 SFP Combo ports

The following figure illustrates the PowerConnect 2724 front panel.

Figure 1-3. PowerConnect 2724 Front Panel

The PowerConnect 2724 switch supports 24 GbE copper ports and has two SFP combo ports 

(1000BASE-SX or 1000BASE-LX).

48 1-Gigabit Ethernet Ports

The following figure illustrates the PowerConnect 2748 front panel.

Figure 1-4. PowerConnect 2748 Front Panel

Содержание 2724 - PowerConnect Switch

Страница 1: ...w w w d e l l c o m s u p p o r t d e l l c o m Dell PowerConnect 27XX Systems User s Guide ...

Страница 2: ...ut notice 2006 Dell Inc All rights reserved Reproduction in any manner whatsoever without the written permission of Dell Inc is strictly forbidden Trademarks used in this text Dell Dell OpenManage the DELL logo and PowerConnect are trademarks of Dell Inc Microsoft is a registered trademark of Microsoft Corporation Other trademarks and trade names may be used in this document to refer to either the...

Страница 3: ...ures 12 Ethernet Switch Management Features 13 Port Default Settings 13 2 Hardware Description Switch Port Configurations 15 PowerConnect 2708 2716 2724 2748 Front Panel Port Description 15 Physical Dimensions 19 LED Definitions 19 Power LED 19 Managed Mode LED 19 Fan LED 2748 only 20 Port LEDs 20 Managed Mode Button 21 Switch Ventilation Fan 22 Cables Port Connections and Pinout Information 22 10...

Страница 4: ...8 Installing the Device 29 Installing the Device in a Rack 29 Installing the Device on a Flat Surface 30 Connecting the Device to AC Power Supply 31 Connecting the Device to the Network 32 4 Starting and Configuring the Dell PowerConnect 27XX Viewing Switch Operation 33 Initial Configuration 33 5 Using the Dell OpenManage Switch Administrator Understanding the Interface 37 Using the OpenManage Swi...

Страница 5: ...gs 51 Configuring LAG Membership 52 Managing System Files 54 Downloading Files From Server 55 Downloading Files From Server 55 Local User Database 60 Integrated Cable Test for Copper Cables 61 Optical Transceivers Diagnostics 63 Port Mirroring 64 Enabling Storm Control 65 7 Configuring Quality of Service Quality of Service QoS Overview 69 CoS Services 70 Defining CoS Settings 71 Configuring QoS Se...

Страница 6: ...6 Contents ...

Страница 7: ...evices are ideal for the small to medium business that requires high performance network connectivity along with advanced web management features The PowerConnect management features are designed to minimize administrative management effort while enhancing and improving network traffic control System Description This section describes the hardware configurations of the PowerConnect 2708 PowerConne...

Страница 8: ... 1 Gigabit Ethernet Ports 2 SFP Combo ports The following figure illustrates the PowerConnect 2724 front panel Figure 1 3 PowerConnect 2724 Front Panel The PowerConnect 2724 switch supports 24 GbE copper ports and has two SFP combo ports 1000BASE SX or 1000BASE LX 48 1 Gigabit Ethernet Ports The following figure illustrates the PowerConnect 2748 front panel Figure 1 4 PowerConnect 2748 Front Panel...

Страница 9: ...ation through power cycles From Managed Mode when the Managed Mode button is pressed the switch enters Unmanaged Mode Secure Mode PowerConnect 2748 only Secure Mode works by the user configuring the switch in Managed Mode and then enabling Secure Mode Once enabled it prevents users from making any further configuration changes to the switch This is done by removing the IP address to the switch so ...

Страница 10: ...detects whether the cable connected to an RJ 45 port is crossed or straight through Standard wiring for end stations is Media Dependent Interface MDI and the standard wiring for hubs and switches is known as Media Dependent Interface with Crossover MDIX Auto MDI MDIX works on 10 100 1000BASE T Ethernet ports This feature is automatically enabled for the entire system and cannot be turned off by th...

Страница 11: ...lity may be configured for untagged frames Addresses are associated with ports by learning them from the incoming frames source address Unmanaged Mode Classic Bridging In Unmanaged Mode the switch performs classic bridging Frames are forwarded based on their destination MAC address only regardless of the VLAN tag Layer 2 Features Port Mirroring The port mirroring mechanism monitors and mirrors net...

Страница 12: ...ts with the same speed set to full duplex operation BootP and DHCP Clients DHCP Dynamic Host Configuration Protocol enables additional setup parameters to be received from a network server upon system startup DHCP service is an on going process DHCP is an extension to BootP The BootP client is operational if there is a corrupted or invalid software image The BootP client then continuously attempts...

Страница 13: ... configured TFTP Trivial File Transfer Protocol The PowerConnect 2708 2716 2724 2748 switches support software boot image and software download through TFTP Remote Monitoring Remote Monitoring RMON is an extension to the Simple Network Management Protocol SNMP which provides network traffic statistics RMON defines current and historical MAC layer statistics and control objects allowing real time i...

Страница 14: ...14 ...

Страница 15: ...l duplex mode The following figures illustrate the front panels and back panels of the PowerConnect 2708 2716 2724 2748 switches Figure 2 1 PowrConnect 2708 Front Panel On the front panel there are eight ports which are numbered 1 to 8 top down and left to right On each port there are LEDs Light Emitting Diode to indicate the port status On the left side of the front panel is the Managed Mode LED ...

Страница 16: ...re LEDs to indicate the port status On the left side of the front panel is the Managed Mode LED which indicates the Ethernet switch operational status The Power LED on the front panel indicates whether the device is powered on or not A Managed Mode push button located on the right side on the front panel restores the device s default settings configuration Figure 2 4 PowerConnect 2716 Back Panel ...

Страница 17: ...d at any one time Port features and port controls are determined by the physical connection used The system automatically detects the media used on a combo port and utilizes the information in all the control interfaces NOTE The system can switch from the RJ 45 to the SFP or vice versa without resetting the device If both RJ 45 and SFP ports are present the SFP port will be the active port whereas...

Страница 18: ...nection used The system automatically detects the media used on a combo port and utilizes the information in all the control interfaces NOTE The system can switch from the RJ 45 to the SFP or vice versa without resetting the device If both RJ 45 and SFP ports are present the SFP port will be the active port whereas the RJ 45 port will be disabled On the top right side of the front panel is the Man...

Страница 19: ...5 mm 10 04 in LED Definitions The front panel contains LEDs that indicate the status of links power supply fan status and Managed Mode status Power LED On the PowerConnect 2708 2716 2724 2748 front panel there is a Power LED The following table describes the Power Supply status LED indications Managed Mode LED On the PowerConnect 2708 2716 2724 2748 front panel there is a Managed Mode LED monitori...

Страница 20: ...EDs Figure 2 9 RJ 45 Copper based 10 100 1000BASE T LEDs The RJ 45 LED indications are described in the following table Table 2 2 Managed Mode LED Indications LED Color Description Green Flashing Indicates diagnostics in progress firmware loading or Managed Mode transition Green Solid Indicates the switch is in Managed Mode Amber Solid Diagnostics has failed Amber Flashing No valid image Off Indic...

Страница 21: ... GUI login user name changes to Admin and the password is not configured appears blank with Read Write privilege The DHCP client is set off The device is rebooted Table 2 4 RJ 45 Copper based 10 100 1000BASE T LED Indications LED Color Description Left LED Green Static The port is linked at 1000 Mbps Green Flashing The port is transmitting or receiving data at 1000 Mbps Amber Static The port is li...

Страница 22: ...o 1000BASE T Cable Requirements All Category 5 UTP cables that are used for 100BASE TX connections also operate with 1000BASE T provided if all four wire pairs are connected However it is recommended that enhanced Category 5 Category 5e cable is used for all critical connections or any new cable installations The Category 5e specification includes test parameters that are only recommendations for ...

Страница 23: ... switch from the RJ 45 to the SFP or vice versa without a system reset The system automatically detects the media used on a combo port and utilizes this information in the control interfaces PowerConnect 2724 switch supports SFP diagnostics The optical transceiver provides access to a set of parameters that can be monitored and displayed to the system administrator NOTE If both RJ 45 and SFP ports...

Страница 24: ...t 3 Transmitter disable laser output disabled on high or open 4 Module definition 2 data line for serial ID 5 Module definition 1 clock line for serial ID 6 Module definition 0 grounded within the module 7 Rate select no connection required 8 Loss of signal indication logic 0 indicates normal operation 9 Receiver ground common with transmitter ground 10 Receiver ground common with transmitter grou...

Страница 25: ...ed to water Ensure that the Ethernet device is not exposed to radiators or heat sources Do not push foreign objects into the device s hardware enclosure as it may cause a fire or electric shock Use the Ethernet device only with approved equipment Allow the Ethernet device to cool before removing covers or touching internal equipment Ensure that the airflow around the front sides and back of the de...

Страница 26: ... clearance for operator access Allow clearance for cabling power connections and ventilation Cabling Cabling is routed to avoid sources of electrical noise such as radio transmitters broadcast amplifiers power lines and fluorescent lighting fixtures Ambient Requirements The ambient unit operating temperature range is 0 to 45C 32 to 113F at a relative humidity of up to 95 non condensing Verify that...

Страница 27: ...tting it down If it is necessary to set the Ethernet switch down place it in its static protective package Do not place the Ethernet switches on a metal table Take additional care when handling Ethernet switches during cold weather because heating reduces indoor humidity and increases static electricity Package Contents While unpacking the device ensure that the following items are included The de...

Страница 28: ...ng bolt may cause electrical shock These components are to be serviced by trained service technicians only Ensure that the power cable extension cable and or plug is not damaged Ensure that the device is not exposed to water Ensure that the device is not exposed to radiators and or heat sources Ensure that the cooling vents are not blocked Do not push foreign objects into the device as it may caus...

Страница 29: ...the mounting holes on the device line up to the mounting holes on the rack mounting bracket The following figure illustrates where to mount the brackets Figure 3 2 Bracket Installation for Rack Installation 2 Insert the supplied screws into the rack mounting holes and tighten with a screwdriver 3 Repeat the process for the rack mounting bracket on the other side of the device 4 Insert the unit int...

Страница 30: ...Device on a Wall 1 Place the supplied wall mounting bracket on one side of the device ensuring that the mounting holes on the device line up to the mounting holes on the rack mounting bracket The following figure illustrates where to mount the brackets Figure 3 3 Bracket Installation for Wall Mounting 2 Insert the supplied screws into the rack mounting holes and tighten with a screwdriver 3 Repeat...

Страница 31: ...that the ventilation holes are not obstructed Figure 3 4 Mounting Device on a Wall Connecting the Device to AC Power Supply 1 Using a 5 foot 1 5 m standard power cable with safety ground connected connect the power cable to the AC connector located on the back panel ...

Страница 32: ...ables can be used to connect to any other Ethernet network systems servers switches or routers that supports auto negotiation NOTE Do not plug a phone jack connector into an RJ 45 port This will damage the Ethernet device Use only twisted pair cables with RJ 45 connectors that conform to FCC standards NOTE If autonegotiation is turned off on the ports a straight through cable must be used To conne...

Страница 33: ...olid amber PowerConnect 2748 If the process fails in the PowerConnect 2708 2716 2724 switch the Managed Mode LED indicator turns solid red Initial Configuration The switch is delivered from the factory in Unmanaged Mode This section describes how to enter Managed Mode and configure the switch If the user wishes to use the switch as an unmanaged switch they can simply plug the switch in and start u...

Страница 34: ...ed Mode the device must be fully operational in Unmanaged Mode Managed Mode LED has stopped blinking and is off Once the Managed Mode LED has stopped blinking press the Managed Mode button The switch reboots and the Managed Mode LED blinks for approximately 90 seconds and stays lit When the Managed Mode LED stays lit the switch is ready to be configured The default IP address is 192 168 2 1 the de...

Страница 35: ...35 2 Enter the IP address Subnet Mask and Default Gateway as supplied by the System Administrator 3 Click Apply Changes The switch is configured with the updated configuration parameters ...

Страница 36: ...36 ...

Страница 37: ...d Web Server EWS which serves HTML pages through which the user can monitor the switch interface Understanding the Interface The home page contains a Tree View located on the left side of the home page The tree view provides an expandable view of the features and their components Figure 5 1 Switch Status ...

Страница 38: ... all the components under a specific feature 2 The Ethernet switch view provides information about switch ports current configuration and status table information and feature components Depending on the option selected the area at the bottom of the Ethernet switch view displays other Ethernet switch information or dialog boxes for configuring parameters 3 The information buttons provide access to ...

Страница 39: ...ethod of configuring the switch information The following table mentions the switch management buttons available Table 5 2 Information Buttons Button Description Support Opens the Dell Support page at support dell com Help Online help containing information to assist in configuring and managing the Ethernet switch The online help pages are linked directly to the page currently open For example if ...

Страница 40: ...with a default IP address user login and password Activating the Managed Mode button recovers the factory default setting no password For information about recovering a lost password see Managed Mode Button NOTE Passwords are both case sensitive and alphanumeric 4 Click OK The Dell PowerConnect OpenManage Switch Administrator home page opens Table 5 3 PowerConnect Switch Management Buttons Button ...

Страница 41: ...41 Resetting the Device The Reset page resets the device To open the Reset page click Reset in the tree view Figure 5 2 Reset 1 Click Reset A confirmation message displays 2 Click OK The device is reset ...

Страница 42: ...rieves vast amounts of configuration data the data is divided into groups The system administrator can peruse the configuration information by either selecting a specific interface or using the Previous and Next links The following screen displays an example of data display on demand Figure 5 3 Data Display on Demand Example ...

Страница 43: ...configuring and viewing general switch information including the Product Name Firmware Version the system MAC Address Asset Tag Service Tag System Name Location Name Serial Number and System Up Time To open the page click Switch Status in the tree view Figure 6 1 Switch Status Product Name Defines the name of the product Firmware Version Defines the version of the product firmware Boot Version Dis...

Страница 44: ... the current configuration will be saved and the device will become Secure and will no longer be able to be configured Defining Switch Information 1 Open the Switch Status page 2 Define the fields 3 Click Apply Changes The switch status parameters are defined and the switch is updated Viewing System IP Address The IP Addressing page enables to manually set the static IP Address Subnet Mask and the...

Страница 45: ... IP Address received from the DHCP server DHCP Mask Specifies the Subnet Mask received from the DHCP server DHCP Default Gateway Defines the Default Gateway Address received from the DHCP server Apply DHCP Address Activates the IP Address Subnet Mask Address and Default Gateway Address received from the DHCP server Updating Static IP Address 1 Open the IP Addressing page 2 Verify that the DHCP fie...

Страница 46: ...re not configured to the device Record the updated dynamic fields 4 Check the box for Apply DHCP Address NOTE The new dynamic DHCP IP Address DHCP Subnet Mask and DHCP Default Gateway Address received from the DHCP server are saved and configured in the device only after the Apply Changes button is clicked on A reset to Default recovers the device default configuration 5 Click Apply Changes The ne...

Страница 47: ...he port When Up is selected the traffic is forwarded through the port When Down is selected no traffic is forwarded through the port Current Port Status Specifies whether the port is currently operational or non operational Operational Status Indicates the port operational status The possible field values are Suspended Indicates that the port is currently active and it is currently not transmittin...

Страница 48: ...the number of packets in the output device exceeds a given threshold value The Backpressure mode is used in Half Duplex mode The receiving port can use backpressure that is occupy the link so it becomes unavailable for additional traffic to temporarily prevent the sending port from transmitting additional traffic Backpressure can be enabled or disabled by setting the field Current Backpressure The...

Страница 49: ... amounts of data in fewer frames Jumbo frames are accepted at ingress incoming traffic and generated at egress outgoing traffic This mechanism ensures less overhead lower processing time and fewer interruptions Internal frames may be effected by enabling Jumbo frames NOTE The PowerConnect 2708 switch does not support Jumbo Frames NOTE A change in Jumbo Frames support requires power cycling of the ...

Страница 50: ...s are assigned VLAN membership by toggling through the Port Control settings The VLAN Membership page contains fields for defining VLAN groups The switch supports the mapping of 4094 VLAN IDs up to 64 VLANs The VLAN Membership page also displays the VLAN ID currently defined and enables to statically create a new VLAN To open the page click VLAN Membership in the tree view Figure 6 5 VLAN Membersh...

Страница 51: ...om the switch Showing Creating VLANs 1 Open the VLAN Membership page 2 Select VLAN ID or Create VLAN field 3 Click Apply Changes The switch VLAN change is applied Removing VLANs 1 Open the VLAN Membership page 2 Select the VLAN to be removed 3 Click Apply Changes The VLAN is removed from the switch Defining VLAN Interface Settings The VLAN Interface Settings page displays the parameters including ...

Страница 52: ...default VLAN s VID will be used Frame Type Packet type accepted by the LAG The possible values are Admit Tag Only Only tagged packets are accepted by the interface Admit All Tagged and untagged packets are accepted by the interface Ingress Filtering Enables or disables incoming filtering by the interface Ingress filtering discards packets which do not include an ingress port Updating the VLAN Inte...

Страница 53: ...on Configurfation Ports Specifies the port s aggregated into the LAG and assigned to which LAG LAG Group Adds a port to a LAG and indicates the specific LAG to which the port belongs Adding a Port to a LAG 1 Open the LAG Aggregation Configuration page 2 Toggle the button under the port number to assign the LAG number 3 Click Apply Changes The port is added to the LAG and the switch is updated ...

Страница 54: ...red in the Running Configuration file are lost During the startup process all commands in the Startup file are copied to the Running Configuration File and applied to the device During the session all new commands entered are added to the commands existing in the Running Configuration file Commands are not overwritten To update the Startup file before powering down the device the Running Configura...

Страница 55: ...File The destination file type to which the file is downloaded The possible field values are the following Software Image Downloads the software image file Boot Code Downloads the Boot file Downloading Files from Server 1 Open the File Download page 2 Define the file type to download 3 Define the fields on the page 4 Click Apply Changes The software file is downloaded to the switch Downloading Fil...

Страница 56: ...re Download Server IP Address The Server IP Address from which the firmware files are downloaded Source File Name 1 159 Characters Indicates the file to be downloaded Destination File Name The destination file type to which the file is downloaded The possible field values are Software Image Downloads the image file Boot Code Downloads the Boot file NOTE The image file overwrites the non active ima...

Страница 57: ...iles The File Upload to Server page contains fields for uploading the software from the TFTP server to the device The image file can also be uploaded from the File Upload to Server page This applies to the PowerConnect 2748 switch configuration only To open the File Upload to Server page click File Upload in the tree view Figure 6 10 File Upload to Server Upload via TFTP Enables initiating an imag...

Страница 58: ...on file appears in the list Uploading Files 1 Open the File Upload to Server page 2 Define the file type to upload 3 Define the fields 4 Click Apply Changes The software is uploaded to the device Copying Files Files can be copied and deleted from the Copy Files page This applies to PowerConnect 2748 switch configuration only To open the Copy Files page click Copy Files in the tree view Figure 6 11...

Страница 59: ... User Password Resets the device to the default user and password when selected Restore Configuration Factory Defaults When selected specifies that the factory configuration default files should be reset When unselected maintains the current configuration settings Copying Files 1 Open the Copy Files page 2 Define the Source and Destination fields 3 Click Apply Changes 4 The file is copied and the ...

Страница 60: ...ined Read Write and Read Only For each Access Level two users can be defined Password 0 32 Characters Defines a User defined alphanumeric password Local User Database passwords can be up to 32 characters long There is no minimum length for the password Confirm Password Confirm the user defined password The password appears in the format Remove When checked removes users from the User Name list Ass...

Страница 61: ...the switch is updated Integrated Cable Test for Copper Cables The Integrated Cable Test page for copper cables contains fields for performing tests on copper cables Cable testing provides information about where errors occurred in the cable the last time the cable test was performed and the type of cable error that occurred Running cable diagnostics tests the quality and characteristics of the cop...

Страница 62: ...or occurred Last Update The last time the cable was tested Approximate Cable Length The approximate cable length This test can only be performed when the port is up and operating Running Integrated Cable Test 1 Open the Integrated Cable Test page 2 Select a port to be tested The possible test results are either No Cable or Open Cable 3 Click Test Now The copper cable test is performed and the resu...

Страница 63: ...ics in the tree view Figure 6 14 Optical Transceivers Diagnostics Port The port on which the cable is tested Temperature Internally measured transceiver temperature Voltage Internally measured supply voltage Current Measured TX bias current Output Power Measured TX output power in milliwatts Input Power Measured RX power in milliwatts Transmitter Fault TX fault Loss of Signal Indicates if a loss o...

Страница 64: ...e page click Port Mirroring in the tree view Figure 6 15 Port Mirroring Destination Port Designates the port number to which port traffic is copied Source Port Designates the port number from which source traffic originates Type Indicates whether the source port is Tx Rx or both Tx and Rx Status Indicates if the port is currently monitored Active or not monitored Ready Remove When checked it indic...

Страница 65: ...st packet rate per port and discards excess packets when the rate exceeds the defined threshold value In addition to the count definition per port the Broadcast rate threshold is configured to exclude certain values The PowerConnect 2708 switch users can do the following Set the threshold value for Broadcast packets on a per port basis to prevent Broadcast storms Enable Storm Control per port with...

Страница 66: ...ally per device and discards excess packets when the rate exceeds the defined threshold value The PowerConnect 2716 and PowerConnect 2724 switch users can do the following Set the maximum number of Broadcast Multicast frames allowed on each port in terms of number of packets per second Enable or disable packet storm control on a per port basis To open the page click Storm Control in the tree view ...

Страница 67: ...orm Control on the PowerConnect 2748 The following describes Storm Control for PowerConnect 2748 Figure 6 18 Storm Control Page PowerConnect 2748 Switch Configuration Port The port from which the Storm Control is enabled Broadcast Control Enables or disables forwarding Broadcast packet types on the switch Mode Sets the mode of Broadcast Storm Control based on the types of traffic selected The poss...

Страница 68: ...The default value is 3500 Modifying PowerConnect 2748 Storm Control Port Parameters 1 Open the Storm Control page 2 Enter the fields 3 Click Apply Changes The Storm Control port parameters are saved to the PowerConnect 2748 switch ...

Страница 69: ...assification Specifies which packet fields are matched to specific values All packets matching the user defined specifications are classified together Action Defines traffic management where packets being forwarded are based on packet information and packet field values such as VLAN priority VPT and DSCP DiffServ Code Point VPT Tag Classification Information VLAN Priority Tags are used to classify...

Страница 70: ... a scheduling scheme by one of the following methods Strict Priority Strict Priority SP allows the prioritization of mission critical and time sensitive traffic over less time sensitive applications Thus ensuring that time sensitive applications are always forwarded before traffic with lower priority For example under Strict Priority voice over IP traffic is forwarded before FTP or e mail SMTP tra...

Страница 71: ...cording to the selected trust mode Traffic not containing a predefined packet field is mapped to the best effort queue q2 The possible Trust Mode field values are None All traffic is mapped to the best effort queue q2 CoS The egress queue assignment is determined by the IEEE802 1p VLAN priority tag VPT or by the default VPT assigned to a port This is the trust default value DSCP The egress queue a...

Страница 72: ...e Trust Mode field 3 Click Apply Changes Trust Mode is enabled on the Ethernet switch Mapping CoS Values to Queues The Cos to Queue page contains fields for classifying CoS settings to traffic queues To open the page click CoS to Queue in the tree view Figure 7 2 CoS to Queue Class of Service Specifies the CoS priority tag values where zero is the lowest and 7 is the highest Queue The queue to whi...

Страница 73: ... To open the page click DSCP to Queue in the tree view Figure 7 3 DSCP to Queue DSCP In The values of the DSCP field within the incoming packet Queue The queue to which packets with the specific DSCP value is assigned The values are 1 4 where 1 is the lowest value and 4 is the highest Mapping a DSCP value and assigning priority queue 1 Open the DSCP to Queue page 2 Select a value in the DSCP In co...

Страница 74: ...74 ...

Страница 75: ...lts using the Web management interface There is no SNMP management interface in the system NOTE The PowerConnect 2708 2716 2724 2748 devices support one RMON group for Ethernet statistics The RMON Statistics page contains links for viewing network information from a remote location To open click RMON Statistics in the tree view Figure 8 1 RMON Statistics Interface Specifies the port or LAG for whi...

Страница 76: ...nce the system was last reset Oversize Packets Number of oversized packets over 1518 octets received on the interface since the system was last reset Fragments Number of fragments packets with less than 64 octets excluding framing bits but including FCS octets received on the interface since the system was last reset Jabbers The total number of packets received that were longer than 1518 octets ex...

Страница 77: ...cond Bandwidth Assignments The amount of bandwidth assigned to a specific application user or interface Best Effort Traffic is assigned to the lowest priority queue and packet delivery is not guaranteed Boot Version The boot version BootP Bootstrap Protocol Enables a workstation to discover its IP address an IP address of a BootP server on a network or a configuration file loaded into the boot of ...

Страница 78: ...ovides a method of tagging IP packets with QoS priority information Domain A group of computers and Ethernet switch modules on a network that are grouped with common rules and procedures Duplex Mode Permits simultaneous transmissions and reception of data There are two different types of duplex mode Full DuplexMode Permits for bisynchronous communication for example a telephone Two parties can tra...

Страница 79: ...forwarded before packets at the end of the line Host A computer that acts as a source of information or services to other computers HTTP HyperText Transport Protocol Transmits HTML documents between servers and clients on the internet I ICMP Internet Control Message Protocol Allows gateway or destination host to communicate with a source host for example to report a processing error IEEE Institute...

Страница 80: ...ing LAG Membership LAN Local Area Networks A network contained within a single room building campus or other limited geographical area Layer 2 Data Link Layer or MAC Layer Contains the physical address of a client or server station Layer 2 processing is faster than Layer 3 processing because there is less information to process M MAC Address Media Access Control Address The MAC Address is a hardwa...

Страница 81: ...in packet switched systems PING Packet Internet Groper Verifies if a specific IP address is available A packet is sent to another IP address and waits for a reply This utility is essentially a System Administrator s tool used to verify if network connections are intact PING uses the Internet Control Message Protocol ICMP Echo function Port Physical ports provide connecting components that allow mi...

Страница 82: ...82 A set of rules that governs how Ethernet switch modules exchange information across networks ...

Страница 83: ...SNMP agents SNMP agents gather network activity and Ethernet switch status information and send the information back to a workstation Startup Configuration Retains the exact switch configuration when the switch module is powered down or rebooted Subnet Sub network Subnets are portions of a network that share a common address component On TCP IP networks Ethernet switch modules that share a prefix ...

Страница 84: ...a Local Area Network LAN created via software rather than defining a hardware solution W WAN Wide Area Networks Networks that cover a large geographical area Wildcard Mask Specifies which IP address bits are used and which bits are ignored A wild switch module mask of 255 255 255 255 indicates that no bit is important A wildcard of 0 0 0 0 indicates that all the bits are important For example if t...

Отзывы: