


Adding and Replacing Parts
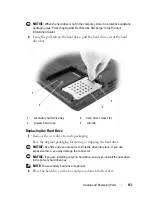
159
3
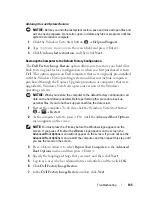
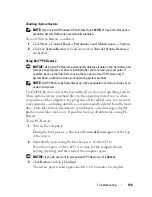
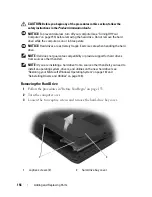
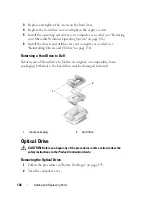
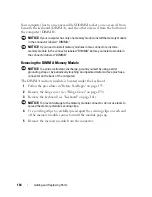
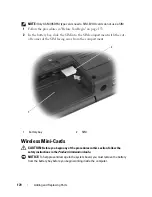
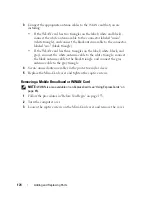
Remove the locking screw from the optical drive.
4
Using a plastic scribe, push the notch to release the optical drive from the
bay.
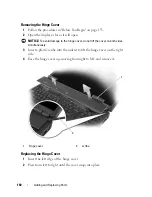
Hinge Cover
CAUTION:
Before you begin any of the procedures in this section, follow the
safety instructions in the
Product Information Guide
.
NOTICE:
To avoid electrostatic discharge, ground yourself by using a wrist
grounding strap or by periodically touching an unpainted metal surface (such as a
connector on the back of the computer).
NOTICE:
To help prevent damage to the system board, you must remove the battery
from the battery bay before you begin working inside the computer.
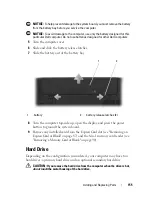
1
optical drive
2
notch
3
device security screw
3
1
2
Содержание 1700 - Personal Laser Printer B/W
Страница 1: ...w w w d e l l c o m s u p p o r t d e l l c o m Dell Vostro 1700 Owner s Manual Model PP22X ...
Страница 13: ...Contents 13 FCC Notice U S Only 211 FCC Class B 211 Macrovision Product Notice 213 Glossary 215 Index 233 ...
Страница 14: ...14 Contents ...
Страница 20: ...20 Finding Information ...
Страница 58: ...58 Using a Battery ...
Страница 84: ...84 Using Multimedia ...
Страница 88: ...88 Using ExpressCards ...
Страница 104: ...104 Securing Your Computer ...
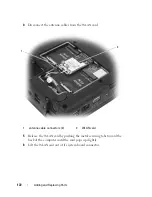
Страница 175: ...Adding and Replacing Parts 175 1 captive screws 2 2 Mini Card cover 1 2 ...
Страница 184: ...184 Adding and Replacing Parts ...
Страница 186: ...186 Dell QuickSet Features ...
Страница 196: ...196 Getting Help ...
Страница 214: ...214 Appendix ...
Страница 232: ...232 Glossary ...
Страница 240: ...240 Index ...


