Install a NOS
CAUTION:
Installing a NOS using ONIE erases all software configurations on the switch. The configuration settings are
not recoverable. Back up all software configurations and installed licenses on the switch before performing OS updates
or changes. Store a regular backup of the switch configuration off the switch.
•
Automatic installation
—ONIE discovers network information including the Dynamic Host Configuration Protocol (DHCP) server,
connects to an image server, and downloads and installs an image automatically.
•
Manual installation
—Manually configure your network information if a DHCP server is not available or if you install the NOS
software image using USB media.
System setup
Before installation, verify that the system is connected correctly:
•
Connect a serial cable and terminal emulator to the console serial port. The serial port settings are 115200 baud rate, 8 data bits, and
no parity.
•
Connect the Management port to the network to download an image over a network. To locate the Console port and the
Management port, see the platform-specific
Installation Guide
Install the NOS
For an ONIE-enabled switch, go to the ONIE boot menu. An ONIE-enabled switch boots with preloaded diagnostics (DIAGs) and ONIE
software.
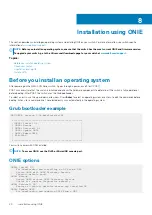
+--------------------------------------------------------+
|*ONIE: Install OS |
| ONIE: Rescue |
| ONIE: Uninstall OS |
| ONIE: Update ONIE |
| ONIE: Embed ONIE |
| ONIE: Diag ONIE |
+--------------------------------------------------------+
•
Install OS—Boots to the ONIE prompt and installs an NOS image using the Automatic Discovery process. When ONIE installs a new
OS image, the previously installed image and configuration are deleted.
•
Rescue—Boots to the ONIE prompt and enables manual installation of an NOS image or ONIE update.
•
Uninstall OS—Deletes the contents of all disk partitions, including the NOS configuration, except ONIE and diagnostics.
•
Update ONIE—Installs a new ONIE version.
•
Embed ONIE—Formats the disk and installs ONIE.
•
EDA DIAG—Runs the system diagnostics.
After the ONIE process installs an NOS image and you later reboot the switch in
ONIE: Install OS
mode (default), ONIE takes
ownership of the system and remains in Install mode (ONIE Install mode is sticky) until an NOS image successfully installs again. To boot
the switch from ONIE for any reason other than installation, select the
ONIE: Rescue
or
ONIE: Update ONIE
option from the ONIE
boot menu.
CAUTION:
During an automatic or manual NOS installation, if an error condition occurs that results in an unsuccessful
installation and if there is an existing OS on the device, select
Uninstall OS
to clear the partitions. If the problem
persists, contact Dell EMC Technical Support.
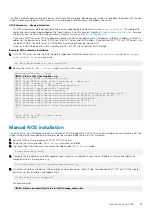
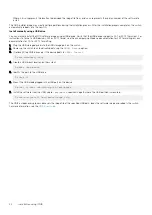
Automatic NOS installation
You can automatically install an NOS image on a Dell EMC ONIE-enabled device. This process is known as zero-touch install. After the
device boots to
ONIE: Install OS
, ONIE autodiscovery follows these steps to locate the installer file and uses the first successful
method:
1. Use a statically configured path that is passed from the boot loader.
2. Search file systems on locally attached devices, such as USB.
3. Search the exact URLs from a DHCPv4 server.
4. Search the inexact URLs based on the DHCP responses.
5. Search IPv6 neighbors.
6. Start a TFTP waterfall.
42
Installation using ONIE


