


9. From the
TPM2 Algorithm Selection
option, select
SHA256
, then go back to
System Security Settings
screen.
10. On the
System Security Settings
screen, from the
Intel TXT
option, select
On
.
11. Save the settings.
12. Restart your system.
Control panel
Control panel details
Your system supports:
•
Left control panel: Contains status LEDs, system ID button, and iDRAC Quick Sync 2 (optional).
•
Right control panel: Contains power button, USB 2.0 port, VGA port micro USB for iDRAC Direct, and status LED for iDRAC Direct.
Removing the left control panel
Prerequisites
1. Follow the safety guidelines listed in
.
2. Follow the procedure listed in
Before working inside your system
3.
Remove the cooling fan assembly
4.
Steps
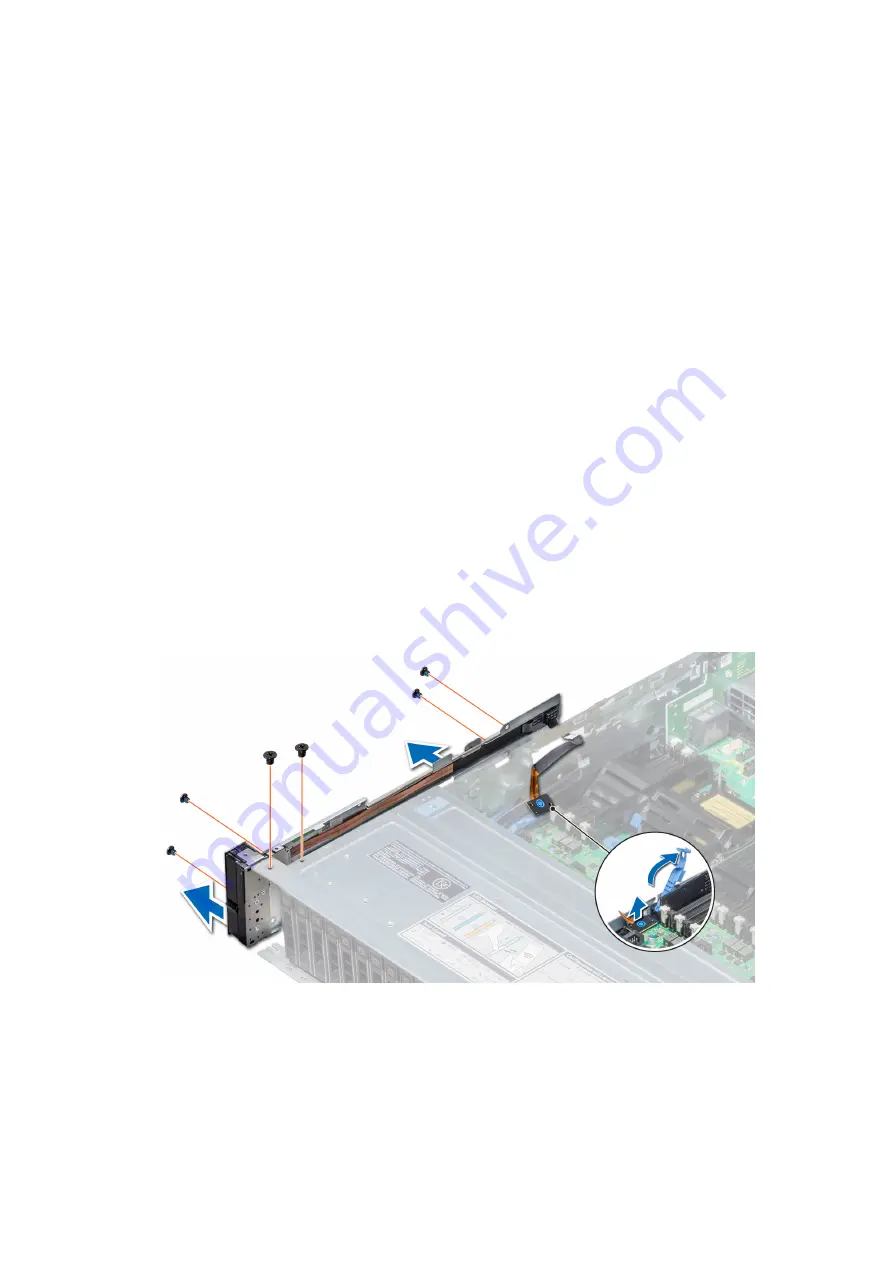
1. Pull the cable latch and disconnect the control panel cable from the system board connector.
2. Using a Phillips #1 screwdriver, remove the screws to remove the cable cover, which secure the lest control panel and cable tube to
the system.
3. Holding the control panel and cable tube by its sides, remove the control panel and cable tube away from the system.
Figure 168. Removing left control panel
Next steps
Install the left control panel.
Installing and removing system components
205
Содержание PowerEdge R740xd
Страница 9: ...Figure 1 Supported configurations PowerEdge R740xd system overview 9 ...
Страница 24: ...Figure 21 system task Figure 22 NVDIMM battery and mid tray hard drives 24 PowerEdge R740xd system overview ...
Страница 160: ...Figure 110 Securing GPU 1 Figure 111 Installing GPU 2 and 3 160 Installing and removing system components ...