


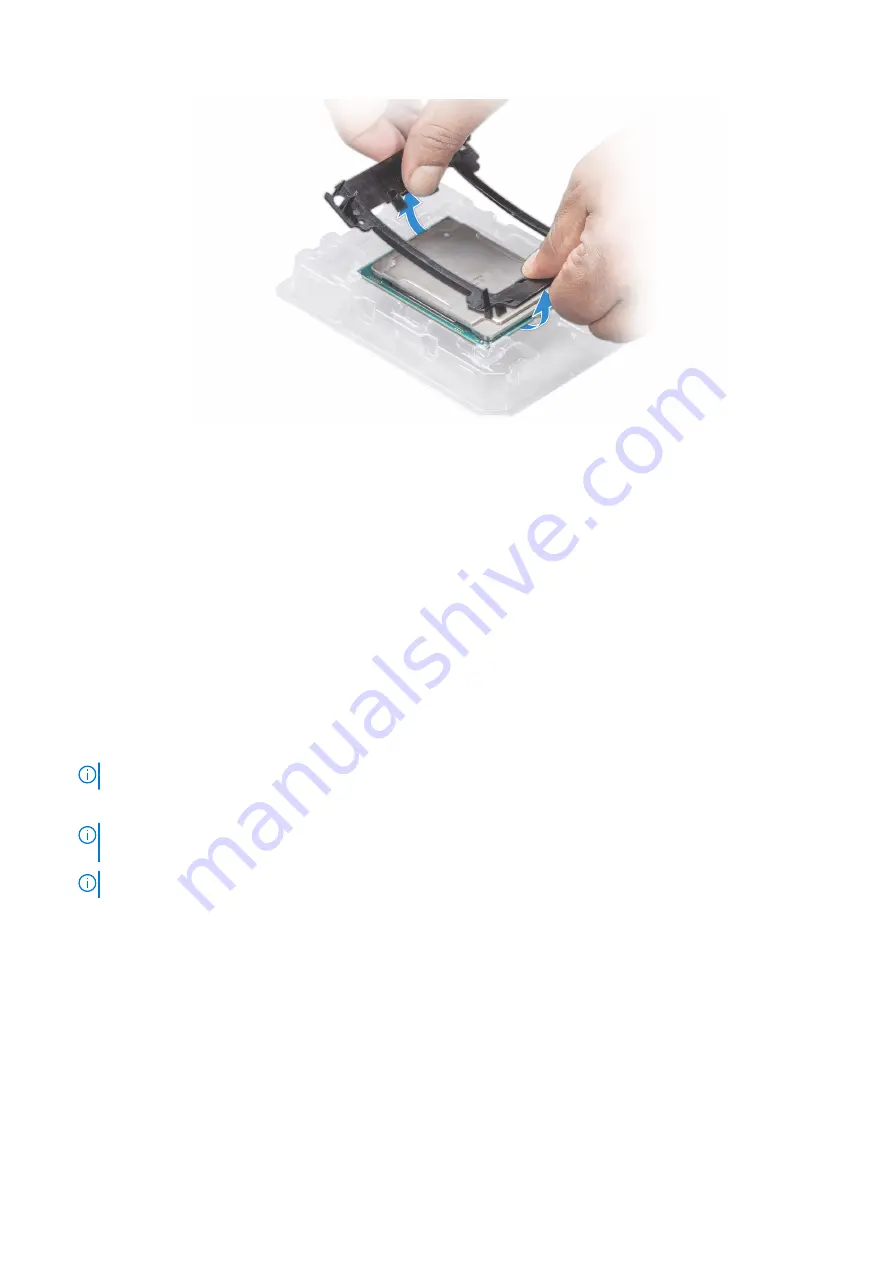
Figure 75. Removing the processor bracket
Next steps
Install the processor into a processor and heat sink module
Installing the processor into a processor and heat sink
module
Prerequisites
Follow the safety guidelines listed in
Steps
1. Place the processor in the processor tray.
NOTE:
Ensure that the pin 1 indicator on the processor tray is aligned with the pin 1 indicator on the processor.
2. Flex the outer edges of the bracket around the processor ensuring that the processor is locked into the clips on the bracket.
NOTE:
Ensure that the pin 1 indicator on the bracket is aligned with the pin 1 indicator on the processor before
placing the bracket on the processor.
NOTE:
Ensure that the processor and the bracket are placed in the tray before you install the heat sink.
Installing and removing system components
129
Содержание PowerEdge R740xd
Страница 9: ...Figure 1 Supported configurations PowerEdge R740xd system overview 9 ...
Страница 24: ...Figure 21 system task Figure 22 NVDIMM battery and mid tray hard drives 24 PowerEdge R740xd system overview ...
Страница 160: ...Figure 110 Securing GPU 1 Figure 111 Installing GPU 2 and 3 160 Installing and removing system components ...