86
Limiter (LIM) Module
Limiters are used to set a ceiling on the signal level, preventing the signal from exceeding a predetermined threshold. For
this reason, they are used to prevent the overdriving of equipment. Limiters are compressors with high ratios (typically, a ratio
of around 10:1 or higher is generally considered limiting). The ratio settings in the VENU360 Limiter modules are fixed at
infinity:1, meaning they provide a “rigid ceiling” or “hard limiting”. In live PA sound systems, limiters can be used just before the
amplifiers to squeeze the last bit of level out of the system and protect the loudspeakers by preventing the amplifiers from
clipping.
The Limiter modules in the VENU360 are post crossover, meaning they can function as band-limited limiters. This allows for
independent limiting of multi-way system drivers. For example, you could apply limiting on the signal feeding the subwoofer
amplifier without affecting any of the higher frequencies being sent to the main speakers. This has the additional benefit of
making any such limiting less noticeable.
The Limiter thresholds will automatically be set for you when you run the Setup Wizard and select your amplifiers from the
tuning list. If tunings aren’t listed for your amplifiers, check the ever-growing online database using the VENU360 control app
to see if they’ve been added. If tunings cannot be found for your amps, select the “Not Listed??” option. Note that the Limiters
will not be set for your amps when selecting the “Not Listed??” option. Therefore, the Limiters will need to be calibrated
manually if you wish to use them to protect the system. See
‘Manually Optimizing A System Using The VENU360’ on
for more information on manually calibrating the Limiters.
Limiter modules are fixed in the output processing stage. The following section provides a description of each of the Limiter
module parameters and how to edit them.
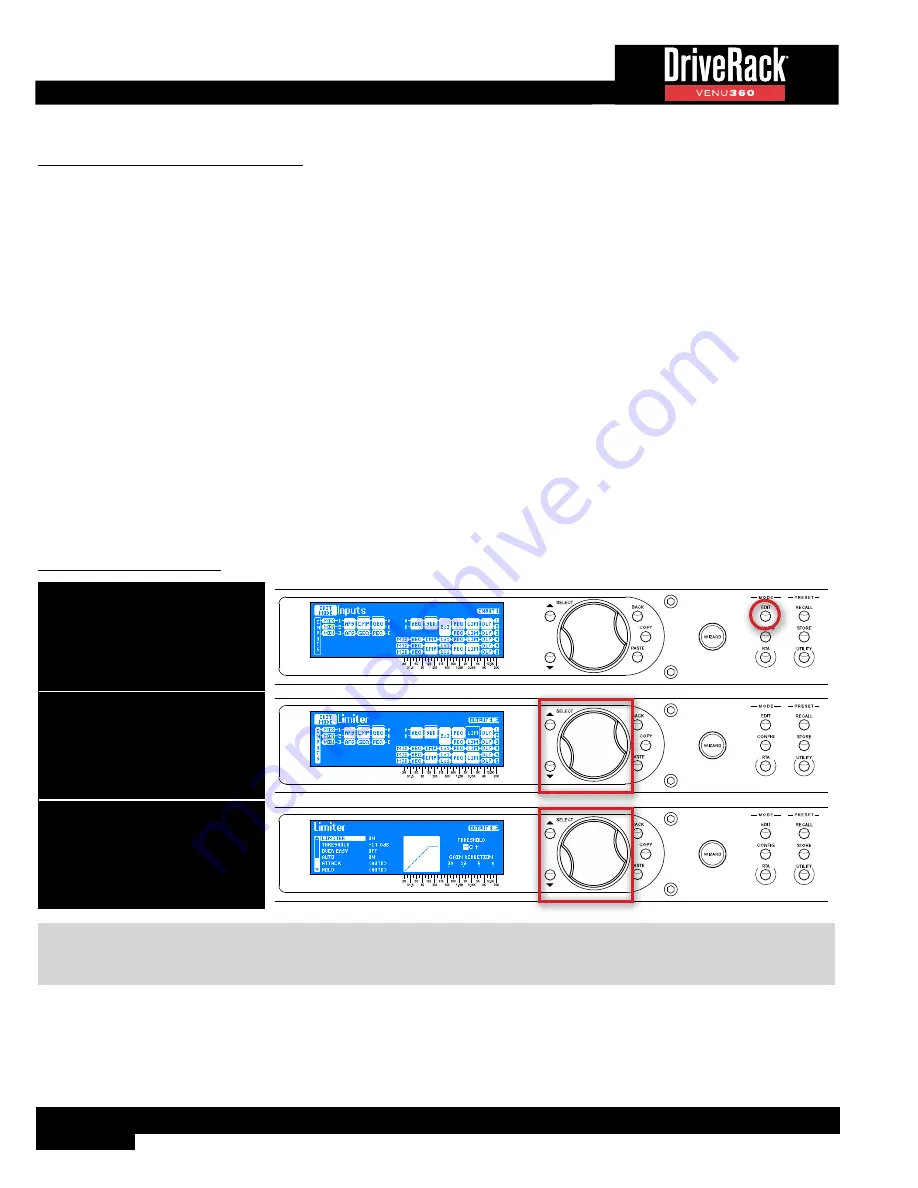
To edit a Limiter module:
1. Press the EDIT button.
2. Select a Limiter module using
the SELECT wheel and UP/DOWN
buttons. Press the SELECT wheel
to enter the module’s menu.
3. Use the SELECT wheel and UP/
DOWN buttons to navigate the
menu and edit parameters.
TIP:
When in a menu, pressing and holding the
EDIT
button for approximately 2 seconds will advance to the next module
below in the configuration map, wrapping around through the available modules. This allows quick navigation between
menus of a column and improves efficiency when performing repetitive tasks within like modules.


