
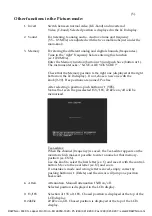


(5).
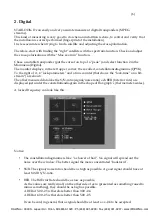
Other functions in the Picture-mode:
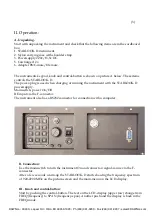
1.
Invert
Switch between normal video (KU-band) and inverterad
Video (C-band). Selected position is displayed in the LCD-display.
2.
Sound
For listening to analog audio. Audio volume and frequency
(5.5 – 8.5 MHz) are adjusted with the two small knobs just under the
main-knob.
3.
Memory
For storing the different analog and digital channels (frequencies).
Tune in the ”right” frequency before entering this function
(ex. 1720 MHz).
Enter the Memory function (button nr 3) and push Save (button nr 1).
The instrumentet asks: -”SAVE. ARE YOU SURE ?”
Check that the Memoryposition is the right one (displayed at the right
bottom on the LCD-display). If not, chose a new one with the
knob (0-99). Free positions are named: Pos free
After selecting a position, push button nr 1 (YES).
Notice that even the preselected 13V/18V, 22 kHz on/off will be
memorized.
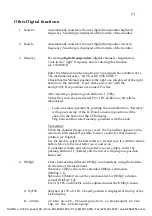
Text-editor:
When the channel (frequency) is saved, the Text-editor appears on the
monitor which makes it possible to enter a name for that memory-
position (ex. CNN).
Use the knob to select the first letter (ex. C) and save it with the control-
button. Move to the next letter (ex. N) and so on.
If a mistake is made and wrong letter is saved, simply correct by
pushing button nr 1 (Delete) and the cursor will jump one position
backward.
4.
Atten:
Attenuation. Manuell attenuation 15dB on/off.
Selected position is displayed in the LCD-display.
0. 13/18V
Selection of 13V alt. 18V. Chosed position is displayed at the top of the
LCD-display.
#. 22kHz
22 kHz on/off. Chosed position is displayed at the top of the LCD-
display.
DAWNco • 3340 S. Lapeer Rd • Orion, MI 48359-1320 • Ph (248) 391-9200 • Fax (248) 391-9207 • [email protected]


