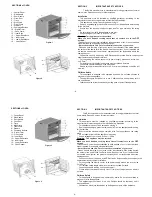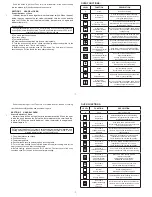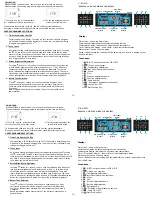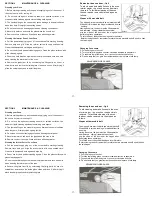
SECTION 4 INTRODUCTION of CONTROL PANEL
You can find control buttons in Figure.5 With these control buttons
power of each heating element can be adjustable. Buttons can turn
clockwise or opposite to clockwise directions. Please bring the control
button to required cooking position and do not forget big numbers on button
print means high heat outlet. For first cooking, it recommended to use
highest cooking position.
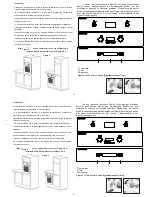
1 Thermostat
2 Timer
3 Selections
Push the button to get it out..Then turn it to related level. At the end of cooking
turn the buttons to (0) position and push them to get in.
SECTION 5 USAGE of OVEN
Control Switches of Oven
Indicator lamp will be on together with thermostat switch. When the heat
inside the oven reaches the set value, thermostat cuts the circuit and the
lamp is off. When the heat is below set value, thermostat is on again and
indicator lamp is lit.
Usage of Oven
During initial operation of your oven, a smell arising from insulation materials and
heating elements will be generated. To avoid it, operate your oven at 250 C for 45
minutes without putting any trays before use.
1.
The meals that can be cooked
2.
Positions of trays
3.
Thermostat positions
4.
Recommended cooking times are given in cooking table.
5.
Turn the “oven heating control” switch clockwise to adjust cooking time for the
meal you desire to cook, refer to cooking table.
6.
Before cooking, pre-heat the oven for 10 minutes. The front cover of the oven
should be open. Put the dish in the oven after pre-heating.
Figure 5. 13550
Control Panels (Digital&Mechanical Timer)
1
2
3
1
2
3
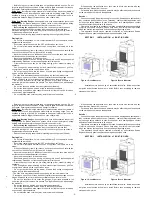
PLATE OPEN DOOR
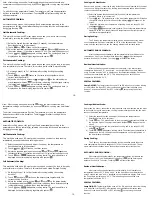
CAUTION :
The oven door has to be open with using plate open door as shown in
figure. Keep children away while duration of functioning grill.
SECTION 6
Grill Function of Oven
Turn the oven temperature button to position
�
We advise you to use grill wire that put into the tray when you are grilling.
By the way leaped or flowed oil can not make your oven dirty.
�
If you use grill wire that placed on shelf, put a tray into one of lower shelves
for collecting oils. For cleaning it easily, please put some water in it.
�
Cover at half closeed position do preheating for 5-10 minutes.
�
Please oil the grill to prevent your grilling food from sticking on grill.
ATTENTION :
For preventing command buttons on control panel from heating, please set
its sheet centered between front cover and oven body without have blank. Our
company is not responsible for damage made by not using this sheet.
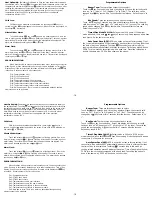
GRILL
Shelf Time (min.)
Lamb Meat 4-5
15
Lamb
Chops
4-5
15
Calf Chops 4-5
15-25
Sheep
Chops
4-5
15-25
SECTION 4 INTRODUCTION of CONTROL PANEL
You can find control buttons in Figure.5 With these control buttons
power of each heating element can be adjustable. Buttons can turn
clockwise or opposite to clockwise directions. Please bring the control
button to required cooking position and do not forget big numbers on button
print means high heat outlet. For first cooking, it recommended to use
highest cooking position.
1 Thermostat
2 Timer
3 Selections
Figure 5. 13550
Control Panels (Digital&Mechanical Timer)
1
2
3
1
2
3
PLATE OPEN DOOR
CAUTION :
The oven door has to be open with using plate open door as shown in
figure. Keep children away while duration of functioning grill.
SECTION 6
Grill Function of Oven
Turn the oven temperature button to position
�
We advise you to use grill wire that put into the tray when you are grilling.
By the way leaped or flowed oil can not make your oven dirty.
�
If you use grill wire that placed on shelf, put a tray into one of lower shelves
for collecting oils. For cleaning it easily, please put some water in it.
�
Cover at half closeed position do preheating for 5-10 minutes.
�
Please oil the grill to prevent your grilling food from sticking on grill.
ATTENTION :
For preventing command buttons on control panel from heating, please set
its sheet centered between front cover and oven body without have blank. Our
company is not responsible for damage made by not using this sheet.
GRILL
Shelf Time (min.)
Lamb Meat 4-5
15
Lamb
Chops
4-5
15
Calf Chops 4-5
15-25
Sheep
Chops
4-5
15-25
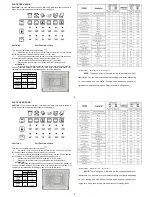
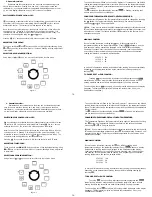
LEVEL
FUNCTION
DESCRIPTION
O
C
lose
O
ven is not working
Oven Lamp
Double Grill
Outer Heating Element and Grill Heating
Element works together.Recommends to use
for big and powerfull grill.
Oven Lamp
Grill Heating Element
Oven Lamp and Grill heater works.
Recommend to use for frying.Thermostat must
be at maximum position.
Oven Lamp
Top&Bottom Heating
Elements
Hot air comes from up and down heats the tray
from both side. Top and bottom sides of meals
cooked equally.
Oven Lamp
Grill Heating Element
Turbo Fan
Oven Lamp, Grill heater and Turbo Fan work
together. Recommend to use for frying.
Thermostat must be at maximum position.
Oven Lamp
Double Grill
Turbo Fan
Oven Lamp, Double Grill and Turbo Fan work
together. Recommend to use for frying.
Thermostat must be at maximum position.
Oven Lamp
Turbo Heating Element
Turbo Fan
Oven Lamp, Turbo Fan and Turbo Heating
Element work.Recommend to use fast cooking.
Oven Lamp
Turbo Heating Element
Turbo Fan, Bottom
Heating Element
Oven Lamp, turbo heating element,
turbo fan and bottom
heating element work together.
Recommed to use for pizza.
Oven Lamp
Turbo Fan
Only Oven Lamp and Turbo Fan work.
Recommend to use for defrosting.
Bottom
Heating Element
Bottom heating element,
Recommed to use cake and bread.
Top
Heating Element
Top Heating Element for keeping cooked food
warm or gently reheating.
Oven Lamp
Top&Bottom Heating
Elements
Turbo Fan
Hot air comes from up and down heats the tray
from both side. Top and bottom sides of meals
cooked equally with Turbo Fan.
OVEN
FUNCTIO
NS:
SECTION 4 INTRODUCTION of CONTROL PANEL
You can find control buttons in Figure.5 With these control buttons
power of each heating element can be adjustable. Buttons can turn
clockwise or opposite to clockwise directions. Please bring the control
button to required cooking position and do not forget big numbers on button
print means high heat outlet. For first cooking, it recommended to use
highest cooking position.
1 Thermostat
2 Timer
3 Selections
Push the button to get it out..Then turn it to related level. At the end of cooking
turn the buttons to (0) position and push them to get in.
SECTION 5 USAGE of OVEN
Control Switches of Oven
Indicator lamp will be on together with thermostat switch. When the heat
inside the oven reaches the set value, thermostat cuts the circuit and the
lamp is off. When the heat is below set value, thermostat is on again and
indicator lamp is lit.
Usage of Oven
During initial operation of your oven, a smell arising from insulation materials and
heating elements will be generated. To avoid it, operate your oven at 250 C for 45
minutes without putting any trays before use.
1.
The meals that can be cooked
2.
Positions of trays
3.
Thermostat positions
4.
Recommended cooking times are given in cooking table.
5.
Turn the “oven heating control” switch clockwise to adjust cooking time for the
meal you desire to cook, refer to cooking table.
6.
Before cooking, pre-heat the oven for 10 minutes. The front cover of the oven
should be open. Put the dish in the oven after pre-heating.
LEVEL
FUNCTION
DESCRIPTION
O
C
lose
O
ven is not working
Oven Lamp
Double Grill
Outer Heating Element and Grill Heating
Element works together.Recommends to use
for big and powerfull grill.
Oven Lamp
Grill Heating Element
Oven Lamp and Grill heater works.
Recommend to use for frying.Thermostat must
be at maximum position.
Oven Lamp
Top&Bottom Heating
Elements
Hot air comes from up and down heats the tray
from both side. Top and bottom sides of meals
cooked equally.
Oven Lamp
Grill Heating Element
Turbo Fan
Oven Lamp, Grill heater and Turbo Fan work
together. Recommend to use for frying.
Thermostat must be at maximum position.
Oven Lamp
Double Grill
Turbo Fan
Oven Lamp, Double Grill and Turbo Fan work
together. Recommend to use for frying.
Thermostat must be at maximum position.
Oven Lamp
Turbo Heating Element
Turbo Fan
Oven Lamp, Turbo Fan and Turbo Heating
Element work.Recommend to use fast cooking.
Oven Lamp
Turbo Heating Element
Turbo Fan, Bottom
Heating Element
Oven Lamp, turbo heating element,
turbo fan and bottom
heating element work together.
Recommed to use for pizza.
Oven Lamp
Turbo Fan
Only Oven Lamp and Turbo Fan work.
Recommend to use for defrosting.
Bottom
Heating Element
Bottom heating element,
Recommed to use cake and bread.
Top
Heating Element
Top Heating Element for keeping cooked food
warm or gently reheating.
Oven Lamp
Top&Bottom Heating
Elements
Turbo Fan
Hot air comes from up and down heats the tray
from both side. Top and bottom sides of meals
cooked equally with Turbo Fan.
OVEN
FUNCTIO
NS:
-
7-
-
7-


