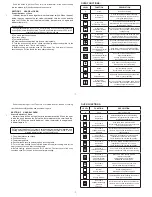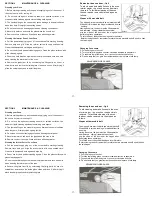
TIMER SETTING
Your digital timer is an electronic timing module that makes the
food in the oven ready for servicing when you want. All you need
to do is to program the cooking duration and the time when you
want your food to be ready.
When the timer is first powered up 12.00 appears on the display.
icon flashes. In this case the oven will not work as the contacts
of the clock relay are open.
The electricity current is transmitted to the heating elements
through the alarm clock. Press
to manually operate the oven.
Oven clock / timer works the same way as the normal clock. In the
event of power failure the clock is reset. If the electricity current is
less than 50 Hz the clock will be slow. This is not a defect of the
clock. In such cases set the clock again.
Note: You don’t have to set the real time of the day for manual and
semi automatic cooking with your oven. For full automatic
programming you should set the real time of the day.
With the clock of your oven
1. You can set the cooking time from 0 to 10 hours.
2. You can set the alarm time between 00:00 and 23:59 hours.
3. You can set the oven to full automatic, semi-automatic or
manual cooking.
4. You can use it for warning purposes
ALARM DURATION SETTING
With this function you can get your alarm clock beep after a period
set by you.
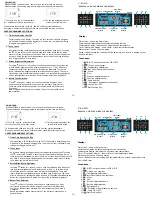
1) Select alarm setting 2) Enter time with + or – keys 3) Time will be displayed mode.
(eg:5 minutes)
after a few seconds.
When the set period ends the alarm starts beeping. You can stop
the alarm by pushing any button.
ALARM VOLUME SETTING
You can select the 3-level volume of your oven by pressing the
button. Alarm volume is changed with every push on the key.
Note: By factory default, volume is set to the highest. In the event
of power failure, the volume setting will be reset to the factory
default, if changed.
DISPLAY BRIGHTNESS SETTING
You can select the 3-level display brightness setting by pressing
the
button. The display brightness setting will change with
every push on the key.
Note: By factory default, the brightness is set to the highest. In the
event of power failure, the brightness setting will be reset to the
factory default, if changed.
IN THE EVENT OF POWER FAILURE
In the event of power failure your oven will be switched off for
safety reasons. This is indicated by the flashing of the hand icon
on the display. All current cooking programmes will be deleted.
Display shows 12:00 and the clock should be set. First switch on
the oven by pressing the button (see Clock setting).
SETTING THE REAL TIME OF THE DAY
Time setting can only be done when there is no active cooking
programme. Press the
button. Two dots between the hour
and minute start flashing; you can set the clock forward by + and
backward by -. Longer pressing on these keys will change the
clock faster.
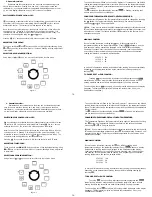
1) Select clock setting
mode
2) Set the time with + or –
keys
3) Display will be fixed
after 5 seconds.
After 1:00 hour power will be switched off and the oven stops.
Alarm starts beeping.
The display to be shown when the
cooking starts
The display to be shown when the
cooking finishes
When the cooking programme is completed, audible warning is on and will remain
on for 7 minutes if not switched off before.
7. When the 1 hour cooking finishes, alarm starts beeping at the
preset level. Alarm can be stopped by pressing any button.
8.
sign is shown.
9. If you wish to restart the oven press the
button. The oven
starts working manually.
NOTE
: If your press the button during semi automatic and full
automatic programming the programmes in the memory will be
cancelled and your oven operates manually.
10. Cooking will end by bringing the oven control button to off (0)
position.
You have finished the semi automatic cooking. Your food is ready
for servicing.
Your oven is in standby mode and the display shows
as the current time of the day and standby signs. The
oven will not work. It starts working at 19:45 and the
icon is
displayed with the current time. The oven works for 1:00 hour and
stops at 20:45. The
sign appears with the end hour.
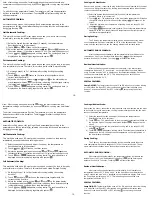
1. Prepare the food that you want to cook and put it in the oven.
Bring the oven selector switch and the thermostat button to the
position shown in the cooking table.
2. Press the
button. Enter the end time of cooking by pressing
the
button In 5 seconds. Let’s enter the end time as 20:45.
While entering the time, auto
sign and the flashing sign
appear with the time. After 5 seconds
sign and the word
“auto” appear on the display. The oven is in operation.
3. Enter the cooking time by pressing first the
button and then
the (-) button. The display is automatically set for 2:15 hours
cooking time. Let’s say that we want to set the cooking time as
1:00 hour. We can change the time as 1:00 instead of 2:15 hours
by pressing the (-) button. In 5 seconds after making the setting,
the current time of the day (18:30), the word “auto” and the
sign appear. The oven will switch to the standby mode and it will
not work.
4. When the oven is in standby mode, you can view the end time
of cooking by pressing the
button and the cooking time by
pressing the
button.
5. The oven starts working after 1 hour and 15 minutes, that is at
19:45. While the oven is in operation the 19:45 auto
is
displayed. The oven works for 1 hour as the entered time is 1
hour.
NOTE
: The cooking time entered should be less than the
difference between the current time of the day and the end time
of cooking. Otherwise the oven will not switch to standby mode
and it will work until the end of cooking time.
6. By pressing the
button, the remaining time can be viewed.
After 5 seconds the display switches to the clock mode and the
current time of the day is displayed. The end of cooking time will
appear on the display by pressing the
button.
Changing the cooking time after programming.
You can change the cooking time and the end of cooking time
while your oven is in operation.
To change the end time of cooking:
The new value is entered by pressing
the
button and using the (+) and (-)
keys.
To change cooking time:
The cooking time is displayed while the
button is pressed. Press the “+” or
“-“ keys to set the new cooking time..
Note: After cooking has ended, touching
brings the previous function and
temperature settings on the screen, by a second
touch, cooking may be initiated
again.
To edit the cooking parameters (Fuction, Temperature, etc), use the appropriate
buttons as described in this document. Touching
will restart cooking with the
edited parameters.
AUTOMATIC COOKING:
Automatic cooking means, that cooking will end automatically according to the
parameters you tell the control after selecting the cooking function and temperature
but before touching
.
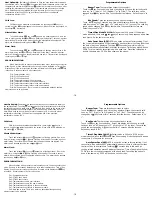
Half Automatic Cooking:
This method is used when NO meat probe is used and you want to start cooking
immediately, entering the desired cooking duration.
1)
Select the desired function and adjust (if needed) the temperature as
described before in this document.
2) Touch
key.
will flash on the timer screen.
3) Adjust the required cooking duration using and keys.
appears on
the status display.
( If duration is brought to 0:00, two warning beeps occur)
4)
Touch
key,
disappears, cooking starts. The cooking end time is
displayed on the timer display, together with symbol
.
Full Automatic Cooking:
This method is used when NO meat probe is used and you want the food to be ready
at a certain time in future. Therefore, this method is also called ‘Delayed Cooking’
1)
Go through steps 1 to 3 of half automatic cooking (setting the cooking
duration)
2)
Touch
key again,
flashes on the timer screen together with the
current cooking end time.
3)
Adjust the desired end time using and keys.
on the status display
may disappear whereas
is still there, indicating that a delayed cooking
is programmed and cooking will not start immediately.
4)
Touch
key,
disappears, cooking starts. The cooking end time is
displayed on the timer display, together with symbol
.
Cooking with Meat Probe:
Meat probe is a sensor, connected to plug inside the oven and inserted into the meat
to be cooked. Using the meat probe, cooking is automatically ended when the meat
reaches the desired temperature.
1)
Select the desired function and adjust (if needed) the temperature as
described before in this document.
2)
Touch
key. The default value of the meat probe temperature will flash on
the right two digits of the timer/meat probe display.
will appear on the
screen.
3)
Adjust the desired meat temperature at cooking end in the range 20-99 C
using and keys.
4)
Touch
,
disappears, cooking starts. The actual meat temperature is
displayed on the left , the adjusted end temperature on the right portion of
the timer/meat probe display.
During Cooking:
The 5 bars on the temperature display give an indication about the actual
oven temperature. Each bar is assigned to 1/5 th of the adjusted value. The up-
arrow near the bars flashes, when the heating elements are currently active.
AUTOMATIC END OF COOKING:
After cooking ends automatically, the temperature display will indicate the
residual heat ,if any ( see: Residual Heat Indication ),
will be flashing and
buzzer will sound for 7 minutes. Touching
will cancel the latter.
Residual Heat Indication:
After cooking has ended manually or automatically, if the internal oven
temperature is above 60
°
C, ‘down arrow’ on the right side of heat bars flashes
every 2 second and also “hot” is displayed on the temperature display. Each one of
the 5 heat bars symbolize now 60
°
C. This indication goes on until the oven
temperature falls below 60
°
C.
SPECIAL FEATURES:
Lamp ON/OFF: The lamp inside the oven will be ON, whenever a function is being
or is adjusted. It will get OFF, after cooking and residual heat indication ends.
However, it can be switched ON or OFF touching , except using the defrost
function.
-
1
5
-
-
1
5
-


