background image

1.  Periodically clean the oil tank 2, 3 or 6 months depending on usage and contamination.

2.  Periodically clean the sensor and filter footer 2, 3 or 6 months by:

Cover a sensor's vent before using the air sprayer for another.

Remove and clean the filter footer.

No.

Phenomena

Reasons

Solutions

1

No output

Sensor's powering wire is
damaged

Check out on the sensor's
powering wire

Overpowering has burnt the signal
cable and circuit board

Send  to manufacturer

Being tampered

Check the seal again before
sending back to manufacturer

2

Signal interference

Sensor was installed too far from 
central hole of tank

Install sensor as closest as
possible to the central hole of tank
(the common point of 02
diagonals)

11. Periodic Cleaning Guidance

12. Troubleshooting

Содержание CAP10G

Страница 1: ...ication according to EN61236 1 standard The technicians who install sensor must be graduated from college of mechanic or electric The mechanical installation staff drill cut grind etc must have skills...

Страница 2: ...astic flange onto tank for all type of tanks and only using screws for the thick and hard ones Sensor length Standard 700mm 1000mm optional 1200 or 1500mm Cuttable down to 200mm Longer than 1500mm sug...

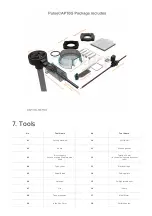
Страница 3: ...ers In case of using stainless steel rivet 12 Twist drill 4 mm In case of using stainless steel rivet 04 Tube cutter 13 Electrical tape 05 Swivel Blade 14 Cutting pliers 06 Hacksaw 15 Phillips screwdr...

Страница 4: ...tral hole After determining the center of the oil tank we clean the surface and use a 38 mm drill to make a hole on the oil tank Remove any burrs from the drilled hole by a file Before drilling it is...

Страница 5: ...L Original length of the sensor H Height of the tank Example Sensor length is L 2000 H 1700 mm C 326 mm Cut the sensor pipe length of 326 mm 7 Calibration After cutting make sure the sensor tube is cl...

Страница 6: ...over the sensor and then use plastic and then use plastic twister seal to lock the head seal and connector seal to protect the sensor Please follow the below steps Note Step 1 Remove the cover Step 2...

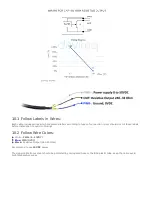
Страница 7: ...fore installation to avoid confusing White PWR 8 50VDC Blue PWR OVDC Black Resistive Output 240 33 Ohm Recommend to use 24VDC power The signal cable from sensor should be protected by corrugated hose...

Страница 8: ...s Solutions 1 No output Sensor s powering wire is damaged Check out on the sensor s powering wire Overpowering has burnt the signal cable and circuit board Send to manufacturer Being tampered Check th...

Страница 9: ...efects from the manufacturer depending on the actual situation Daviteq will consider replacement or repairs Notes One way was shipping cost to the warranty centre shall be paid by Customers 1 The warr...

Страница 10: ...Nam Hung Vuong Res An Lac Ward Binh Tan Dist Ho Chi Minh City Vietnam Tel 84 28 6268 2523 4 ext 122 Email info daviteq com www daviteq com Revision 2 Created Fri Oct 16 2020 6 19 AM by Ki t Anh Nguy...

Отзывы: