


Page 2
Wireless Temperature/Humidity Station
Tools Needed
You may need the following tools to install your station:
•
A medium Phillips-Head screwdriver.
•
A small wrench or 3/8” (9 mm) nutdriver.
Installation Steps
The Fan-Aspirated Temp/Hum Station comes pre-assembled. You will, however, need to
partially disassemble your station to prepare it for operation.
Here are the installation steps:
1.
Prepare the solar radiation shield for installation.
2.
Prepare the SIM for installation.
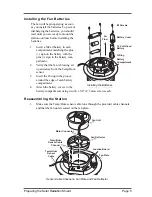
3.
Install the Sensor Interface Module (SIM) batteries.
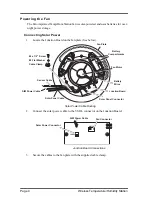
4.
Apply power to the fan.
5.
Reassemble the station.
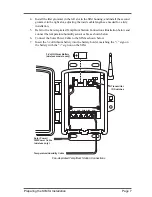
6.
Configure the DavisTalk
™
transmitter ID code.
7.
Test signal reception at the console.
8.
Choose a location for the station.
9.
Mount the station.
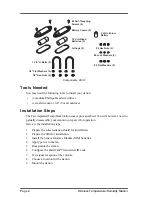
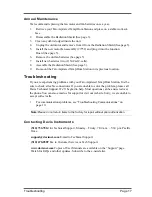
#8 Hex Nuts (3)
#8 Lock Washers (3)
#8 Flat Washers (3)
#4 Self-Threading
Screws (4)
Battery Covers (2)
1.2 Volt Nicad
Batteries (2)
O-Rings (2)
1-1/2" U-Bolts (2)
1/4" Flat Washers (4)
1/4" Hex-Nuts (4)
3 Volt Lithium
Battery
Components, Part 2


