


Page 14
Wireless Temperature/Humidity Station
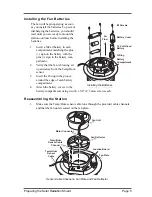
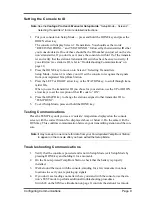
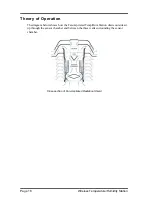
Mounting on a Post or Wall
1.
Using four 1/4" x 1-1/2" lag screws (not included), attach the mounting bracket to
the surface in the desired location.
• Drill holes using a 3/16" (5 mm) drill bit.
• Use a carpenter’s level when marking the holes, to ensure that the bracket
will be level.
Attaching Mounting Bracket to a Post
2.
Slide the stud ends protruding from the top of the station through the holes on the
mounting bracket.
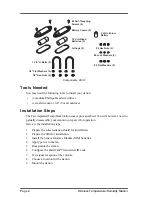
1/4" x 1-1/2"
Lag Screws (4)
Not included, but requred for
wall or post mounting:
OR
Mounting
Bracket
1/4" x 1-1/2"
Lag Screws


