background image

User's Guide

www.dave.eu

[email protected]

DAVE Embedded Systems

Single Board Computer

AXEL LITE

SBC AXEL (SBCX)

Содержание SBC AXEL

Страница 1: ...User s Guide www dave eu info dave eu DAVE Embedded Systems Single Board Computer AXEL LITE SBC AXEL SBCX ...

Страница 2: ...S B C X U s e r s G u i d e v 1 0 1 Page intentionally left blank December 2019 2 139 ...

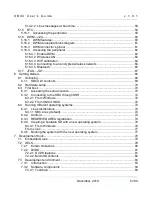
Страница 3: ...22 3 1 1 Dimensions 22 3 1 2 Drills position and size 23 3 1 3 Side view 24 3 2 Mechanical data table 24 4 System components 25 4 1 Power Supply Unit PSU 25 4 1 1 Power up sequence 25 4 1 2 RTC battery 25 4 2 On board buttons 26 4 2 1 S3 Reset button 26 5 Interfaces and connectors 27 5 1 Power supply J2 27 5 1 1 Power LED DL1 28 5 2 CPU module connector J10 28 5 3 UARTs 29 5 3 1 UART3 J22 29 5 3 1...

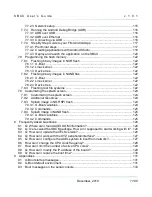
Страница 4: ...Linux messages at boot time 43 5 8 WIDE connector J33 44 5 8 1 Available add on modules 46 5 9 MIPI and PCI Express connector J34 46 5 9 1 Accessing the peripheral 48 5 10 Touch screen connector J50 49 5 10 1 Accessing the peripheral 49 5 10 1 1 Touch screen calibration and test 49 5 10 1 2 Linux messages at boot time 50 5 11 MicroSD slot J26 50 5 11 1 Accessing the peripheral 51 5 11 1 1 Linux me...

Страница 5: ... 3 First boot 70 6 3 1 Accessing the serial console 70 6 3 2 Connecting to the SBC through SSH 72 6 3 2 1 From Windows 72 6 3 2 2 From UNIX LINUX 72 6 4 Running different operating systems 74 6 4 1 Linux distributions 74 6 4 1 1 SBCLinux default 74 6 4 2 Android 74 6 4 3 RESERVED AREA registration 74 6 4 4 Creating a bootable SD with a new operating system 76 6 4 4 1 From Windows 76 From Linux 77 ...

Страница 6: ...uild environment 99 7 4 3 Build the Yocto image 99 7 5 Building the software components outside Yocto 100 7 5 1 Build configure U Boot 100 7 5 2 Build configure Linux kernel 100 7 5 3 Build a custom application 101 7 6 Building Qt applications 103 7 6 1 Launching Qt Creator 103 7 6 2 Building a QtQuick Hello World 104 7 6 3 Running and debugging a Qt application on the SBCX 108 7 6 3 1 Launch the ...

Страница 7: ... 7 9 1 Customizing the splash screen 124 7 9 2 Additional resources 124 7 9 3 Splash image in NOR SPI flash 124 7 9 3 1 U Boot variables 124 7 9 3 2 Commands 125 7 9 4 Splash image in NAND flash 125 7 9 4 1 U Boot variables 125 7 9 4 2 Commands 125 8 Frequently Asked Questions 126 8 1 Q Where can I found AXEL SOM information 126 8 2 Q I ve received the SBCK package How am I supposed to start worki...

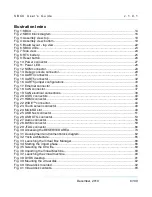
Страница 8: ...ical connections 38 Fig 20 LVDS connectors 40 Fig 21 HDMI connector 42 Fig 22 WIDE connector 44 Fig 23 Touch screen connector 48 Fig 24 MicroSD slot 49 Fig 25 USB host connector 51 Fig 26 USB OTG connector 53 Fig 27 Audio connector 56 Fig 28 DWM connector 59 Fig 29 JTAG connector 66 Fig 30 Accessing the RESERVED AREA 74 Fig 31 Development environment block diagram 82 Fig 32 Yocto architecture 85 F...

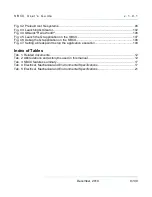
Страница 9: ...g 46 Debug the Qt application on the SBCX 108 Fig 47 Setting a breakpoint to stop the application execution 109 Index of Tables Tab 1 Related documents 12 Tab 2 Abbreviations and acronyms used in this manual 12 Tab 3 SBCX features summary 17 Tab 4 Electrical Mechanical and Environmental Specifications 17 Tab 5 Electrical Mechanical and Environmental Specifications 21 December 2019 9 139 ...

Страница 10: ...anual that are not strictly part of the SBCX board SBCX is not designed for use in life support appliances devices or systems where malfunctioning of these products can reasonably be expected to result in personal injury DAVE Embedded Systems customers who are using or selling these products for use in such applications do so at their own risk and agree to fully indemnify DAVE Embedded Systems for...

Страница 11: ...ing by the customer unauthorized modification or misuse operation outside of the product s specifications or improper installation or maintenance DAVE Embedded Systems will not be responsible for any defects or damages to other products not supplied by DAVE Embedded Systems that are caused by a faulty SBCX board December 2019 11 139 ...

Страница 12: ...ition BTN Button EMAC Ethernet Media Access Controller GPI General purpose input GPIO General purpose input and output GPO General purpose output PCB Printed circuit board PMIC Power Management Integrated Circuit PSU Power supply unit RTC Real time clock SBCX Single Board Computer AXEL LITE SOC System on chip SOM System on module WDT Watchdog Tab 2 Abbreviations and acronyms used in this manual De...

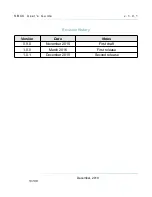
Страница 13: ...S B C X U s e r s G u i d e v 1 0 1 Revision History Version Date Notes 0 9 0 November 2015 First draft 1 0 0 March 2016 First release 1 0 1 December 2019 Second release December 2019 13 139 ...

Страница 14: ...hanks to IEC 61131 SW language environment and or other plug ins like QT environment or multimedia GStreamer video applications This hardware proposal by DAVE Embedded Systems is completed with SW solutions SoftPLC QT RTOS which permit to reduce overall system cost and making SBCs ideally suited for deployment into a wide range of cost sensitive and robust industrial applications SBCX supports a b...

Страница 15: ...erface WIDE TM interface VIDEO HDMI and MIPI interfaces TOUCH resistive and capacitive AUDIO Stereo OUT and MIC in CONNECTIVITY Bluetooth and Wi Fi DIMENSIONS 85x156mm Standard DIN 9modules PSU 12 24 VDC Designed for industries HMIs SMART VIDEO devices Digital Signage Platforms READY SOFTWARE Operating Systems Linux Android Software Platforms QT Yocto Ubuntu Industrial Applications AXEL Software L...

Страница 16: ...Fig 2 SBCX block diagram S B C X U s e r s G u i d e v 1 0 1 2 2 Block Diagram December 2019 16 139 ...

Страница 17: ...t with PHY DWM Wireless module optional Display 2x LVDS HDMI WIDE display interface Storage 1x microSD slot USB 1x USB 2 0 Host port 1x USB OTG port Audio SGTL5000 codec Miscellaneous Resistive 4 wire touch controller GPIOs JTAG RTC battery Tab 3 SBCX features summary Feature Specifications Options Supply Voltage 12 24 V Active power consumption Please refer to Power consumption section Dimensions...

Страница 18: ...Fig 3 Assembly view top S B C X U s e r s G u i d e v 1 0 1 2 4 Assembly view top December 2019 18 139 ...

Страница 19: ...Fig 4 Assembly view bottom S B C X U s e r s G u i d e v 1 0 1 2 5 Assembly view bottom December 2019 19 139 ...

Страница 20: ...E 2013289 1 J21 UART5 RS232 RS422 RS485 DB9 Male J16 Fast Ethernet LAN RJ 45 10 100Base T 7499511440 J34 MIPI camera input and PCI Express 20x1 00 mm One Piece Interface FSI FSI 120 03 G S AD J11 HDMI HDMI Receptacle Type A FCI 10029449 001RLF J23 CAN Header 3x2x2 54mm J8 LVDS0 20pin Double Row 1 25mm Pitch Miniature Crimping Connector Hirose DF13A 20DP 1 25V J9 LVDS1 20pin Double Row 1 25mm Pitch...

Страница 21: ...tch vertical ZIF WE 686 304 124 422 J17 USB Host USB Type A Up Right WE 614 004 134 726 J18 USB OTG USB Micro AB receptacle Hirose ZX62D AB 5P8 J26 MicroSD slot MicroSD slot Molex 47571 0001 J24 DWM 30 pins 0 50mm Pitch SlimStack Receptacle Molex 52991 0308 J33 WIDE Display Interface 10x1 00 mm One Piece Interface FSI FSI 110 03 G S AD Tab 5 Electrical Mechanical and Environmental Specifications D...

Страница 22: ...ter describes the mechanical characteristics of the SBCX board Mechanical drawings are available in DXF format on request 3 1 Board Layout The following figures shows the physical dimensions of the SBCX board 3 1 1 Dimensions December 2019 22 139 Fig 5 Board layout top view ...

Страница 23: ...S B C X U s e r s G u i d e v 1 0 1 3 1 2 Drills position and size December 2019 23 139 Fig 6 SBCX drills ...

Страница 24: ...Mechanical data table All dimensions on the following table are in millimeters Dimension Value Width 156 Depth 84 Max components height top side 13 87 23 with RTC battery Max components height bottom side PCB height 1 69 December 2019 24 139 Fig 7 Side view ...

Страница 25: ... The power up sequence of the whole system matches the AXEL LITE recommended power up sequence as described in AXEL LITE Hardware Manual section 5 1 1 4 1 2 RTC battery Fig 8 RTC battery SBCX uses the RTC device provided by AXEL LITE Backup power is generated by ML2020 rechargeable coin battery and provided to the SOM through the PMIC_LICELL J1 14 signal Battery is plugged into BT2 battery holder ...

Страница 26: ...S B C X U s e r s G u i d e v 1 0 1 4 2 On board buttons 4 2 1 S3 Reset button Fig 9 Reset button S3 is the hardware reset button December 2019 26 139 ...

Страница 27: ...e on SBCX providing the pinout tables for each connector For each interface a brief note on how to use the peripheral on Linux is provided 5 1 Power supply J2 Fig 10 Power connector Power is provided through the J2 connector Power voltage range is 12 24 V Pin Function Notes 1 DGND Ground 2 VIN 12 24 V December 2019 27 139 ...

Страница 28: ...f the power input This LED is ON when a valid power supply is present Fig 11 Power LED 5 2 CPU module connector J10 J10 is the 204 pins SODIMM mating connector for the AXEL LITE SOM For a detailed description of the SOM pinout please refer to the AXEL LITE Hardware Manual Fig 12 SOM connector December 2019 28 139 ...

Страница 29: ...in Pin name Function Notes 1 2 4 6 7 8 10 N A N C Not connected 3 J1 189 RS232_RX Receive line 5 J1 187 RS232_TX Transmit line 9 DGND Ground 5 3 1 1 Accessing the peripheral UART3 is mapped to dev ttymxc2 device in Linux The peripheral is used as the default serial console both for the bootloader and the kernel To connect to the debug serial port 1 connect the DB9 adapter bracket to the J22 connec...

Страница 30: ...s e r s G u i d e v 1 0 1 3 start your favorite terminal emulator software on PC eg PuTTY communication parameters are Parameter Value Baud rate 115200 bps Data bits 8 Stop bits 1 Parity None December 2019 30 139 ...

Страница 31: ...ctor s pinout Pin SOM pin Pin name Function Notes 1 J10 50 PMOD_A0 Clear to send 2 J10 89 PMOD_A1 Transmit data 3 J10 91 PMOD_A2 Receive data 4 J10 40 PMOD_A3 Request to send 5 DGND Ground 6 3V3 3 3 V 5 3 2 1 Accessing the peripheral UART4 is mapped to dev ttymxc3 device in Linux root axel lite dmesg grep ttymxc3 1 439339 21f0000 serial ttymxc3 at MMIO 0x21f0000 irq 61 is a IMX Serial ports can be...

Страница 32: ... provides some configuration options for the selection of the UART mode RS232 RS422 RS485 with auto direction The following table reports the connector s pinout for each port mode Pin SOM pin Pin name RS232 mode RS422 mode RS485 mode 1 Not connected Not connected Not connected Not connected 2 J10 95 UART5_A UART2 rx line UART5_A UART5_A 3 J10 93 UART5_Y UART2 tx line UART5_Y UART5_A 4 Not connecte...

Страница 33: ...nfiguration Jumpers J19 e J20 RS232 RS422 RS485 Fig 16 UART5 jumper configurations The J19 and J20 jumpers are used to configure the UART mode as reported below Jumper RS232 mode RS422 mode RS485 mode 1 3 open open closed 5 7 open closed open 9 11 open closed open 2 4 open open closed 6 8 open closed closed 10 12 open closed closed 13 15 open open closed 14 16 open open closed December 2019 33 139...

Страница 34: ...orts can be used through the standard serial programming API For detailed information please refer to the Serial Programming HOWTO at tldp org HOWTO Serial Programming HOWTO index html A simple loopback test in RS232 mode is the following root axel lite stty F dev ttymxc4 115200 crtscts echo root axel lite cat dev ttymxc4 1 745 root axel lite echo Test loopback dev ttymxc4 root axel lite Test loop...

Страница 35: ...receive pair 0 data 10 J10 21 ETH0_TXRX0_M Transmit and receive pair 0 data 4 J10 23 ETH0_TXRX1_P Transmit and receive pair 1 data 3 J10 27 ETH0_TXRX2_P Transmit and receive pair 2 data 2 J10 29 ETH0_TXRX2_M Transmit and receive pair 2 data 5 J10 25 ETH0_TXRX1_M Transmit and receive pair 1 data 8 J10 31 ETH0_TXRX3_P Transmit and receive pair 3 data 9 J10 33 ETH0_TXRX3_M Transmit and receive pair 3...

Страница 36: ...te ifconfig eth0 Link encap Ethernet HWaddr 00 50 C2 B9 CF 95 inet addr 192 168 1 1 Bcast 192 168 0 255 Mask 255 255 255 0 inet6 addr fe80 250 c2ff feb9 cf95 64 Scope Link UP BROADCAST RUNNING MULTICAST MTU 1500 Metric 1 RX packets 30648 errors 0 dropped 24 overruns 0 frame 0 TX packets 25162 errors 0 dropped 0 overruns 0 carrier 0 collisions 0 txqueuelen 1000 RX bytes 34382831 32 7 MiB TX bytes 3...

Страница 37: ...The CAN transceiver is implemented on the AXEL LITE SOM The following table reports the connector s pinout Pin SOM pin Pin name Function Notes 1 2 Bus termination 3 J10 44 CAN_M Low bus line 4 J10 42 CAN_P High bus line 5 CAN_SHIELD Shield 6 DGND Ground Inserting a jumper on pins 1 and 2 enables 120Ω bus termination For additional detail regarding the CAN electrical connections please refer to the...

Страница 38: ...366366 can controller area network core rev 20120528 abi 9 3 377102 can raw protocol rev 20120528 3 381380 can broadcast manager protocol rev 20120528 t 3 387070 can netlink gateway rev 20130117 max_hops 1 5 5 1 2 Enable the interface and check status root axel lite ip link set can0 type can bitrate 500000 triple sampling on root axel lite ifconfig can0 up 230 190741 flexcan 2090000 can can0 writi...

Страница 39: ...11 22 33 44 55 66 77 00 root axel lite cansend can0 5A1 11 22 33 44 55 66 77 11 root axel lite cansend can0 5A1 11 22 33 44 55 66 77 33 root axel lite candump can0 can0 000 8 AA FF AA FF AA FF AA FF can0 000 8 AA FF AA FF AA FF AA FF can0 000 8 AA FF AA FF AA FF AA FF can0 000 8 AA FF AA FF AA FF AA FF 5 5 1 4 Additional information Each CAN port appears like a networking interface in the form can...

Страница 40: ...r s pinout Pin SOM pin Pin name Function Notes 1 2 3 3V_LCD0 3 3 V 3 4 7 10 13 16 19 DGND Ground 5 J10 137 LVDS0_TX0_N LVDS Data 0 6 J10 139 LVDS0_TX0_P LVDS Data 0 8 J10 141 LVDS0_TX1_N LVDS Data 1 9 J10 143 LVDS0_TX1_P LVDS Data 1 11 J10 145 LVDS0_TX2_N LVDS Data 2 12 J10 147 LVDS0_TX2_P LVDS Data 2 14 J10 133 LVDS0_CLK_N LVDS Clock 15 J10 135 LVDS0_CLK_P LVDS Clock 17 LVDS0_P17 Mount options 18...

Страница 41: ...ata 1 9 J10 165 LVDS1_TX1_P LVDS Data 1 11 J10 167 LVDS1_TX2_N LVDS Data 2 12 J10 169 LVDS1_TX2_P LVDS Data 2 14 J10 155 LVDS1_CLK_N LVDS Clock 15 J10 157 LVDS1_CLK_P LVDS Clock 17 LVDS1_P17 Mount options 18 LVDS1_P18 Mount options 20 LVDS1_P20 Mount options 21 22 LVDS_SHIELD LVDS shield 5 6 3 Accessing the peripheral LVDS displays can be enabled passing the video kernel command line by the U Boot...

Страница 42: ...llowing table reports the connector s pinout Pin SOM pin Pin name Function Notes 1 J10 125 HDMI_D2P TX pair 2 data 3 J10 123 HDMI_D2N TX pair 2 data 4 J10 121 HDMI_D1P TX pair 1 data 6 J10 119 HDMI_D1N TX pair 1 data 7 J10 117 HDMI_D0P TX pair 0 data 9 J10 115 HDMI_D0N TX pair 0 data 10 J10 113 HDMI_CLKP Tx pair clock 12 J10 111 HDMI_CLKN Tx pair clock 13 J10 127 CE_REMOTE_OUT Consumer Electric Co...

Страница 43: ...32 5 7 1 1 Linux messages at boot time root axel lite dmesg grep hdmi 0 439643 mxc_sdc_fb fb 23 register mxc display driver hdmi 0 439710 mxc_hdmi 20e0000 hdmi_video Detected HDMI controller 0x13 0xa 0xa0 0xc1 0 486715 mxc_sdc_fb fb 24 register mxc display driver hdmi 0 486733 mxc_hdmi 20e0000 hdmi_video Error only one HDMI output support now 0 502501 mxc_hdmi 20e0000 hdmi_video Read EDID again 0 ...

Страница 44: ...s implementing additional interfaces as SPI I2C RGB displays PWMs GPIOs The following table reports the connector s pinout Pin SOM pin Pin name Function Notes 1 J10 134 LCD_B0 3 J10 136 LCD_B1 4 J10 181 SPI_SCLK_R 5 J10 138 LCD_B2 6 J10 183 SPI_MISO_R 7 J10 140 LCD_B3 8 J10 195 SPI_MOSI_R 9 J10 142 LCD_B4 10 J10 179 SPI_SS0_R 11 J10 144 LCD_B5 12 J10 185 SPI_GPIO_R 13 J10 148 LCD_B6 14 EXT_PWR_EN ...

Страница 45: ..._G4 26 J10 28 PWM2_R 27 J10 162 LCD_G5 28 J10 191 GPIO0 29 J10 166 LCD_G6 30 J10 193 GPIO1 31 J10 168 LCD_G7 32 J10 50 GPIO2 33 J10 170 LCD_R0 34 J10 40 GPIO3 35 J10 172 LCD_R1 37 J10 174 LCD_R2 38 TSC_YP 39 J10 176 LCD_R3 40 TSC_XP 41 J10 178 LCD_R4 42 TSC_YM 43 J10 180 LCD_R5 44 TSC_XM 45 J10 182 LCD_R6 47 J10 184 LCD_R7 48 50 AUX_BL_LVDS1_ 3V3 49 J10 124 LCD_DV 51 J10 126 LCD_AUX_PIN 52 AUX_BL_...

Страница 46: ...24x600 display Capacitive touch controller or resistive 5 wire controller SBCAL300 for Innolux G121I1 L01 panel SBCAL310 for Ampire AM 1024786T4TMQW T63H panel SBCAL10 7 800x480 display with capacitive touch controller for Ampire AM 800480SETMQW TA1H panel SBC4K4L00 4 buttons with 4 leds SBCAM000 MIPI and PCIe for MIPI e Con Systems e CAM51IMX6 camera For additional information please contact sale...

Страница 47: ...X_USB_DN 15 AUX_USB_DP 16 J10 96 PCIE_TXN_C 18 J10 98 PCIE_TXP_C 19 J10 53 CAM_PWD 20 3V3 21 J10 51 CAM_RSTn 22 J10 60 CAM_CLK 25 J10 102 CSI_CLK0M_1 26 J10 48 CSI_SDA 27 J10 104 CSI_CLK0P_1 28 J10 38 CSI_SCL 31 J10 110 CSI_D1M_1 32 J10 106 CSI_D0M_1 33 J10 112 CSI_D1P_1 34 J10 108 CSI_D0P_1 37 J10 118 CSI_D3M_1 38 J10 114 CSI_D2M_1 39 J10 120 CSI_D3P_1 40 J10 116 CSI_D2P_1 5 8 11 14 17 23 24 29 3...

Страница 48: ...S B C X U s e r s G u i d e v 1 0 1 5 9 1 Accessing the peripheral The interface can be used connecting a dedicated add on For additional information please contact sales dave eu December 2019 48 139 ...

Страница 49: ...ch controller X 3 TSC_YM Touch controller Y 4 TSC_XM Touch controller X 5 10 1 Accessing the peripheral The touch controllet is attached to the generic Linux input event interface evdev For additional information please refer to Documentation input input txt 5 10 1 1 Touch screen calibration and test The simplest tools for touch screen management are the tslib library and ts_tools utilities To cal...

Страница 50: ...a Micro SD card header This interface is connected to the USDHC1 controller of the i MX6 CPU The following table reports the connector s pinout Pin SOM pin Pin name Function Notes 1 J10 79 SD_DAT2 Data 1 2 J10 81 SD_DAT3 Data 3 3 J10 83 SD_CMD CMD 4 3V3 3 3 V 5 J10 85 SD_CLK Clock 6 12 DGND Ground 7 J10 75 SD_DAT0 Data 0 8 J10 77 SD_DAT1 Data 1 9 10 11 SD_SHIELD Shield 13 J10 177 EIM_D19 Card dete...

Страница 51: ...ered data mode Opts null Ths card is automatically mounted to the media mount point root axel lite mount dev mmcblk0p1 on media mmcblk0p1 type vfat rw relatime gid 6 fmask 0007 dmask 0007 allow_utime 0020 codepag e 437 iocharset iso8859 1 shortname mixed errors remount ro The following command can be used to manually mount the first partition mount dev mmcblk0p1 media mmcblk0p1 5 11 1 1 Linux mess...

Страница 52: ..._HOST_VBUS VBUS 2 J10 202 USB_HOST_DN USB Host Data 3 J10 200 USB_HOST_DP USB Host Data 4 DGND Ground 5 12 1 1 Overcurrent limiter USB Host port is protected from overcurrent conditions by an overcurrent limiter which allows for a 500mA current limit threshold It also offers reverse voltage protection The status of the overcurrent limiter can be read with the following commands root axel lite echo...

Страница 53: ... 3 10 17 xelk 2 1 0 ehci_hcd 2 253126 usb usb1 SerialNumber ci_hdrc 1 3 335007 usbcore registered new interface driver usbhid 3 340589 usbhid USB HID core driver When a USB pen drive is plugged the kernel prints the following messages root axel lite 829 707392 usb 1 1 new high speed USB device number 5 using ci_hdrc 829 859654 usb 1 1 New USB device found idVendor 8564 idProduct 1000 829 866404 us...

Страница 54: ...pe vfat rw relatime gid 6 fmask 0007 dmask 0007 allow_utime 0020 codepag e 437 iocharset iso8859 1 shortname mixed errors remount ro The following command can be used to manually mount the first partition mount dev sda1 media sda1 5 12 2 USB OTG J18 Fig 26 USB OTG connector J18 is a micro AB type receptacle for a USB OTG connection This interface can operate in Host mode and Device peripheral mode...

Страница 55: ...e axel sbc modules mkdir loop root axel lite axel sbc modules mount o loop mass loop root axel lite axel sbc modules echo pluto loop pippo root axel lite axel sbc modules umount loop root axel lite axel sbc modules insmod libcomposite ko root axel lite axel sbc modules insmod g_mass_storage ko file mass 431 236094 g_mass_storage gadget Mass Storage Function version 2009 09 11 431 243265 g_mass_sto...

Страница 56: ...he value is just like a state Where 0 means low and 1 means high For further details about how to manage the GPIOs from sysfs please refer to the Linux kernel documentation at Documentation gpio txt 5 13 1 Available GPIOs The following table reports the signals available as GPIOs by default Connector PIN Pin Name GPIO number Sysfs mapping J33 28 EIM_D26 GPIO3_IO26 gpio90 J33 30 EIM_D27 GPIO3_IO27 ...

Страница 57: ... a value on a pin echo 0 sys class gpio gpioXX value or echo 1 sys class gpio gpioXX value 5 14 Audio J27 Fig 27 Audio connector J27 is a 7x2x2 54mm header The audio codec is a SGTL5000 device connected to the I S interface The following table reports the connector s pinout Pin Pin name Function Notes 1 2 9 10 AGNDM Analog ground 3 C_AUD_LINE_OUT_L Line out left 4 AUXL Line in left 5 C_AUD_LINE_OU...

Страница 58: ...ux Sound Architecture which consists in a kernel driver and a users space library for application developers A set of standard tools alsa utils can be used for simple management of the audio codec 5 14 2 1 Basic usage To list the available sound cards root axel lite aplay l List of PLAYBACK Hardware Devices card 0 imx51babbagesgt imx51 babbage sgtl5000 device 0 HiFi sgtl5000 0 Subdevices 1 1 Subde...

Страница 59: ... 142386 snvs_rtc 20cc034 snvs rtc lp rtc core registered 20cc034 snvs rtc lp as rtc0 3 461548 snvs_rtc 20cc034 snvs rtc lp setting system clock to 2015 01 19 21 19 56 UTC 1421702396 5 15 1 Accesssing the peripheral root axel lite date 060511572015 root axel lite hwclock Mon Jan 19 21 24 26 2015 0 000000 seconds root axel lite hwclock w root axel lite hwclock Fri Jun 5 11 57 51 2015 0 000000 second...

Страница 60: ...AN applications in conjunction with a host processor over a SDIO interface The module also provides a Bluetooth platform through the HCI transport layer Both WLAN and Bluetooth share the same antenna port 5 16 1 DWM features Based on Texas Instruments WL1271L Transceiver IEEE 802 11 b g n d e i compliant Bluetooth 2 1 EDR Power Class 1 5 Full support for BT4 0 BLE and ANT Reduced footprint 25 mm x...

Страница 61: ...The following table reports the connector s pinout Pin SOM pin Pin name Function Notes 1 2 5V 3 4 3 3V 5 6 9 10 19 DGND 7 J10 69 TIWI_MMC2_CMD 8 J10 71 TIWI_MMC2_CLK 11 J10 61 TIWI_MMC2_DAT0 13 J10 63 TIWI_MMC2_DAT1 15 J10 65 TIWI_MMC2_DAT2 17 J10 67 TIWI_MMC2_DAT3 21 J10 47 UART2_RX 23 J10 55 UART2_CTS 24 J10 39 TIWI_BT_F5 December 2019 61 139 SBCX SDI O 5V 3 3V UART TiWi BLE DWM ENABLE and CTRL ...

Страница 62: ...107 sys class gpio export echo low sys class gpio gpio107 direction echo 199 sys class gpio export echo out sys class gpio gpio199 direction echo 1 sys class gpio gpio199 value usleep 150000 echo 0 sys class gpio gpio199 value usleep 1000 echo 1 sys class gpio gpio199 value echo 107 sys class gpio export echo low sys class gpio gpio107 direction sleep 1 echo high sys class gpio gpio107 direction 5...

Страница 63: ... Address CA D7 19 92 F9 16 Channel 1 Frequency 2 412 GHz Channel 1 Quality 18 70 Signal level 92 dBm Encryption key on ESSID daveguest Bit Rates 1 Mb s 2 Mb s 5 5 Mb s 11 Mb s 18 Mb s 24 Mb s 36 Mb s 54 Mb s Bit Rates 6 Mb s 9 Mb s 12 Mb s 48 Mb s Mode Master Extra tsf 00000007736a128a Extra Last beacon 80ms ago IE Unknown 0009646176656775657374 IE Unknown 010882848B962430486C IE Unknown 030101 IE...

Страница 64: ...127x TQS_S_2 6 ini lib firmware ti connectivity wl127x nvs bin 00 00 00 00 00 00 2106 815826 wl12xx loaded 2106 831756 wl12xx power up 2107 337219 wl12xx firmware booted in PLT mode PLT 6 3 5 0 98 Using nvs version 2 1 Calibrate lib firmware ti connectivity wl127x nvs bin Writing calibration data to lib firmware ti connectivity wl127x nvs bin Writing mac address 00 00 00 00 00 00 to file lib firmw...

Страница 65: ...sages 5102 560000 wlan0 authenticate with 00 1f 1f bd 24 30 try 1 5102 560000 wlan0 authenticated 5102 610000 wlan0 associate with 00 1f 1f bd 24 30 try 1 5102 610000 wlan0 RX AssocResp from 00 1f 1f bd 24 30 capab 0x411 status 0 aid 1 5102 620000 wlan0 associated 5103 300000 wl1271 Association completed 5 16 4 5 Bluetooth Bluetooth interface can be managed using the HCI protocol and related comma...

Страница 66: ... 4 SCO MTU 180 4 DOWN RX bytes 598 acl 0 sco 0 events 30 errors 0 TX bytes 464 acl 0 sco 0 commands 30 errors 0 root axel lite axel sbc dwm bluetoothd root axel lite axel sbc dwm hcitool dev Devices hci0 88 33 14 5E 05 6F root axel lite axel sbc dwm hcitool scan Scanning root axel lite axel sbc dwm hcitool scan Scanning D0 DF C7 80 2C 42 bias December 2019 66 139 ...

Страница 67: ...trip connector the pin holes are on the SBCX carrier located under the SOM module The following table reports the connector s pinout Pin SOM pin Pin name Function Notes 1 DGND 2 JTAG_TCK 3 JTAG_TMS 4 JTAG_TDO 5 JTAG_TDI 6 JTAG_nTRST 7 CPU_PORn 8 9 NC Not connected 10 JTAG_VREF December 2019 67 139 ...

Страница 68: ...l guide you through the setup and installation procedures 6 1 Unboxing Once you ve received the kit please open the box and check the kit contents with the packing list included in the box using the table on chapter 6 1 1 as a reference The hardware components SOM carrier boards and display are pre assembled as shown in the picture below December 2019 68 139 ...

Страница 69: ...able lists the kit components Component Description SBCX with AXEL LITE SOM Ampire AM 800480SETMQW 7 800x480 LCD display LVDS interface Quick Start Guide AC DC Single Output Wall Mount adapter Output 12V 2 0 A MicroSDHC card with SD adapter and USB adapter December 2019 69 139 ...

Страница 70: ...t empty password 6 3 First boot Once power has been applied U Boot bootloader will be executed and the debug messages will be printed on the serial console U Boot automatically runs the autoboot macro that loads the kernel and launches it with the options for mounting the root file system from the flash memory At the end of the boot process a demo application is launched and you can interact with ...

Страница 71: ...favorite terminal emulator software on PC eg PuTTY Minicom communication parameters are Parameter Value Baud rate 115200 bps Data bits 8 Stop bits 1 Parity None The following image shows the serial connection with Minicom in Linux December 2019 71 139 ...

Страница 72: ...TTY from http www chiark greenend org uk sgtatham putty download html Double click on the putty exe icon to launch PuTTY Insert SBCX IP Save the configuration as SBCX for convenience and hit load 6 3 2 2 From UNIX LINUX Open your favorite terminal software From the shell launch the following command December 2019 72 139 ...

Страница 73: ... e r s G u i d e v 1 0 1 ssh root 192 168 1 1 Answer yes to the Are you sure you want to continue connecting yes no question You are now logged in and you have access to the SBCX system shell December 2019 73 139 ...

Страница 74: ...x default This is the default Linux distribution It comes pre programmed in the SBCX flash memory and it is started by default when no bootable microSD card is detected at startup 6 4 2 Android Android 4 4 2 is available for SBCX 6 4 3 RESERVED AREA registration Additional development kit contents binary images and documentation can be downloaded from the RESERVED AREA of the DAVE Embedded Systems...

Страница 75: ...ccess the RESERVED AREA from the DAVE Embedded Systems web site home page clicking on the SUPPORT Reserved Area entry from the top menù or clicking on the dedicated button in the lower section of the page Fig 30 Accessing the RESERVED AREA December 2019 75 139 ...

Страница 76: ...mages to SD cards so an external tool is required We suggest to download and install Win32 DiskImager https sourceforge net projects win32diskimager and follow the instructions below insert the microSD card launch Win32 DiskImager select the disk label assigned to the microSD eg F select the previously downloaded operating system image file December 2019 76 139 ...

Страница 77: ...he microSD card into the J26 slot power up the system 1 To check the device file associated to the SD card open a terminal and enter the dmesg command to see the kernel messages like in the following example 20178 490564 scsi14 usb storage 1 1 4 1 0 20179 490102 scsi 14 0 0 0 Direct Access Generic STORAGE DEVICE 0272 PQ 0 ANSI 0 20179 491614 sd 14 0 0 0 Attached scsi generic sg4 type 0 20179 70371...

Страница 78: ...ications running on top of Linux that can easily be integrated in the embedded system Last but not least there are no license fees The typical Embedded Linux system is composed of the bootloader this software is run by the processor after exiting the reset state It performs basic hardware initialization retrieves the Linux kernel image for example from a remote server via the TFTP protocol and lau...

Страница 79: ...sis and the release packages have a reference code as L Kernel_version _ x y z eg L3 10 17_1 0 0 For more details please refer to http www nxp com products microcontrollers and processors arm processors i mx applications processors based on arm cores i mx 6 processors i mx6qp i mx 6quad processors high performance 3d graphics hd video arm cortex a9 core i MX6Q fpsp 1 tab Design_Tools_Tab https com...

Страница 80: ...s provides the so called recipes meta repositories required to build all the software components bootloader kernel and root file system with the Yocto build system For further details please refer to https wiki yoctoproject org wiki FAQ 7 2 1 Known limitations The following table reports the known limitations of the latest kit version which will be solved for the next releases of the development k...

Страница 81: ...tegory DVDK on DAVE Embedded Systems Developer s Wiki for further information 7 2 2 1 DVDK features VirtualBox virtual machine OVA archive Based on Lubuntu 12 04 LTS 64 bit version Pre installed VirtualBox Guest Additions LXDE desktop environment available Boot disk with pre installed Lubuntu Linux 12 04 2 LTS and pre configured basic Linux services TFTP NFS Secondary disk containing source code a...

Страница 82: ...des A bootable partition mmcblk0p1 vfat containing binary images MLO u boot and kernel images hardware and software documentation DVDK virtual machine image in an OVA archive root file system partition mmcblk0p2 ext3 The development kit contains all the required software and documentation to start developing Linux applications on the AXEL platform December 2019 82 139 ...

Страница 83: ...s used by the developer to cross compile the code that is to run on the target In our case the target is the AXEL CPU module while the host is assumed to be a PC running the Linux operating system either in a physical installation or as a virtual machine The bootloader running on the target can download the Linux kernel image through the network TFTP as well as the u boot binary images useful when...

Страница 84: ...sed to build U Boot and the Linux kernel is the GNU toolchain for the ARM architecture built for x86 hosts In other words the toolchain runs on x86 machines but generates binaries for ARM processors As for all the software compliant to the GPL license it is released in source code Thus the first thing to do to set up the developing environment should be building the cross toolchain This is not a t...

Страница 85: ...arily by NXP Freescale Periodically NXP Freescale releases the so called Linux BSP which provides updated kernel sources Kernels released within XELK derive directly from NXP Freescale Linux BSP kernels 7 3 2 4 Linux Device Tree The Flattened Device Tree FDT is a data structure for describing the hardware in a system for further information please refer to http elinux org Device_Tree Device tree s...

Страница 86: ... architecture used The software components for the AXEL platform can be built using Yocto and the source trees released with the XELK 2 0 0 and above 7 3 2 7 Git repositories SBCX source trees for U Boot and Linux kernel are provided as git repositories so the user can immediately get access to the development trees and keep these components in sync and up to date with DAVE Embedded Systems reposi...

Страница 87: ...are installed on the Linux development server select your username ad es username myhost com start a shell session on the Linux host enter the ssh subdirectory into your home directory cd ssh launch the following command ssh keygen t rsa C username myhost com this command creates the files ssh username myhost com private key and ssh username myhost com pub public key edit your ssh config adding th...

Страница 88: ...on the configuration Some well known build systems are the following OpenEmbedded http wiki openembedded net index php Main_Page Yocto https www yoctoproject org Buildroot http buildroot uclibc org LTIB http ltib org For the Linux BSP release NXP Freescale officially supports Yocto as build system and therefore XELK 2 0 0 and above kits are based on Yocto 7 3 3 2 Prerequisites Recommended PC specs...

Страница 89: ...ion exported in Open Virtualization Format OVF Please find below the instructions for importing the virtual machine into Virtualbox 1 Start the Oracle VM VirtualBox Manager 1 Click on File and select Import Virtual Application then click on Open Virtual Application December 2019 89 139 Fig 33 Launching the Virtual Box Manager Fig 34 Starting the import phase ...

Страница 90: ...d e v 1 0 1 2 Navigate your file system and select the ova file provided with the XELK 3 Click Next and on the next window click on Import December 2019 90 139 Fig 35 Selecting the OVA file Fig 36 Importing the Virtual Machine ...

Страница 91: ...K virtual machine 1 Launch the new Virtual Machine by double clicking on the XELK x y z entry on the left menù 2 VirtualBox will open some message windows like the following you can click Ok to close them December 2019 91 139 Fig 37 Launching the virtual machine ...

Страница 92: ... user dvdk Please note that the user account credentials are provided with the development kit you can find them into the README file contained in the dvdk folder of the kit distribution 4 Mount the sdk disk launching the following commands from a shell terminal cd home dvdk sh sdk mount sh xelk December 2019 92 139 Fig 38 DVDK desktop ...

Страница 93: ...logged in the system could suggest to update the Virtualbox Guest Additions package You can follow the on screen instructions to easily install the updated package December 2019 93 139 Fig 39 Mounting the virtual disk Fig 40 Virtual disk mounted ...

Страница 94: ...etwork interface as described in this page http wiki dave eu index php VirtualBox_Network_Configu ration 7 3 3 5 Overview of the installed components Once the virtual machine is running and the secondary disk is mounted the actual development kit can be found into the directory home dvdk xelk The xelk directory contains the following subdirectories linux 2 6 imx the Linux source tree December 2019...

Страница 95: ...lines export PATH xelk yocto sdk axel qt5 sysroots x86_64 pokysdk linux usr bin arm poky linux gnueabi PATH export ARCH arm export CROSS_COMPILE arm poky linux gnueabi 7 3 3 6 TFTP Server One of the most useful features of a bootloader during development is the capability to download the Linux kernel from the network This saves a lot of time because developer doesn t have to program the image in f...

Страница 96: ...st Linux distribution The default DVDK NFS installation is configured for sharing home directory and all the subdirectories 7 3 3 8 Pre built toolchain To start developing software for the AXEL platform users need a proper toolchain which can be pre built or built from scratch Building a toolchain from scratch is not a trivial task though using a recent build system is easier than in the past so t...

Страница 97: ...ems that can be used during the evaluation development phase since they contains the software packages for working with the AXEL platform XELK root file systems are built with the Yocto build system and are stored into the following directories home dvdk xelk rfs axel base home dvdk xelk rfs axel fsl image home dvdk xelk rfs axel qt5 December 2019 97 139 Fig 42 Pre built root file systems ...

Страница 98: ...ARALLEL_MAKE variables and a centralized tarball download directory through the DL_DIR variable Build the image using the bitbake command If you want information on BitBake see the BitBake User Manual N B Since the XELK virtual machine is already configured to match all the requirements for using the Yocto build system developers who wants to quickly build a Yocto image can directly go to section ...

Страница 99: ...lease note that even building the basic root file system requires a few hours to complete the process on a mid hi range desktop PC 4 6 cores 8 12 GiB RAM also depending on the Internet connection speed all source are fetched from the network Nearly 20GiB of disk space is required for the build Moreover building inside the DVDK adds some overhead since the performances of a virtual machine are redu...

Страница 100: ...e git repositories using the git fetch merge or the git pull commands For further details please refer to section 7 3 2 7 Assuming that you ve configured the environment variables sourcing the env sh script enter the U Boot sources directory xelk u boot imx and run the following commands dvdk dvdk vm xelk u boot imx make mx6qdlaxel_spi The former command selects the default SBCX configuration whic...

Страница 101: ...e uImage make target to update the binary image Once the build process is completed the kernel binary image is stored into the linux 2 6 imx arch arm boot uImage file while the dtb is stored into the linux 2 6 imx arch arm boot dts imx6q sbcx dtb These files can be copied to the srv tftp xelk directory with the following commands dvdk dvdk vm xelk linux 2 6 imx sudo cp arch arm boot uImage srv tft...

Страница 102: ...ing the env sh script developers can write a simple Hello world application called for example hello c include stdio h int main printf Hello world n return 0 To cross compile it arm poky linux gnueabi gcc o hello hello c Copy the executable file to the root file system and execute it from the AXEL system hello Hello world December 2019 102 139 ...

Страница 103: ...alled and pre configured in the DVDK This means that developers can quickly build 7 6 1 Launching Qt Creator To launch QtCreator simply open the main menù clicking on the LXDE icon on the bottom left corner and select Programming Qt Creator December 2019 103 139 Fig 43 Launching QtCreator ...

Страница 104: ...S B C X U s e r s G u i d e v 1 0 1 7 6 2 Building a QtQuick Hello World Follow the wizard to create a simple Hello World application using the QtQuick 2 library December 2019 104 139 ...

Страница 105: ...S B C X U s e r s G u i d e v 1 0 1 December 2019 105 139 ...

Страница 106: ...S B C X U s e r s G u i d e v 1 0 1 December 2019 106 139 ...

Страница 107: ...S B C X U s e r s G u i d e v 1 0 1 December 2019 107 139 Fig 44 QtQuick Hello World ...

Страница 108: ...pplication on the SBCX 7 6 3 1 Launch the application To launch the application select the Build option on the top menù and then click Run The application binary will be deployed and executed on the target Fig 45 Launch the Qt application on the SBCX December 2019 108 139 ...

Страница 109: ...tion To debug the application select the Debug option on the top menù and then click Start debugging The application binary will be deployed and executed on the target with a debug session attached Fig 46 Debug the Qt application on the SBCX December 2019 109 139 ...

Страница 110: ...akpoints Breakpoints can set by right clicking on the corresponding line in the source code In the next debug session the application execution will stop at the breakpoint Fig 47 Setting a breakpoint to stop the application execution December 2019 110 139 ...

Страница 111: ...uded in the Android SDK Once you ve downloaded and installed the SDK you can access these tools right from your Android Studio the recommended method Eclipse IDE through the ADT plugin or from the command line or another IDE The following picture shows the typical development workflow For further information please visit https developer android com tools workflow index html December 2019 111 139 ...

Страница 112: ...you can install it first and use the SDK Management tool to install the Android SDK Note if you prefer to use Eclipse as an alternative IDE you should also install the Android Development Tools ADT Plugin please find here the related instructions http developer android com sdk eclipse adt html installing 7 7 1 3 Android NDK The NDK is a toolset that allows you to implement parts of your app using ...

Страница 113: ...ersatile command line tool that lets you communicate with an emulator instance or connected Android powered device It is a client server program that includes three components A client which runs on your development machine You can invoke a client from a shell by issuing an adb command Other Android tools such as the ADT plugin and DDMS also create adb clients A server which runs as a background p...

Страница 114: ...re on PC eg PuTTY communication parameters are Parameter Value Baud rate 115200 bps Data bits 8 Stop bits 1 Parity None 4 connect the SBCX RJ45 connector J16 to the same Ethernet LAN of your PC 5 power up the system Once power has been applied U Boot bootloader will be executed and the following messages will be printed on serial console U Boot 2013 04 Mar 16 2015 09 52 15 xelk 2 1 0 rc1 CPU Frees...

Страница 115: ... access the system 7 7 2 2 Running in Normal mode 1 connect the SBCX RJ45 connector J16 to the same Ethernet LAN of your PC 2 power up the board Once power has been applied the system will boot loading the software components from the storage media Once the boot process has completed you ll get the default Android graphical user interface desktop You can now access the system using adb 7 7 2 3 Net...

Страница 116: ...sc adb adb_keys of the Android root file system You can use an USB pen drive or a SD card to transfer the file to the Android target root sbcx cd mnt media_rw extsd root sbcx cp adbkey pub data misc adb adb_keys From the Android console launch root sbcx setprop service adb tcp port 5555 Then kill the adbd process it will be relauched automatically 7 7 3 3 Connecting via ADB On the host PC launch a...

Страница 117: ...l mode section if you want to use ADB over ethernet configure the network interface according with your set up check the Android Debug Bridge ADB and connect to the target starting a connection through the Android Debug Bridge as described in the ADB over Ethernet section Please note that setting the correct IP address on the target and is mandatory to make ADB work if you prefer using ADB over US...

Страница 118: ...roid com training basics firstapp creating project html to create a new project The default project includes a simple application skeleton which runs a simple Activity which shows the Hello World message You can extend this application adding some other features When you feel comfortable you can jump to the next step Please refer to the following pictures December 2019 118 139 ...

Страница 119: ...S B C X U s e r s G u i d e v 1 0 1 December 2019 119 139 ...

Страница 120: ...he application on the SBCX make sure that ADB connection to the SBCX is active click on Run on the top menù select Run app on the Choose Device window select the SBCX device and click on OK the app will be built installed and run on the SBCX Please refer to the following pictures December 2019 120 139 ...

Страница 121: ...S B C X U s e r s G u i d e v 1 0 1 December 2019 121 139 ...

Страница 122: ...shing binary images in NAND flas 7 8 2 1 U Boot run load run nand_update 7 8 2 2 Linux kernel run loadk run nand_updatek 7 8 2 3 Device tree run loadfdt run nand_updatefdt 7 8 3 Flashing root file systems The recommended procedure is the following boot the system from network NFS format the flash MTD partition that have the size required to store the rfs create and mount the MTD partition using th...

Страница 123: ...used for an UBIFS file system after booting the board via nfs Please note that X is the mtd partition number you can read the proc mtd file to find the partition mapping ubiformat dev mtdX ubiattach dev ubi_ctrl m X ubimkvol dev ubi0 N rootfs m mount t ubifs dev ubi0_0 mnt ubifs cd mnt ubifs tar zxvf path to rfs archive cd sync umount mnt ubifs ubidetach dev ubi_ctrl m X reboot December 2019 123 1...

Страница 124: ...he BMP image from the storage device e g flash memory to RAM This command is automatically run by U Boot at startup splashpos image position eg splashpos m m for centering the image 7 9 2 Additional resources For further details on splash screen support in U Boot please refer to http www denx de wiki DULG UBootSplashScreen http www denx de wiki DULG UbootBitmapSupport 7 9 3 Splash image in NOR SPI...

Страница 125: ...and_loadsplash nand read splashimage nand splash splashfile splash_image bmp splashimage 0x20000002 splashpos m m splashsize 0x400000 loadsplashfile tftpboot loadaddr axel splashfile nand_updatesplash nand erase part nand splash nand write loadaddr nand splash filesize Please note that the NAND mtd partition for the splash image nand splash is defined using the mtdparts parameter and then referenc...

Страница 126: ...start working with it A You can follow the steps listed below 1 Check the kit contents with the packing list included in the box 2 Insert the SD into the card slot on the carrier board 3 Connect the power supply adapter and the serial cable as described in Section 6 2 4 Start your terminal emulator program 5 Switch on the power supply 6 Monitor the boot process on the serial console 7 Install the ...

Страница 127: ...board through an Ethernet LAN exports the directory containing the root file system for the target through the NFS server runs a TFTP server has a proper subnet IP address If your system does not match this configuration just change the necessary variables and store them permanently with the u boot setenv saveenv commands To do that from the U boot shell please check the following parameters and s...

Страница 128: ...ource tree The cpufreq framework works in conjunction with the related driver governor Cpufreq implementation controls the Linux OPP Operating Performance Points adjusting the CPU core voltages and frequencies CPUFreq is enabled by default in the AXEL kernel configuration To view the available governors root axel lite cat sys devices system cpu cpu0 cpufreq scaling_available_governors interactive ...

Страница 129: ...fs run loadk loadfdt nfsargs addip addcons addmisc bootm buf dtb_addr For further details please refer to the Documentation kernel parameters txt file of the kernel source tree provided with the XELK 8 8 Q How can I modify the IP address of the board A The network configuration is managed by a mix of init scripts and configuration files In particular the etc network interfaces provides the interfa...

Страница 130: ...time A Reducing the boot time is a fine tuning task that is usually performed when the development of all the system components is complete The achievable results depends on many factors so it s not simple to provide figures that fit for all cases Please feel free to contact us to request assistance for this activity For further information please contact sales dave eu December 2019 130 139 ...

Страница 131: ... using default on XELK CB ConfigID CRC mismatch for 0x00000000 was 0x00000000 expected 0x2144df1c at block 3 offset 96 using default Power found PFUZE100 devid 10 revid 21 HW ver 0x1 module_id CB ConfigID CRC mismatch for 0x00000000 was 0x00000000 expected 0x2144df1c at block 3 offset 96 using default unsupported boot devices Net FEC Normal Boot Hit any key to stop autoboot 0 U Boot 9 2 U Boot def...

Страница 132: ...and_loadsplash nand read splashimage nand splash nand_nand run nand_loadk nand_loadfdt nandargs addcons addmisc if run configid_fixupfdt then bootm loadaddr fdtaddr fi nand_update echo update for NAND boot using kobs ng from Linux nand_updatefdt nand erase part nand fdt nand write fdtaddr nand fdt filesize nand_updatek nand erase part nand kernel nand write loadaddr nand kernel filesize nand_updat...

Страница 133: ...ame Linux 3 10 17 xelk 2 2 0 Image Type ARM Linux Kernel Image uncompressed Data Size 5741464 Bytes 5 5 MiB Load Address 10008000 Entry Point 10008000 Verifying Checksum OK Flattened Device Tree blob at 18000000 Booting using the fdt blob at 0x18000000 Loading Kernel Image OK OK Power using LDO bypass mode Frame buffer configure splashscreen reserved memory to 0x8f600000 1 MiB Using Device Tree in...

Страница 134: ...ic identity map for 0x806bfa90 0x806bfae8 0 228960 CPU1 thread 1 cpu 1 socket 0 mpidr 80000001 0 338960 CPU2 thread 1 cpu 2 socket 0 mpidr 80000002 0 398959 CPU3 thread 1 cpu 3 socket 0 mpidr 80000003 0 399058 Brought up 4 CPUs 0 399087 SMP Total of 4 processors activated 6324 22 BogoMIPS 0 399096 CPU All CPU s started in SVC mode 0 399782 devtmpfs initialized 0 404009 pinctrl core initialized pin...

Страница 135: ...bus 01 0 765607 NET Registered protocol family 2 0 766225 TCP established hash table entries 16384 order 5 131072 bytes 0 766597 TCP bind hash table entries 16384 order 5 131072 bytes 0 766958 TCP Hash tables configured established 16384 bind 16384 0 767178 TCP reno registered 0 767198 UDP hash table entries 1024 order 3 32768 bytes 0 767303 UDP Lite hash table entries 1024 order 3 32768 bytes 0 7...

Страница 136: ...sh 2 380826 0x000001800000 0x000020000000 nand ubi 2 387169 gpmi nand 112000 gpmi nand driver registered 2 394047 m25p80 spi32766 0 s25fl256s1 32768 Kbytes 2 399375 7 cmdlinepart partitions found on MTD device spi32766 0 2 405667 Creating 7 MTD partitions on spi32766 0 2 410818 0x000000000000 0x000000100000 spi uboot 2 416994 0x000000100000 0x000000140000 spi env1 2 423009 0x000000140000 0x0000001...

Страница 137: ...6701 caam 2100000 caam authencesn hmac sha1 cbc aes caam 3 822854 caam 2100000 caam authenc hmac sha224 cbc aes caam 3 828903 caam 2100000 caam authencesn hmac sha224 cbc aes caam 3 835228 caam 2100000 caam authenc hmac sha256 cbc aes caam 3 841289 caam 2100000 caam authencesn hmac sha256 cbc aes caam 3 847619 caam 2100000 caam authenc hmac md5 cbc des3_ede caam 3 853856 caam 2100000 caam authence...

Страница 138: ...89 libphy 2188000 ethernet 07 Link is Up 100 Full 7 202338 IPv6 ADDRCONF NETDEV_CHANGE eth0 link becomes ready 7 222798 IP Config Complete 7 226089 device eth0 hwaddr 00 50 c2 1e af e3 ipaddr 192 168 0 123 mask 255 255 255 0 gw 255 255 255 255 7 236688 host xelk domain nis domain none 7 241873 bootserver 192 168 0 13 rootserver 192 168 0 13 rootpath 7 249049 ALSA device list 7 252057 No soundcards...

Страница 139: ...S B C X U s e r s G u i d e v 1 0 1 December 2019 139 139 ...

Отзывы: