AP25 Installation and Operating Guide
Version 1.00
Appendix F. H338 Optical Film Card Option
F-9
Document #: 9301H79500 Ver. 1.00
the audio. While in this screen you may also select the red
Muted
button to un-mute the
audio. When un-muted, the button will turn gray and say
Mute
.
The Film Card Setup screen allows you to make needed adjustments in the selected optical
format.
The left screen allows you to choose the adjustment you want to make.
o
y
Optical Gain
adjusts the optical gain.
o
y
Azimuth
allows the azimuth to be viewed.
o
y
Slit Loss EQ
adjusts the slit loss EQ.
o
y
Digital Soundtrack Input
sets the Digital Soundtrack Input source that will use
Optical as its fallback. See section F4.4.6 for more information.
The right screen has a pictorial of adjustments that can be made and changes with the selections
on the left.
F4.4.1.
Optical Gain Adjustment
Items needed: 50% tone test film (CAT 69T), oscilloscope, and specific tools required to
make adjustments, such as Allen/Hex Wrenches, small screw driver etc.
On the AP25 select one of the optical formats in the home screen, next select
Menu (System)
→
Formats
→
Format Options
→
Film Options
→
Film Setup
. You should now be in the
Film Card Setup screen as shown in
. Select
Optical Gain
.
Figure 11 – Film card setup screen, Optical Gain
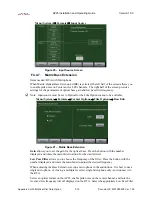
Thread the 50% tone test film (Cat69T) and run the projector. The signal should now be
present on the scope and the AP25 Film Card Setup screen as shown in
.
Two vertical graphs indicate the optical level for the left and right channels. The goal is to
adjust each signal to the reference level. The numbers in white (under Auto Adjust) follow the
graph. The numbers are separated into two readings (0.0 / 0.0) where the number on the left is
left channel and number on right is the right channel.
A projector select button is provided: Projector 1 =
Proj1
and projector 2 =
Proj2
. Pressing
the button makes the selection.
Auto Adjust
enables auto (self) adjustment when pressed. When pressed, a count down will
appear as adjustments are made. If no signal is present or is out of range, a pop-up message
will appear:
Содержание AP25
Страница 46: ...AP25 Installation and Operating Guide Page 46 AP25 Installation Operating Guide Document 9301H79500 Ver 1 00...
Страница 47: ...AP25 Installation and Operating Guide Page 47 AP25 Installation Operating Guide Document 9301H79500 Ver 1 00...
Страница 48: ...AP25 Installation and Operating Guide Page 48 AP25 Installation Operating Guide Document 9301H79500 Ver 1 00...
Страница 49: ...AP25 Installation and Operating Guide Page 49 AP25 Installation Operating Guide Document 9301H79500 Ver 1 00...
Страница 50: ...AP25 Installation and Operating Guide Page 50 AP25 Installation Operating Guide Document 9301H79500 Ver 1 00...
Страница 122: ...AP25 Installation and Operating Guide Version 1 00 Appendix B Interface Wiring Diagrams B 2 Document 9301H79500 Ver 1 00...
Страница 123: ...AP25 Installation and Operating Guide Version 1 00 Appendix B Interface Wiring Diagrams B 3 Document 9301H79500 Ver 1 00...
Страница 124: ...AP25 Installation and Operating Guide Version 1 00 Appendix B Interface Wiring Diagrams B 4 Document 9301H79500 Ver 1 00...
Страница 125: ...AP25 Installation and Operating Guide Version 1 00 Appendix B Interface Wiring Diagrams B 5 Document 9301H79500 Ver 1 00...
Страница 126: ...AP25 Installation and Operating Guide Version 1 00 Appendix B Interface Wiring Diagrams B 6 Document 9301H79500 Ver 1 00...
Страница 127: ...AP25 Installation and Operating Guide Version 1 00 Appendix B Interface Wiring Diagrams B 7 Document 9301H79500 Ver 1 00...
Страница 128: ...AP25 Installation and Operating Guide Version 1 00 Appendix B Interface Wiring Diagrams B 8 Document 9301H79500 Ver 1 00...


