background image

7

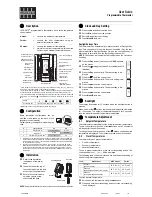
Commissioning (RF models only) 

If the thermostat and the receiver have been supplied together 
in a combined pack, the units have been paired in the factory 
and no commissioning is required (RX1 only).

To tune the RX receiver to the frequency of the thermostat signal, 
follow steps 1-5 below.

Step 1  RT51/52-RF

Reset the unit by removing the 
batteries for 2 minutes, then replace.

Step 2 

Press and hold

 V and


+


buttons for 3 seconds (Thermostat now 
transmits unique signal continuously 
for 5 minutes).

Step 3  RX1

Press and hold buttons 

PROG and CH1


for 3 seconds until green light fl ashes 
once.

Step 4  RX2 (if applicable)

Stat 1 - perform steps 1-3. 
Stat 2 - wait 5 mins, perform steps 1-2 and 
then press 

PROG and CH2 on RX2.

RX3  (if applicable)


Stat 1 - perform steps 1-3. 
Stat 2 - wait 5 mins, perform steps 1-2 and then press 

PROG and 

CH2 on RX3.

Stat 3 - wait 5 mins, perform steps 1-2 and then press 

PROG and 

CH3 on RX3.

Step 5  RT51/52-RF

Press 


Λ


or V

 to select temperature - unit will revert back to operating 

mode.

Installa

tion Instruc

tions

GB

Содержание RT51-RF

Страница 1: ...instalaci n Instrucciones del usuario Instruktions vejledning Brugervejleding Electronic room thermostat with manual or automatic Day Night set back Installatie handleiding Instructiesevoor Gebruik In...

Страница 2: ...ucciones de instalaci n 31 35 Instrucciones del usuario 36 39 Instruktions vejledning 40 44 Brugervejleding 45 48 Installatie handleiding 49 53 Instructiesevoor Gebruik 54 57 58 62 63 66 Instrukcja in...

Страница 3: ...h the current edition of the IEEE wiring regulations Thermostat features RT51 52 RT51 52 RF Power supply 2 x AA MN1500 LR alkaline cells Memory back up 1 min for battery change Switching action of out...

Страница 4: ...e from the back of the unit From the top left hand corner of the wallplate there must be clearances of at least 140mm to the right 15mm to the left 30mm above and 100mm below in order to mount the plu...

Страница 5: ...res the boiler at regular intervals to maintain a set temperature achieving a constant ambient environment for the user Some existing thermostats will have a Neutral wire and or Earth wire connected T...

Страница 6: ...2 3 4 ELECTRONICS N L COM ZONE 1 ON ZONE 1 OFF A ELECTRONICS B C 1 2 3 4 5 6 N L ZONE 1 ON ZONE 1 OFF ZONE 2 ON ZONE 3 ON COM TERMINAL 6 RX3 ONLY RX Receiver Wiring RF models only N L NB Formainsvolta...

Страница 7: ...uttons for 3 seconds Thermostat now transmits unique signal continuously for 5 minutes Step 3 RX1 Press and hold buttons PROG and CH1 for 3 seconds until green light flashes once Step 4 RX2 if applica...

Страница 8: ...setting that you are comfortable with and then leave it alone to do its job The best way to do this is to set the room thermostat to a low temperature say 18 C and then turn it up by one degree each d...

Страница 9: ...emperature at a time chosen by you Wireless RF versions Both models are available in wireless versions RT51 RF and RT52 RF which offer exactly the same functions as the hard wired models Each thermost...

Страница 10: ...arge characters and required temperature in the smaller characters DAY temperature Use the and buttons until the required DAY temperature is shown NIGHT set back temperature Press and buttons together...

Страница 11: ...ntil the correct TIME is shown Press PROG button again Use and buttons to select the time you wish the unit to return to DAY mode RUN Mode Moving between DAY and NIGHT mode RT52 RT52 RF only Setting t...

Страница 12: ...will switch off When changing batteries remove old batteries and insert new ones within ONE MINUTE and programming will not be lost 22 C 20 0 NB If the display ever goes blank during normal operation...

Страница 13: ...glementationsde c blageIEEE Caract ristiques RT51 52 RT51 52 RF Alimentation 2 piles alcalines x AA MN1500 Pr cision Horloge 1 minute pour changer les piles Type de contact 1 x SPDT Type 1B N A Carac...

Страница 14: ...rri re de l appareil Par rapport au coin gauche sup rieur de la plaque murale vous devez disposer d espacements d au moins 140 mm droite 15 mm gauche 30 mm au dessus et 100 mm en dessous afin de pouvo...

Страница 15: ...el fonction d conomie d nergie qui d clenche la chaudi re intervalles r guliers pour maintenir une temp rature d finie offrant un environnement ambiant constant l utilisateur 1 ON OFF 2 CHRONO Certain...

Страница 16: ...L COM ZONE 1 ON ZONE 1 OFF A ELECTRONICS B C 1 2 3 4 5 6 N L ZONE 1 ON ZONE 1 OFF ZONE 2 ON ZONE 3 ON COM TERMINAL 6 RX3 ONLY C blage du R cepteur RX mod les RF uniquement NB Pourlessyst mesaliment ss...

Страница 17: ...alors un signal unique en continu pendant 5 minutes Etape 3 RX1 Appuyez sur les touches PROG et CH1 en les maintenant enfonc es pendant 3 secondes jusqu ce que le voyant vert clignote une fois Etape 4...

Страница 18: ...mostat la temp rature Jour l heure que vous avez choisie Mod les RF sans fil Les deux mod les sont disponibles en versions sans fil RT51 RF et RT52 RF qui offrent exactement les m mes fonctions que le...

Страница 19: ...temp rature d sir e en petits caract res La Temp rature de la Journ e Appuyer sur les boutons ou jusqu ce que la TEMPERATURE DE LA JOURNEE requise s affiche La Temp rature de la Nuit Appuyer une fois...

Страница 20: ...che Appuyer une nouvelle fois sur le bouton PROG Appuyer sur les boutons ou jusqu ce que l HEURE correcte s affiche Mode RUN Fonctionnement R glage de l heure du retour au mode jour RT52 52 RF uniquem...

Страница 21: ...e vous remplacez les piles retirez les piles us es et ins rez les piles neuves dans LA MINUTE qui suit pour pr server vos programmations 22 C 20 0 NB Si rien ne s affiche l cran pendant le fonctionnem...

Страница 22: ...EE Bestimmungen installiert werden Technische Daten RT51 52 RT51 52 RF Stromversorgung 2 x AA MN1500 Batterien alkaline Zeitgenauigkeit 1 Minute f r Batteriewechsel Schaltkontakt Umschaltkontakt poten...

Страница 23: ...f der Ger ter ckseite Es m ssen folgende Abst nde eingehalten werden Von der linken oberen Ecke der Wandplatte mindestens 140mm nach rechts 15 mm nach links 30 mm nach oben und 100 mm nach unten um da...

Страница 24: ...n bei der das Heizger tinregelm igenIntervallenanspricht umeineeingestellte Temperatur zu halten und eine konstante Umgebungstemperatur f r den Benutzer zu erreichen Verschiedene bereits vorhandene Th...

Страница 25: ...RONIK B C 1 2 3 4 5 6 N L ZONE 1 EIN ZONE 1 AUS ZONE 2 EIN ZONE 3 EIN COM KLEMME 6 NUR BEI RX3 Verdrahtung der Empfangseinheit RX nur RF Modelle Hinweis Bei Systemen die per Netzspannung betrieben wer...

Страница 26: ...al f r die Dauer von 5 Minuten ohne Unterbrechung 3 RX1 Die Tasten PROG und CH1 3 Sekunden gedr ckt halten bis das gr ne Licht einmal aufleuchtet 4 RX2 falls zutreffend Stat 1 Schritte 1 3 ausf hren S...

Страница 27: ...umschaltet Drahtlose RF Versionen Beide Modelle werden auch als drahtlose Versionen unter den Bezeichnungen RT51 RF und RT52 RF angeboten und verf gen ber die selben Funktionen wie die Modelle mit Ka...

Страница 28: ...grossen Zeichen und die gew nschte Temperatur in kleineren Zeichen an Tagestemperatur Verwenden Sie die Tasten und bis die gew nschte TAGESTEMPERATUR angezeigt wird Nacht Absenk Temperatur W hlen Sie...

Страница 29: ...oder bis die korrekte UHRZEIT angezeigt wird Dr cken Sie wieder die Taste PROG Verwenden Sie die Tasten und bis die korrekte UHRZEIT angezeigt wird RUN Modus ZwischenTag undNacht Moduswechseln Nur RT5...

Страница 30: ...l m ssen die verbrauchten Batterien und die neuen Batterien innerhalb von 1 MINUTE entnommen und eingesetzt werden da ansonsten der Programmspeicher gel scht wird 22 C 20 0 Hinweis Falls die Anzeige b...

Страница 31: ...de acuerdo con la edici n vigente de las normasdecableadodelaIEEE Especificaciones RT51 52 RT51 52 RF Fuente de alimentaci n 2 pilas AA MIN 1500 LR 6 Respaldo de bater a 1 minuto para cambio de bater...

Страница 32: ...trasera de la unidad Desde la esquina superior izquierda de la placa mural debe haber un espacio libre de al menos 140mm a la derecha de 15mm a la izquierda de 30mm arriba y de 100mm abajo con el fin...

Страница 33: ...caldera se enciende a intervalos peri dicos para mantener una temperatura establecida obteni ndose una temperatura ambiente constante para el usuario Algunos termostatos existentes tendr n un cable Ne...

Страница 34: ...N ZONE 1 OFF A ELECTRONICS B C 1 2 3 4 5 6 N L ZONE 1 ON ZONE 1 OFF ZONE 2 ON ZONE 3 ON COM TERMINAL 6 RX3 ONLY Cableado del Receptor RX solo para modelos RF N B Parasistemasquefuncionenconlatensi nde...

Страница 35: ...nte 3 segundos La RT51 52 RF transmite ahora una se al nica continuamente durante 5 minutos Paso 3 RX1 Oprimir los botones PROG y CH1 y mantenerlos oprimidos durante 3 segundos hasta que la luz verde...

Страница 36: ...a una hora elegida por usted Versiones RF sin hilos Ambos modelos est n disponibles en versiones sin hilos RT51 RF y RT52 RF que tienen exactamente las mismas funciones que los modelos con conexi n a...

Страница 37: ...ama o y la temperatura requerida en caracteres de menor tama o La Temperatura diurna Utilice los botones y hasta que se muestre la TEMPERATURA DIURNA deseada LaTemperatura nocturna Pulse los botones y...

Страница 38: ...uestre la HORA correcta Pulse el bot n PROG otra vez Utilice los botones y hasta que se muestre la HORA correcta Cambiar entre el modo D A y NOCHE RT52 52 RF s lo FijarVolver a laTemperatura diurna Mo...

Страница 39: ...d se apague Durante el cambio de pilas quite las pilas antiguas e introduzca las nuevas en UN MINUTO y no se perder la programaci n 22 C 20 0 NB Si la pantalla se queda en blanco alguna vez durante el...

Страница 40: ...petent varmeinstallat r og installation skal ske i henhold til de g ldende IEEE standarder for tr df ring Specifications RT51 52 RT51 52 RF Batterier 2 x AA MN1500 LR alkaline cells Tidsn jagtighed t...

Страница 41: ...en For at kunne montere indstiksmodulet skal der i verste venstre hj rne af v gpladen v re en afstand p mindst 140 mm til h jre for v gpladen 15 mm til venstre for v gpladen 30 mm over v gpladen og 10...

Страница 42: ...de temperatur 2 Tidsm ssig proportionalitet energibesparelsesfunktion som opvarmer kedlen med j vne mellemrum for at bevare den indstillede temperatur hvorved brugeren opn r en konstant omgivende temp...

Страница 43: ...ZONE 1 ON ZONE 1 OFF A ELECTRONICS B C 1 2 3 4 5 6 N L ZONE 1 ON ZONE 1 OFF ZONE 2 ON ZONE 3 ON COM TERMINAL 6 RX3 ONLY Tr df ring af RX modtager kun RF modeller PS I relation til systemer der modtag...

Страница 44: ...51 52 sender nu et entydigt vedvarende signal i fem minutter Trin 3 RX1 Tryk p og hold knapperne PROG og CH1 nede i tre sekunder indtil den gr nne lampe blinker n gang Trin 4 RX2 hvis anvendelig Termo...

Страница 45: ...dagtemperatur p et tidspunkt som du har valgt Tr dl se RF udgaver Begge modeller f s i tr dl se udgaver RT51 RF og RT52 RF som har n jagtig de samme funktioner som modellerne med tr d Termostaterne k...

Страница 46: ...e temperatur med store tal og den nskede temperatur med mindre tal DAG temperatur Brug og knappen indtil DAG temperaturen vises NATTE tilbagestilling temperatur Tryk p og knappen samtidigt n gang for...

Страница 47: ...NKTET Tryk p PROG igen Brug og knappen til at v lge det tidspunkt hvor du nsker at enheden skal vende tilbage til DAG tilstand DRIFTS tilstand Skiftning mellem DAG og NATTE tilstand G lder kun for RT5...

Страница 48: ...udskiftning af batterier skal de nye batterier inds ttes inden for et minut efter udtagningen af de gamle batterier for at bevare programmeringen 22 C 20 0 NB Hvis displayet skulle blive blankt under...

Страница 49: ...undige verwarmingsinstallateur conform de thans geldende IEEE voorschriftenvoorbedrading Omschrijving RT51 52 RT51 52 RF Voeding 2 x AA MN1500 Alkaline batterijen Programma backup 1 minuut voor wissel...

Страница 50: ...t Monteer de wandplaat op een hoogte van ca 1 5 m vanaf de vloer niet op de tocht en uit de buurt van warmtebronnen zoals radiatoren open haard of direct zonlicht Rondom de wandplaat dient een vrije r...

Страница 51: ...CHRONO proportioneel energiebesparende comfortabele functie die de ketel met regelmatige tussenpozen inschakelt waardoor een constante ruimtetemperatuur voor de gebruiker wordt bereikt Op sommige best...

Страница 52: ...ZONE 3 ON COM TERMINAL 6 RX3 ONLY Aansluiting van de RX ontvanger alleen bij RF modellen N B Bij netspanning gevoede systemen dient klem 2 te worden aangesloten op de fase van de netvoeding Sluit de k...

Страница 53: ...5 minuten een aanmeldsignaal uit Stap 2 RX ontvanger Druk binnen 5 minuten na stap 1 gedurende 3 seconden gelijktijdig op PROG en CH1 De groene LED knippert n keer aanmelding in orde Stap 3 Druk op of...

Страница 54: ...r u gekozen tijdstip terugzet op Dag temperatuur Draadloze RF versies Beidemodellenzijnverkrijgbaarindraadlozeversies RT51 RFenRT52 RF die exact dezelfde functies bieden als de vast bedrade modellen E...

Страница 55: ...ratuur in kleinere cijfers weergegeven DAGTEMPERATUUR Gebruik de of toets tot de gewenste DAGTEMPERATUUR wordt aangegeven tussen 5 30 C of Off uit NACHTTEMPERATUUR Druk n keer gelijktijdig op de en to...

Страница 56: ...e TIJD wordt aangegeven Druk weer op de PROG toets Gebruik de en toetsen om de gewenste TIJD in te stellen Normaal bedrijf Schakelen tussen DAG en NACHT stand Alleen RT52 52 RF Instellen van Terug naa...

Страница 57: ...er de oude batterijen en zet er binnen een minuut nieuwe in dan gaat de programmering niet verloren BELANGRIJK Gebruik hoogwaardige alkaline batterijen N B Wanneer de display tijdens normaal bedrijf o...

Страница 58: ...58 RF RT51 52 RT51 52 RF M 2 x AA MN 1500 1 SPDT 1 N A 3 1 A 10 230 Vac N A N A 433 92MHz N A Max 30 5 30 C x x 110 mm x 88 mm x 29 mm EN60730 2 9 EN300220 RF 2 5Kv 75 C Degree 2 1 C GR...

Страница 59: ...59 140 mm 15 mm 30 mm 100 mm GR...

Страница 60: ...60 ON OFF 1 ON OFF ON OFF 2 RT51 52 RT51 52 RT51 52 1 ON OFF 2 CHRONO GR...

Страница 61: ...61 RX1 RX2 RX3 1 2 3 4 ELECTRONICS N L COM ZONE 1 ON ZONE 1 OFF A ELECTRONICS B C 1 2 3 4 5 6 N L ZONE 1 ON ZONE 1 OFF ZONE 2 ON ZONE 3 ON COM TERMINAL 6 RX3 ONLY RX RF 2 GR...

Страница 62: ...62 RF RX 1 5 1 RT51 52 RF 2 2 3 RT51 52 5 3 RX1 PROG CH1 3 4 RX2 1 1 3 2 5 1 2 PROG CH2 RX2 RX3 1 1 3 2 5 1 2 PROG CH2 RX3 3 5 1 2 PROG CH3 RX3 5 RT51 52 RF GR...

Страница 63: ...63 RT51 RT51 2 RT52 RT52 RT51 RF RT51 RF RT52 RF RX 30 m 22 C 20 0 22 C n 20 0 DAY NIGHT GR...

Страница 64: ...64 2 DAY s t s t n s t 5 30 C Off 22 C 20 0 22 C n 20 0 GR...

Страница 65: ...65 i2 00 d n PROG PROG RUN RT52 52 RF PROG GR...

Страница 66: ...66 22 C 20 0 LCD 15 GR...

Страница 67: ...le y przeprowadza zgodnie z aktualnymi przepisami dotycz cymi przewod w elektrycznych IEEE Specy kacja RT51 52 RT51 52 RF Zasilanie 2 x AA MN 1500 LR 6 Baterie Podtrzymanie pami ci 1 minuta dla wymian...

Страница 68: ...z tylnej cz ci urz dzenia Aby zamontowa przew d w lewym g rnym rogu pokrywy musi znajdowa si wolny obszar o wymiarach przynajmniej 140 mm z prawej strony 15 mm z lewej 30 mm powy ej i 100 mm poni ej...

Страница 69: ...ionej warto ci 2 Tryb chronoproporcjonalny tryb oszcz dzaj cy energi w kt rym kocio w cza si w regularnych odst pach czasu w celu utrzymania wyznaczonej temperatury tworz c ci g e przyjazne rodowisko...

Страница 70: ...ZONE 1 ON ZONE 1 OFF A ELECTRONICS B C 1 2 3 4 5 6 N L ZONE 1 ON ZONE 1 OFF ZONE 2 ON ZONE 3 ON COM TERMINAL 6 RX3 ONLY Przewody instalacji elektrycznej odbiornika RX tylko w modelach RF UWAGA Dla sys...

Страница 71: ...nut Krok 3 RX1 Naci nij i przytrzymaj przyciski PROG oraz CH1 przez 3 sekundy a jeden raz zab y nie zielona lampka Krok 4 RX2 je eli dotyczy Czynno 1 wykonaj czynno ci opisane w krokach 1 3 Czynno 2 o...

Страница 72: ...dzienn w momencie wybranym przez Ciebie Bezprzewodowe wersje RF Oba modele dost pne s w wersjach bezprzewodowych RT51 RF oraz RT52 RF posiadaj cych takie same funkcje jak modele przewodowe Ka dy termo...

Страница 73: ...temperatur rzeczywist a za pomoc ma ych cyfr temperatur zadan Temperatura dzienna Manipulowa przyciskami i a do wy wietlenia danej TEMPERATURY DZIENNEJ Temperatura nocna Jednocze nie przycisn jeden r...

Страница 74: ...oprawnego czasu Wcisn ponownie przycisk PROG Manipulowa przyciskami i a do wy wietlenia si poprawnego czasu Tryb RUN praca Prze czanie pomi dzy trybem DZIENNYM i NOCNYM Tylko RT52 52 RF Nastawianie po...

Страница 75: ...i samoczynnie Podczas wymiany baterii wyjmij stare baterie i w nowe w ci gu jednej minuty a ustawienia program w zostan zachowane WA NE zawsze u ywaj wysokiej jako ci baterii alkalicznych UWAGA Je li...

Страница 76: ...os laid montavimo reglamento dabartine redakcija Specifikacija RT51 52 RT51 52 RF Maitinimas 2xAA MN 500 armin s baterijos Laiko nustatymo tikslumas 1 min baterijos krovimui Kontakto tipas SPDT tipas...

Страница 77: ...l nuo prietaiso galo Nuo vir utinio kairiojo sienos plok tel s kampo iki de iniojo kra to turi b ti ma iausiai 140 mm iki kairiojo kra to 15 mm 30 mm vir uje ir 100 mm apa ioje tarpas kad b t galima s...

Страница 78: ...l laik re imas tai taupantis energij re imas kai boileris kaitinamas reguliariais intervalais kad b t i laikyta nustatyta temperat ra taip u tikrinant reikiamas aplinkos s lygas Prie kai kuri termosta...

Страница 79: ...ON ZONE 1 OFF A ELECTRONICS B C 1 2 3 4 5 6 N L ZONE 1 ON ZONE 1 OFF ZONE 2 ON ZONE 3 ON COM TERMINAL 6 RX3 ONLY RX imtuvo laidai tik RF modeliams D mesio Jei naudojate su maitinimo altiniais veikian...

Страница 80: ...siun ia unikalius signalus 3 RX1 Paspauskite kartu PROG ir CH1 klavi us ir palaikykite 3 sekundes juos nuspaud kol vien kart blykstel s alia viesa 4 RX2 jei taikoma Stat 1 atlikite 1 3 veiksmus Stat 2...

Страница 81: ...antis termostat dienos temperat r Bevieliai RF modeliai Abu modelius galima sigyti kaip bevieles versijas RT51 RF ir RT52 RF kurioms b dingos visi kai tos pa ios funkcijos kaip ir modeliams su laidais...

Страница 82: ...o pageidaujama temperat ra ma esniais skaitmenimis Dienos temperat ros nustatymas Spauskite ir mygtukus kol pasirodys reikiama DIENOS TEMPERAT RA Nakties temperat ros nustatymas Nor dami pasirinkti N...

Страница 83: ...Spauskite ir mygtukus kol pasirodys tinkamas LAIKAS V l paspauskite PROG mygtuk Spauskite ir mygtukus kol pasirodys tinkamas LAIKAS RUN re imas DIENOS ir NAKTIES re im nustatymas Tik RT52 52 RF Gr im...

Страница 84: ...o prietaisas i sijungs Keisdami baterijas per vien minut i imkite sen sias ir d kite nauj sias baterijas tuomet nustatyta programa i liks SVARBU Naudokite tik auk tos kokyb s armines baterijas sid m k...

Страница 85: ...conformit con le ultimeprescrizionidellanormativaIEEE Caratteristiche del termostato RT51 52 RT51 52 RF Alimentazione 2 x AA MN1500 LR batteriealcaline Supporto memoria 1 minuto per la sostituzione de...

Страница 86: ...ll unit Per il montaggio del modulo plug in necessario che in corrispondenza dell angolo superiore sinistro della piastra sia disponibile uno spazio libero di almeno 140 mm verso destra 15 mm verso si...

Страница 87: ...oporzionale funzione a risparmio energetico che inserisce la caldaia ad intervalli regolari per mantenere una temperatura preimpostata consentendo cos all utente di avere una temperatura ambiente cost...

Страница 88: ...ONE 1 OFF A ELECTRONICS B C 1 2 3 4 5 6 N L ZONE 1 ON ZONE 1 OFF ZONE 2 ON ZONE 3 ON COM TERMINAL 6 RX3 ONLY Cablaggio del ricevitore solo modelli RF Importante Sui sistemi alimentati con tensione di...

Страница 89: ...tivamente per 5 minuti Punto 3 RX1 Premere i pulsanti PROG e CH1 per 3 secondi fino a quando l indicatore verde non lampeggia una volta Punto 4 RX2 se previsto Termostato 1 seguire le istruzioni di cu...

Страница 90: ...diurna all ora selezionata Versioni RF senza fili Entrambiimodellisonodisponibilinelleversionisenzafili RT51 RFeRT52 RF che presentano le stesse funzioni dei modelli con fili Ciascun termostato comuni...

Страница 91: ...rogrammata con caratteri pi piccoli Temperaturediurna Utilizzare i pulsanti e fino a visualizzare la temperatura DIURNA desiderata Temperaturenotturna Premere contemporaneamente una volta i pulsanti e...

Страница 92: ...ualizzare l ora esatta Premere nuovamente PROG Utilizzare i pulsanti e per selezionare l ora alla quale si desidera che l unit ritorni in modalit DAY Modalit RUN Commutazione tra modalit DAY diurna e...

Страница 93: ...he l apparecchio si spenga definitivamente All atto della sostituzione togliere le vecchie batterie ed inserire quelle nuove entro un minuto per non perdere i parametri di programmazione IMPORTANTE ut...

Страница 94: ...94...

Страница 95: ...95...

Страница 96: ...96 www danfoss com BusinessAreas Heating Part No 61076v07 07 07...

Отзывы: