background image

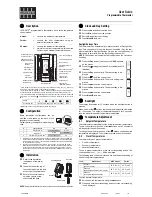
Instruction CF-RD Room Thermostat with Display

3

VI.UH.Q4.1C 

Produced by Danfoss Floor Heating Hydronics 03.2007

GB

GB

 Index

. Functional Overview.................................................4
2. Installation ....................................................................4
3. Temperature Settings ...............................................6
4. Transmission Test .......................................................7
5. Mounting ......................................................................8
6. Uninstallation ..............................................................8
7. Specifications ..............................................................9
8. Troubleshooting ...................................................... 0
9. Figures and illustrations ................................A-A2

Содержание 088U0212

Страница 1: ...Vejledning CF RD Rumtermostat med display F Instruction CF RD Thermostat avec cran SE Bruksanvisning CF RD rumstermostat med display PL Instrukcja obs ugi termostatu pomieszczenia z wy wietlaczem CF...

Страница 2: ...Q4 1C Produced by Danfoss Floor Heating Hydronics 03 2007 GB Instruction 3 D Instruktion 11 DK Vejledning 21 F Instruction 29 SE Bruksanvisning 37 PL Instrukcja obs ugi 45 NL Handleiding 53 I Istruzi...

Страница 3: ...VI UH Q4 1C Produced by Danfoss Floor Heating Hydronics 03 2007...

Страница 4: ...Produced by Danfoss Floor Heating Hydronics 03 2007 GB GB Index 1 Functional Overview 4 2 Installation 4 3 Temperature Settings 6 4 Transmission Test 7 5 Mounting 8 6 Uninstallation 8 7 Specification...

Страница 5: ...ow flashing Flashes Fast flashing Flickers Back fig 2 Back plate Back plate lock unlock turn 90 Screw hole for wall mounting Battery placement Screw and wall plug Note To activate batteries please rem...

Страница 6: ...ermostat Press the push button LED and flicker during communication Select output on Master Controller All available output LEDs on Master Controller light up and the first of them flashes Press outpu...

Страница 7: ...ntrol set from Remote Controller CF RC Setting of Temperatures fig 1 The actual room temperature is shown in the display as default Setting of room temperature Press the up down selector to set the de...

Страница 8: ...splay 4 Transmission Test Initiate transmission test on Room Thermostat fig 1 Press the push button LED goes ON Link test is satisfactory LED goes OFF Link test is unsatisfactory LED flashes 5 times N...

Страница 9: ...ht other heaters eg TV s etc is avoided Mounting with screws fig 2 Back plate Screw hole for wall mounting Screw and wall plug 6 Uninstallation Activate Uninstall mode on Master Controller fig 1 Use t...

Страница 10: ...Heating Hydronics 03 2007 GB 7 Specifications Temperature setting range 5 35 C Transmission frequency 868 42MHz Transmission range in normal buildings up to 30m Transmission power 1mW Battery Alkalin...

Страница 11: ...Indication Possible Cause The LED and flashes every 5th minute Low battery The LED and flashes every 30 sec Critical low battery The LED and flashes Critical low battery trans mission has stopped The...

Страница 12: ...Danfoss Floor Heating Hydronics 03 2007 D D Inhaltsverzeichnis 1 Funktions bersicht 12 2 Installation Anmeldung 12 3 Temperatureinstellungen 14 4 Funk Verbindungstest 15 5 Montage 16 6 Reset Zur ckset...

Страница 13: ...elles Blinken Flackert R ckseite Fig 2 Hintere Abdeckung Hintere Abdeckung verriegeln entriegeln um 90 drehen Schraubenloch f r Wandmontage Batteriepositionierung Schraube und D bel Anmerkung Zum Akti...

Страница 14: ...Aktivieren Sie den Installationsmodus indem Sie auf OK dr cken Die Installations LED wechselt zu EIN Dauerleuchten Aktivieren Sie den Installationsmodus am Raumthermostaten Fig 1 Bet tigen Sie den Dru...

Страница 15: ...werden berpr fen Sie Ihre Zuordnung durch einen Verbindungstest die LED s der zugeordneten Kan le m ssen aufblinken Siehe Kap 4 Funk Verbindungstest 3 Temperatureinstellungen Digitale Anzeige Fig 1 Te...

Страница 16: ...egrenzung Halten Sie den Druckknopf gedr ckt bis SET MAX in der Anzeige erscheint Bet tigen Sie den Temperaturw hler um die maximale Raumtemperatur einzustellen Bet tigen Sie kurz den Druckknopf SET M...

Страница 17: ...Installieren Sie die externe Antenne CF EA F r den optimalen Funkkontakt die Raum thermostate senkrecht an der Wand und den Hauptregler waagerecht montieren Der Funk Verbindungstest ist im jeweiligen...

Страница 18: ...ionsmodus zu w hlen Die Deinstallations LED blinkt Aktivieren Sie den Deinstallationsmodus indem Sie auf OK dr cken Die Deinstallations LED wechselt zu EIN Dauerlicht Heben Sie die Wahl des Ausgangs a...

Страница 19: ...und kann wieder verwendet werden Anmerkung Zur berpr fung dr cken sie den Druckknopf 1 mal Wenn die rote LED 3 x flackert und 5 x blinkt war der Reset Zur cksetzen erfolgreich 7 Technische Daten Tempe...

Страница 20: ...Die LED und blinken alle 5 Minuten Batterieladezustand niedrig Die LED und blinken Batterieladezustand u erst niedrig Die LED und blinken Batterieladezustand u erst niedrig Sendevorgang wurde beendet...

Страница 21: ...20 VI UH Q4 1C Produced by Danfoss Floor Heating Hydronics 03 2007...

Страница 22: ...illet af Danfoss Floor Heating Hydronics 03 2007 DK DK Indhold 1 Funktionsoversigt 22 2 Installation 22 3 Temperaturindstillinger 24 4 Transmissionstest 25 5 Montering 26 6 Afinstallation 26 7 Specifi...

Страница 23: ...t Langsomme blink Blinker Hurtige blink Flimrer Bagside fig 2 Bagplade Bagpladel s drej 90 Skruehul til v gmontering Placering af batterier Skrue og rawplug Bem rk Fjern de medf lgende strips fra batt...

Страница 24: ...tall p rumtermostaten Tryk p knappen Lysdioderne og flimrer under kommunikationen Valg af udgang p masterregulatoren Alletilg ngeligeudgangsdioderp masterregu latoren lyser konstant og den f rste ledi...

Страница 25: ...zonestyring kan kun foretages med fjernbetjeningen CF RC Temperaturindstilling fig 1 Den faktiske rumtemperatur vises som standard i displayet Indstilling af rumtemperatur Tryk p op ned knappen for at...

Страница 26: ...sionstest fra rumtermostaten fig 1 Tryk p knappen Lysdioden t ndes i et kort jeblik Linktesten er tilfredsstillende Lysdioden slukkes Linktesten er ikke tilfredsstillende Lysdioden blinker fem gange I...

Страница 27: ...der f eks tv osv undg s Montering med skruer fig 2 Bagplade Skruehul til v gmontering Skrue og rawplug 6 Afinstallation Aktivering af Uninstall p masterregulatoren fig 1 Tryk p menuknappen for at v lg...

Страница 28: ...ing Hydronics 03 2007 DK 7 Specifikationer Temperatur indstillingsomr de 5 35 C Transmissionsfrekvens 868 42MHz Transmissionsr kkevidde i almindelige bygninger op til 30m Transmissionseffekt 1mW Batte...

Страница 29: ...dioden og blinker hvert femte minut Batteriniveau lavt Lysdioden og blinker hver 30 sekund Batteriniveau kritisk lavt Lysdioden og blinker Batteriniveau kritisk lavt Transmissionen er stoppet Lysdiode...

Страница 30: ...it par Danfoss Floor Heating Hydronics 03 2007 F 9 Tableaux et illustrations A1 A2 1 Pr sentation des fonctions 30 2 Installation 30 3 R glages temp rature 32 4 Test transmission 33 5 Montage 34 6 D s...

Страница 31: ...lent Clignotant Clignotement rapide Scintillant Arri re fig 2 Plaque arri re Verrouiller d verrouiller plaque arri re tourner 90 Orifice vis pour montage mural Emplacement piles Visser le support mur...

Страница 32: ...ppuyer sur le bouton poussoir Diode LED et scintillent durant la communication S lection sortie sur R gulateur principal Toutes les diodes LED de sortie disponibles sur le R gulateur principal s allum...

Страница 33: ...minuterie valeur de consigne commande zone heure depuis la com mande distance CF RC R glage temp ratures fig 1 La temp rature effective de la pi ce est indi qu e par d faut sur l cran R glage temp ra...

Страница 34: ...4 Test transmission Initialiser le test de transmission sur le Thermostat d ambiance fig 1 Appuyer sur le bouton poussoir La diode LED s allume Le test de transmission est satisfaisant La diode LED s...

Страница 35: ...fig 2 Plaque arri re Orifice vis pour montage mural Visser le support mural 6 D sinstallation Activer le mode D sinstallation sur le R gulateur principal Utiliser le bouton de s lection Menu pour s l...

Страница 36: ...cs 03 2007 F 7 Sp cifications Gamme de r glage temp rature 5 35 C Fr quence transmission 868 42MHz Port e transmission dans des immeubles normaux jusqu 30m Puissance transmission 1mW Piles Alcaline 2x...

Страница 37: ...ble La diode LED et clignote toutes les 5 minutes Piles faibles La diode LED et clignote Piles tr s faibles La diode LED et clignote Piles tr s faibles transmission interrompue La diode LED et clignot...

Страница 38: ...kad av Danfoss Floor Heating Hydronics 03 2007 SE 9 Bilder och illustrationer A1 A2 1 Funktions versikt 38 2 Installation 38 3 Temperaturinst llningar 40 4 Kommunikationstest 41 5 Montering 42 6 Avins...

Страница 39: ...inkningar Blinkar Snabba blinkningar Flimrar Baksida bild 2 Lock p baksidan L s till locket p baksidan vrid 90 Skruvh l f r v ggmontering Plats f r batterier Skruv och plugg Observera Ta bort remsorna...

Страница 40: ...sdioderna och flimrar under kommunikationen Val av utg ng p masterregulatorn Alla tillg ngliga utg ngsdioder p masterregu latorn lyser med fast sken utom den f rsta av dem som blinkar ist llet Tryck p...

Страница 41: ...dursikon tids och zonstyrning kan endast g ras med hj lp av fj rrkontrollen CF RC Temperaturinst llning bild 1 Den verkliga rumstemperaturen visas som standard i displayen Inst llning av rumstemperatu...

Страница 42: ...ikationstest Start av kommunikationstest fr n rumstermo staten bild 1 Tryck p knappen Lysdioden t nds F rbindelsetestet r tillfredsst llande Lysdioden sl cks F rbindelsetestet r inte tillfredsst lland...

Страница 43: ...d mera undviks Montering med skruvar bild 2 Lock p baksidan Skruvh l f r v ggmontering Skruv och plugg 6 Avinstallation Aktivering av Uninstall p masterregulatorn bild 1 Tryck p menyknappen f r att v...

Страница 44: ...Hydronics 03 2007 SE 7 Specifikationer Temperaturinst llningsomr de 5 35 C Kommunikationsfrekvens 868 42 MHz Kommunikationsr ckvidd i vanliga byggnader upp till 30 m Kommikationseffekt 1 mW Batteri Al...

Страница 45: ...och blinkar var femte minut L g batteriladdningsniv Lysdioden och blinkar Kritiskt l g batteriladdn ingsniv Lysdioden och blinkar Kritiskt l g batteriladdn ingsniv Transmissionen har stoppats Lysdiode...

Страница 46: ...VI UH Q4 1C Wyprodukowane przez Danfoss Floor Heating Hydronics 03 2007 PL 9 Rysunki A1 A2 1 Przegl d funkcji 46 2 Instalacja 46 3 Regulacja temperatury 48 4 Test transmisji 49 5 Mocowanie 50 6 Odins...

Страница 47: ...iody wieci W CZONA Nie wieci WY CZONA Wolno miga Miga Szybko miga Migocze Ty rys 2 Tylna p yta Blokada zwolnienie blokady tylnej pokrywy przekr ci o 90 Otw r do monta u ciennego Komora baterii ruba mo...

Страница 48: ...rybu instalacji w termostacie pomieszczenia Nacisn przycisk Dioda i miga podczas komunikacji urz dze Wyb r wyj cia regulatora Wszystkie dost pne diody w regulatorze zapalaj si a pierwsza z nich miga N...

Страница 49: ...Ikona alarmu Ikona zegara programowanie czasowe aktywowane z pilota CF RC Regulacja temperatury rys 1 Aktualna temperatura pomieszczenia jest domy lnie wy wietlana na ekranie Ustawianie temperatury p...

Страница 50: ...isku na wy wietlaczu pojawi si bie ca temperatura pomieszczenia 4 Test transmisji Rozpocz cie testu transmisji z termostatu pomieszczenia rys 1 Nacisn przycisk Zapali si dioda Poprawny test po czenia...

Страница 51: ...znych wiatru lub innych r de ciep a np odbiornik w TV Monta za pomoc rub rys 2 Tylna p yta Otw r do monta u ciennego ruba monta owa 6 Odinstalowanie Aktywacja trybu odinstalowania w regulatorze rys 1...

Страница 52: ...anfoss Floor Heating Hydronics 03 2007 PL 7 Specyfikacje Zakres regulacji temperatury 5 35 C Cz stotliwo transmisji 868 42 MHz Zakres transmisji w zwyk ych budynkach maks 30 m Moc transmisji 1 mW Bate...

Страница 53: ...ek Wskazanie b du Mo liwe przyczyny Dioda i miga co 5 minut Niski stan na adowania baterii Dioda i miga co 30 sekund Krytyczny stan na adowania baterii Dioda i miga Krytyczny stan na adowania baterii...

Страница 54: ...produceerd door Danfoss Floor Heating Hydronics 03 2007 NL 9 Afbeeldingen A1 A2 1 Functies overzicht 54 2 Installatie aanmelden 54 3 Temperatuurinstellingen 56 4 Verbindingstest 57 5 Montage 58 6 Afme...

Страница 55: ...Snel knipperend Knippert snel Achterzijde fig 2 Muurplaat Muurplaat vergrendelen ontgrendelen 90 draaien Schroefgat voor wandmontage Batterijcompartiment Schroef en muurplug Opmerking om de batterije...

Страница 56: ...veer de installatiemode op de kamerthermostaat Druk op de drukknop Led en knipperen snel tijdens de communicatie Selecteer uitgang op regelaar Alle beschikbare uitgang led s op de regelaar gaan brande...

Страница 57: ...is actief vanuit afstandsbediening CF RC Instelling van temperaturen fig 1 De werkelijke ruimtetemperatuur wordt stan daard in het display weergegeven Instellen van de ruimtetemperatuur Druk op de keu...

Страница 58: ...ijke ruimtetemperatuur weer gegeven 4 Verbindingstest Verbindingstest voor kamerthermostaat starten fig 1 Druk op de drukknop Led gaat branden Verbindingstest is geslaagd Led dooft Verbindingstest is...

Страница 59: ...bronnen bijv tv s enz geen invloed kunnen uitoefenen Montage fig 2 1 Monteer de muurplaat met de twee schroe ven en pluggen via de schroefgaten op de wand 2 Schuif de kamerthermostaat op zijn plaats o...

Страница 60: ...mostaat van de muurplaat en koppel een van de batterijen los Druk de druktoets in en houd hem ingedrukt en sluit de batterij weer aan Laat de druktoets los wanneer de rode led aan en uit is gegaan De...

Страница 61: ...utmelding Mogelijke oorzaken De led en knipperen om de 5 minuten Batterij bijna leeg De led en knipperen om de 30 sec Batterij op kritisch peil De led en knipperen Batterij op kritisch peil transmissi...

Страница 62: ...rodotto da Danfoss Floor Heating Hydronics 03 2007 I 9 Figure e illustrazioni A1 A2 1 Panoramica funzioni 62 2 Installazione 62 3 Impostazioni temperatura 64 4 Test di trasmissione 65 5 Montaggio 66 6...

Страница 63: ...iante Lampeggio rapido Tremolante Parte posteriore fig 2 Piastra posteriore Blocco sblocco piastra posteriore ruotare di 90 Foro vite per montaggio a parete Vano batterie Vite e tassello Nota Per atti...

Страница 64: ...to ambiente Premere il pulsante I LED e sono tre molanti durante la comunicazione Selezionare l uscita sul Regolatore principale Si accendono tutti i LED d uscita disponibili sul Regolatore principale...

Страница 65: ...er gestione orario e zone impo stata dal regolatore a distanza CF RC Impostazione delle temperature fig 1 La temperatura ambiente effettiva viene indica ta a display per default Impostazione della tem...

Страница 66: ...lsante sul display appare la temperatura ambiente effettiva 4 Test di trasmissione Far partire il test di trasmissione sul Termostato ambiente fig 1 Premere il pulsante Il LED si accende Il test di co...

Страница 67: ...tallare il termostato ambiente in una posizione tale da evitare gli effetti della luce solare di correnti d aria di altre fonti di calore es TV ecc Montaggio con viti fig 2 Piastra posteriore Foro vit...

Страница 68: ...da eliminare mediante il pulsante di selezione uscita Eliminare l uscita lampeggiante con OK 7 Specifiche Intervallo di impostazione della temperatura 5 35 C Frequenza di trasmissione 868 42 MHz Porta...

Страница 69: ...le Il LED e lampeggiano ogni 5 minuti Carica della batteria bassa Il LED e lampeggia no ogni 30 sec Carica della batteria critica Il LED e lampeggiano Carica della batteria critica si interrotta la tr...

Страница 70: ...Fig 1 A1...

Страница 71: ...Fig 2 Fig 3 1 5 m A2...

Страница 72: ...088N2461 01 03 2007 Version 04...

Отзывы: