Calibir 640 GigE IR Camera User's Manual
Quick Start Guide
•
21
Camera Connection Setup
•
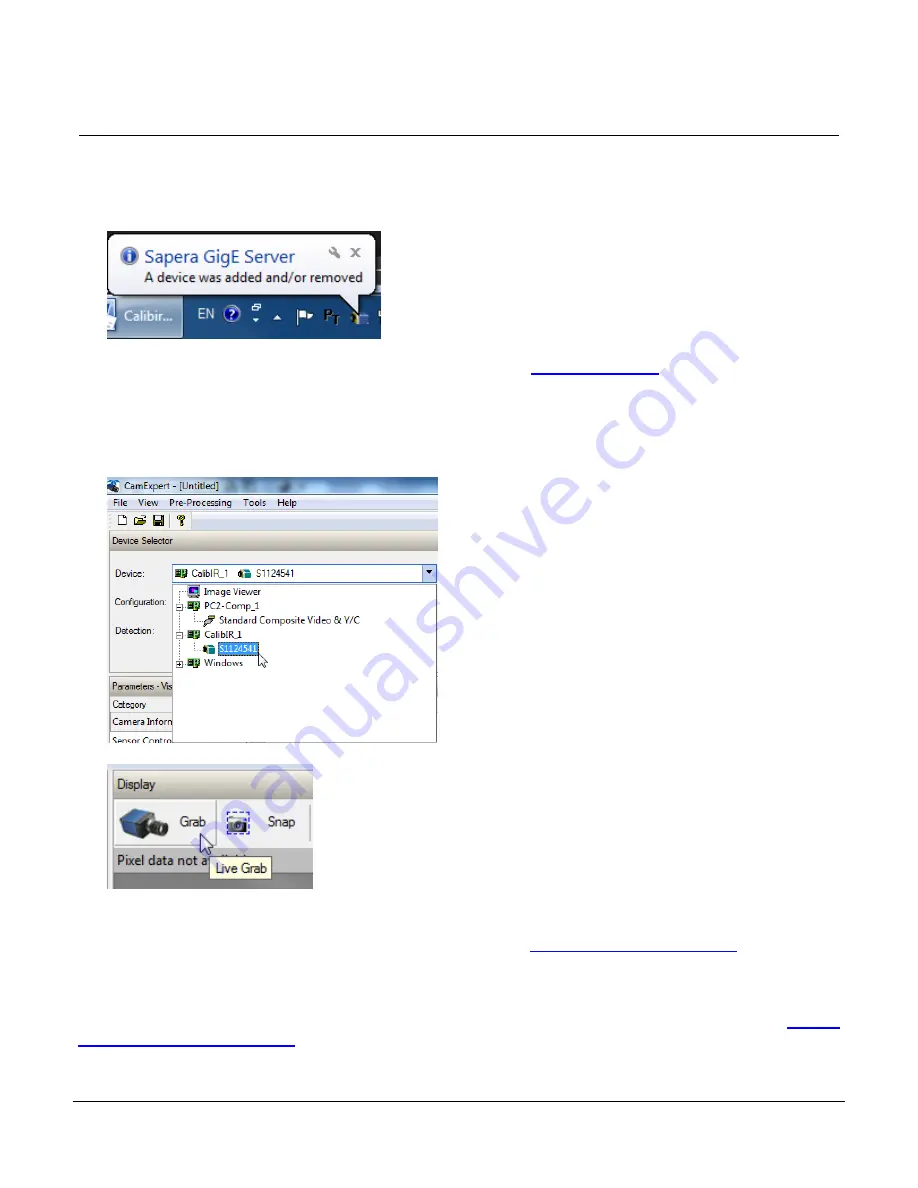
Connect Calibir to the spare NIC and wait for the GigE Server Icon in the Windows tray to show
that the Calibir is connected.
If the camera is not automatically detected, refer to the Troubleshooting section for possible
solutions.
•
The Calibir Status LED will be steady Blue.
•
Start CamExpert. The Calibir Status LED will be steady light blue.
•
Select the Calibir 640 GigE camera using the Device Selector:
•
Click the Grab button for live acquisition.
•
Adjust the lens as required (if no lens is available, select a test pattern from the Image Format
Feature Category).
•
If a firmware update is available for the camera see the Camera Firmware Updates section for
information how to perform a firmware update.
•
To obtain the best quality images possible, a single point fixed pattern noise (FPN) correction
can be performed when the camera is at the required working temperature in the expected
application environment. For more information on how to perform FPN correction, see the Fixed
Pattern Noise Correction section.
Содержание CALIBIR 640 GigE
Страница 57: ...Calibir 640 GigE IR Camera User s Manual Operational Reference 57 Figure 29 Sapera CamExpert GUI Layout...
Страница 88: ...88 Technical Specifications Calibir 640 GigE IR Camera User s Manual EC FCC Declarations of Conformity...
Страница 89: ...Calibir 640 GigE IR Camera User s Manual Technical Specifications 89...


