


3
x
Installation
EKSV21P/EKSV26P/EKSH26P
Solar panels on-roof installation
008.1618444_00 – 12/2012
Installation instructions
33
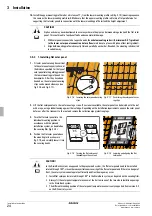
3.4.8 Installing solar panel temperature sensor
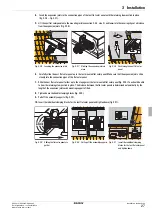
CAUTION!
Plastic connection pipes will not conduct voltages induced by electrical storms. Under adverse circumstances,
these voltages can extend through the solar panel sensor up to the control and thus damage both.
• Carry out equipotential bonding ("Earthing") between foundation earth connection and solar panel array.
This should only be performed by an authorised specialist (electrician) in accordance with the local regulations.
The installation openings for the solar panel temperature sensor are located left and right on the side solar panel
frame and are blanked off with plugs in the as-delivered condition.
In the Drain-Back system, as opposed to the pressurised system, the flat solar panels need to be installed
rotated through 180°.
This produces the following mounting positions for the solar panel temperature sensor:
–
Installation opening at the bottom edge of the solar panel
–
Installation opening at the top edge of the solar panel
The different mounting position of the solar panel temperature sensor is only supported from version 4.2 on the
R3 control system.
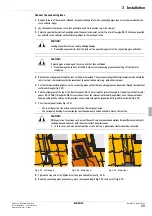
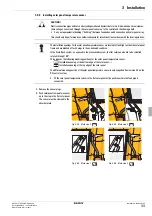
• Fit the solar panel temperature sensor in the flat solar panel at the position where the feed pipe is
connected.
1.
Remove the sensor plugs.
2.
Push solar panel temperature sensor
up to the stop in the flat solar panel.
The sensor must be clamped to the
absorber plate.
Fig. 3-52 Work step 1 -
Fig. 3-53 Work step 2 -
Fig. 3-54 Work step 1 -
Fig. 3-55 Work step 2
-


