Page 40 of 60
IM 817-4
Mounting
The MicroTech II™ Wall Mount Sensor allows for two mounting
methods: wallbox mounting and surface mounting.
Note:
Wallbox mounting requires the large mounting base.
Use either the large or small mounting base for surface mounting.
Performing Wallbox Mounting
To perform wallbox mounting (Figure 105):
1. Slide the desired cover slider insert onto the cover until it
snaps into place.
2. Remove the two endcaps from the mounting base.
3. Loosen the cover screw using a 1.5 mm (1/16 in.) Allen
wrench and remove the sensor.
4. Pull the cable or wiring through the wallbox and mounting base.
5. Rotate the mounting base until one of the arrows on the
base points up and the screw openings in the base align
with the threaded holes in the wallbox. If necessary, reposition the
cover screw above the arrow.
6. Fasten the base to the wallbox with the No. 6-32 x 1 in.
screws provided.
7. Remove terminal block and wire to the appropriate terminals as
shown in
”Wiring”
.
9. Replace the sensor and tighten the cover screw.
10. Replace the two endcaps on the mounting base.
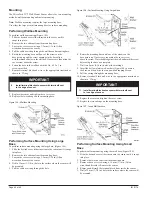
Figure 105 - Wallbox Mounting
Performing Surface Mounting Using Large
Base
To perform surface mounting using the large base. (Figure 106):
1. Slide the desired cover slider insert onto the sensor until it snaps
into place.
2. Remove the two endcaps from the mounting base.
3. Loosen the cover screw using a 1.5 mm (1/16 in.) Allen
wrench and remove the sensor.
4. Drill a 35 mm (1-3/8 in.) hole in the surface where the sensor will
be mounted.
5. Pull the cable or wiring through the hole.
6. Rotate the mounting base until one of the arrows on the
base points up. If necessary, reposition the cover screw
above the arrow. Place the base against the wall, and mark the screw
holes using the base as a template.
7. Drill two 8 mm (5/16 in.) holes at the markings.
8. Insert the hollow plastic wall anchors (Figure 106), position
the base, and then drive the two pan-head tapping screws.
9. Pull the wiring through the mounting base.
10. Remove terminal block and wire to the appropriate terminals as
shown in “
Wiring”
.
11. Install terminal block onto sensor with terminal 6 next
to the edge of sensor.
12. Replace the sensor and tighten the cover screw.
13. Replace the two endcaps on the mounting base.
Figure 107 - Insert Wall Anchors
Performing Surface Mounting Using Small
Base
Figure 106 - Surface Mounting Using Large Base
To perform surface mounting using the small base (Figure 108):
1. Slide the desired cover slider insert onto the sensor until it snaps
into place.
2. Remove the two endcaps from the mounting base.
3. Remove the cover screw using a 1.5 mm (1/16 in.) Allen
wrench and discard it. Remove the sensor.
4. Remove and discard the terminal block from inside the sensor.
5. Drill a 35 mm (1-3/8 in.) hole in the surface where the sensor will
be mounted.
8.
Install terminal block onto sensor with terminal 6 next
to the edge of sensor.
IMPORTANT
IMPORTANT


