background image

IVSS Client


40


IVSS  Client 

System supports to work with the corresponding general applications (IVSS) to access the 

Device remotely. It is to realize system configuration and operations.   

If you are using general browser to login the Device, Web login interface displays IVSS browser 

information. You can get IVSS installation package.   

  Open the browser, enter IP address, and then click Enter key.   

Step 1

Enter Web login interface.   

  Click Download to download IVSS browser installation package.   

Step 2


NOTE


If you have downloaded IVSS browser packages, click Run to enable IVSS browser.   

  Double click the IVSS installation package and install the IVSS client according to the 

Step 3

prompts.   

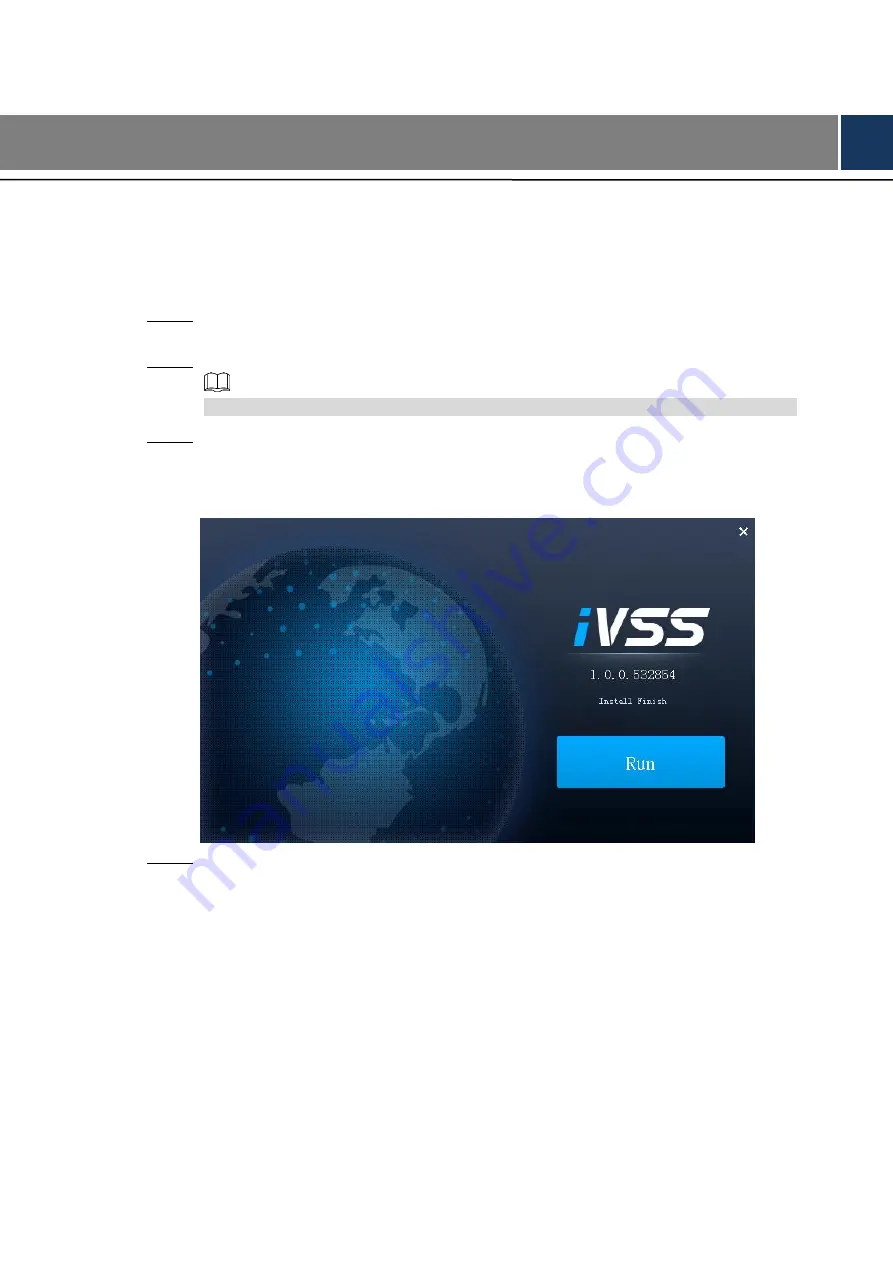
After the installation is completed, the interface is shown as in Figure 6-1. 

 Successful installation 

Figure 6-1


  Click Run to enter the IVSS client. 

Step 4


Содержание IVSS

Страница 1: ...Intelligent Video Surveillance Server Quick Start Guide V1 1 0 ...

Страница 2: ... be changed to any set of numbers between 1025 65535 Avoiding the default ports reduces the risk of outsiders being able to guess which ports you are using 3 Enable HTTPS SSL Set up an SSL Certificate to enable HTTPS This will encrypt all communication between your devices and recorder 4 Enable IP Filter Enabling your IP filter will prevent everyone except those with specified IP addresses from ac...

Страница 3: ...ng SNMP you should do so only temporarily for tracing and testing purposes only 12 Multicast Multicast is used to share video streams between two recorders Currently there are no known issues involving Multicast but if you are not using this feature deactivation can enhance your network security 13 Check the Log If you suspect that someone has gained unauthorized access to your system you can chec...

Страница 4: ...ditional information as the emphasis and supplement to the text Privacy Protection Notice As the device user or data controller you might collect personal data of others such as face fingerprints car plate number Email address phone number GPS and so on You need to be in compliance with the local privacy protection laws and regulations to protect the legitimate rights and interests of other people...

Страница 5: ... the Guide are the properties of their respective owners Please visit our website contact the supplier or customer service if there is any problem occurred when using the Device If there is any uncertainty or controversy please refer to our final explanation Writing Conventions In order to simplify the description the commonly used functional names in the Guide are made as follows The remote devic...

Страница 6: ...ed battery type Otherwise there may be explosion risk Make sure to use batteries according to requirements otherwise it may result in fire explosion or burning risks of batteries To replace batteries only the same type of batteries can be used Make sure to dispose the exhausted batteries according to the instructions The product shall use electric wires power wires recommended by this area which s...

Страница 7: ...e 7 2 4 Connecting Cables 10 3 Initial Configuration 12 3 1 Boot up 12 3 2 Initializing the Device 12 3 3 Quick Settings 14 System Time 14 3 3 1 IP Address Settings 15 3 3 2 P2P Settings 17 3 3 3 3 4 Registering Remote Device 18 4 Business Operations 23 4 1 Logging In 23 4 2 Preview and Monitor 25 View Management 25 4 2 1 Preview 29 4 2 2 4 3 Record Playback 32 4 4 AI Detection Settings 33 Enablin...

Страница 8: ...nd then play back videos This series product has user friendly interface which is suitable for users to operate At the same time it supports real time alarm and search record file or image by human face features which greatly enhance record file search speed This series product supports 4K and H 265 decoding It meets the main development trend of current market This series product can be widely us...

Страница 9: ...ing properly The indicator light is off Device is not running 4 Alarm indicator light It is to display local input alarm status The indicator light is off There is no local alarm input event The blue indicator light is on There is one or more local alarm input event 5 Network indicator light It is to display current network status The blue indicator light is on At least one Ethernet port has conne...

Страница 10: ...I module indicator light It is to display AI module status When the yellow light flashes AI module is running properly When the yellow light is on AI module is in malfunction NOTE This function is null if there is no AI module 3 RESET button Use a needle or something like that to press the button device restores factory default settings 4 High Definition Media Interface High definition audio and v...

Страница 11: ...t can connect to the SAS extension controller 11 Network port 10M 100 1000Mbps self adaptive Ethernet port Connect to the network cable 12 Alarm input 16 groups 1 16 alarm input ports corresponding to ALARM 1 ALARM 16 The alarm becomes valid in low level A B cable Control the A B cable of the RS485 device It is to connect to the PTZ camera Please parallel connect 120Ω between A B cables if there a...

Страница 12: ...r after sales engineer immediately Sequence Checking items Requirement 1 Package Appearance No obvious damage Packing materials No broken or distorted positions that could be caused by hit Accessories Complete 2 Labels Labels on the Device Not torn up Do not tear up or throw away the labels otherwise the warranty services are not ensured You need to provide the serial number of the product when yo...

Страница 13: ...x Place one side of the HDD closely along the upper side of the box and press down to push the HDD down to the lower side of the mounting surface Insert the HDD box into the HDD slot press it to the bottom and then close the box handle Removing HDD Press the button on the front panel of IVSS device open the handle and then pull out the HDD box On the back of the HDD box press hard on the position ...

Страница 14: ...S device open the handle and then pull out the HDD box Unlock the screws on the back of the HDD box NOTE The screws are at different positions for different HDDs See the actual situation Take out the HDD and reinsert the box to the slot Push it to the bottom and close the box handle 2 3 Installing AI Module The Device supports to install AI module to realize smart detective functions such as face ...

Страница 15: ...ot support hot plug If you need to replace the AI module unplug the device power cable first Otherwise it will lead to file damage on the AI module Remove the screws on the rear panel of the Device See Figure 2 1 Step 1 Install AI module 1 Figure 2 1 Remove the case cover See Figure 2 2 Step 2 Install AI module 2 Figure 2 2 Install the double screw bolts and AI module and then fasten the screws Se...

Страница 16: ...the AI module See Figure 2 4 Step 4 Install AI module 4 Figure 2 4 Optional Install the rest AI modules according to Step 3 to Step 4 Step 5 Put back the cover and fasten the screws on the rear panel See Figure 2 5 Step 6 Install AI module 5 Figure 2 5 Check AI module version Step 7 Turn on the Device 1 ...

Страница 17: ...ersion is not matched you need to upgrade the host For details see IVSS User s Manual Host upgrade Figure 2 6 AI module upgrade Figure 2 7 2 4 Connecting Cables For the device connection see Figure 2 8 The following figure is for reference only The actual product shall prevail Display mouse and keyboard are needed for local operation Before using the smart detective functions such as face detectio...

Страница 18: ...n and Connection 11 CAUTION AI module does not support hot plug If you need to replace the AI module unplug the device power cable first Otherwise it will lead to file damage on the AI module Connection Figure 2 8 ...

Страница 19: ...ure Some series products do not have power on off button connect the Device to the power socket to boot up directly Before you boot up the Device see 2 4 Connecting Cables to connect the cables For 8 HDD series product Press the power button on the rear panel to boot up the Device For other series products Connect to the power socket to boot up the Device After clicking shut down on the GUI to tur...

Страница 20: ... It is recommended to set password of high security according to the prompts Click Next Step 3 Enter password protection interface See Figure 3 2 Password protection Figure 3 2 Figure 3 1 Set password protection information For details see Figure 3 1 Step 4 Configure the security questions You can use the email you input here or answer the security questions to reset admin password NOTE Click to c...

Страница 21: ...ce initialization Step 5 System displays device initialization successful interface See Figure 3 3 Click Enter Quick Settings to go to the quick setting interface It is to set device basic information For details see 3 3 Quick Settings Successful Figure 3 3 3 3 Quick Settings After initialize the Device it goes to quick settings interface You can quickly set system time IP address and P2P System T...

Страница 22: ...nc with Internet Time Server check box enter the IP address or domain name of the NTP server and then enter the time interval Time and Date Format Select the display format of system date and time Time Zone Select the time zone that the Device locates Click Next to save the configuration Step 3 IP Address Settings 3 3 2 Modify device information such as IP address and DNS server according to the n...

Страница 23: ...ure 3 6 Editing Ethernet network Figure 3 6 Configure the parameters 2 When there is a DHCP server in the network select this check box and the system can allocate a dynamic IP address to the Device There is no need to set IP address manually When selecting using static IP address you can enter the static IP address subnet mask and gateway to set a fixed IP address for the Device ...

Страница 24: ...IC according to practical needs NOTE Only the NIC connected to the network can be set as default NIC Click Next to save the configuration Step 5 P2P Settings 3 3 3 P2P is a peer to peer technology You can scan the QR code to download cellphone APP without DDNS service or the port mapping or installing the transmission server After registering the device to the APP you can view the remote video and...

Страница 25: ...t is to search the remote devices on the same network and then filter to register It is useful if you do not know the exact IP address Manual add For some remote devices you can input IP address user name and password to register NOTE Uninitialized remote device cannot register to the system For detailed information see User s Manual The following contents are introduced in the example of smart ad...

Страница 26: ...ere is no specified search condition the system searches for the remote devices in the same IP segment by default Click 1 The Add interface is displayed See Figure 3 10 Remote device register Figure 3 10 Select the manufacturer and enter the IP address to search for 2 IP address Enter the IP address of the remote device The system only ...

Страница 27: ... OK to save the configuration 3 The system returns to the Add Device interface Click Start Search 4 The system starts to search the remote devices and displays the results See Figure 3 11 Search results Figure 3 11 Register remote device Step 4 Add 1 channel remote device Select a remote device and then click Add The Device begins adding remote device and pops up confirmation interface See Figure ...

Страница 28: ...See Figure 3 13 Add confirmation 2 Figure 3 13 Double click Please select a channel and select the channel you need to add 2 Click enter the key words in the search box and then you can search the channel quickly Click OK to add the selected channel 3 Click Continue to add or Finish Step 5 Continue to add System goes back to Smart Add interface to add more remote devices ...

Страница 29: ...Initial Configuration 22 Finish Complete adding remote device System displays Device Manager interface to view the newly added remote device information ...

Страница 30: ... on the Device Step 1 Enter login interface See Figure 4 1 Login Figure 4 1 Enter the username and password Step 2 NOTE Default user name is admin The password is that you set during initialization process For your device safety change the admin password regularly and keep it well In case you forgot password click Forgot password to reset it For details see User s Manual Click Login Step 3 Enter t...

Страница 31: ...erface to view or enable the applications 3 Operation interface It is to display currently enabled app operation interface 4 System info Click to view system information 5 Background task Click to view the background running task information 6 Multiple screen control Click to control the local screen NOTE This function is for local menu only 7 System settings Click to enter system setting interfac...

Страница 32: ...ays Live interface by default View Management 4 2 1 View is a video component of several remote devices Go to the view pane at the top left corner of the Live interface to view or call the view See Figure 4 3 System has created View Group by default Please create more views or view groups under the View Group Double click the view or drag the view to the play pane on the right side and the system ...

Страница 33: ...ne After adding one remote device the view edit pane displays layout split line See Figure 4 5 Each layout grid supports one remote device If you want to add several remote devices please drag the rest remote device to other idle layout grid If the layout grid has added the remote device dragging another remote device to the current grid is to replace the original one Move the mouse to the orange ...

Страница 34: ...or Cannot drag the view window to the layout grid if its background color is orange Edit view 2 Figure 4 5 Set view name Step 3 The view group name ranges from 1 to 64 digital It can contain English letters number and special character Click OK to save the settings Step 4 System pops up the successful interface 4 2 1 2 Enable view Follow the steps listed below to enable view Right click view and t...

Страница 35: ... position permanently go to the view edit mode to set For details see User s Manual Zoom in video window Once the current view window number is too many more than 9 click one view window and the system displays current view window at the center of the window in the zoom in mode Click any other blank position and you can view window restores original size Double click a view window and the system d...

Страница 36: ...unction go to the preview interface to view AI detection results NOTE To enable AI detect function see User s Manual Go to the Live interface enable view and the system displays view video See Figure 4 7 The view window displays currently detected human face rule rectangle The view window displays properties pane such as human face detected image and human face comparison results on the right pane...

Страница 37: ...e Figure 4 10 Click to add this image to the face database AI detection images 2 Figure 4 10 Move the cursor to the detected face image and click or double click the image and the system plays the record 20 seconds before and after the image See Figure 4 11 NOTE The system supports this function only when a record is available Click to pause and the icon becomes Click to continue Click to exit the...

Страница 38: ...e Figure 4 12 It is to set AI detection results displayed rule and features pane transparency NOTE Click Sync from AI Dis and you can get global intelligent detection display rule from the device directly For details see User s Manual Click Apply to all windows to copy current configuration to other window s Human face Figure 4 12 ...

Страница 39: ...me bar displays the record period green color means there is a record Drag the thumbnail to the playback window or double click the thumbnail Step 4 Device begins to play the record See Figure 4 14 NOTE The playback window amount depends on the thumbnail amount or you can drag to set System max supports 16 windows System automatically adjusts each window size according to the playback file origina...

Страница 40: ...e detection rule Enabling AI Plan 4 4 1 The AI detection function becomes valid once you enabled AI plan NOTE Some remote devices do not support AI plan See the actual interface The interface might vary since the remote device supports different AI functions See the actual interface Click and select EVENT Step 1 The EVENT interface is displayed After selecting the remote device select AI Plan AI P...

Страница 41: ...deos collected by the IPC and the system triggers alarm once any human face information is detected NOTE Enable human face detection plan For details see 4 4 1 Enabling AI Plan Click and select EVENT Step 1 The EVENT interface is displayed Select the remote device in the Device list and then select AI Plan Face Detection Step 2 The Face Detection interface is displayed See Figure 4 16 ...

Страница 42: ...Click to enable face enhance Step 4 After face enhance is enabled the system displays enhanced human faces on the monitor screen NOTE Only AI by camera supports this function Press and hold down the left mouse button and draw the face detection zone on the Step 5 screen Click or to set the minimum size and maximum size of face detection Only when the target size is between the min size and max siz...

Страница 43: ...alarm NOTE The following contents are based on AI by device Face database is already created For details see User s Manual You need to enable the face detection function For details see 4 4 2 Human Face Detection Click and select EVENT Step 1 The EVENT interface is displayed After selecting the remote device select AI Plan Face Recognition Step 2 The Face Recognition interface is displayed Click A...

Страница 44: ... 4 18 Configure the parameters For details see Table 4 3 2 Description of stranger control mode parameters Table 4 3 Parameter Description AI Alarm Rule Click it to select the color for the alarm rule box Show Feature Panel When it is enabled the system displays the stranger panel on the LIVE interface when an alarm is triggered Configure alarm linked events 3 Configure the linked face database St...

Страница 45: ... Enable Show Feature Panel and the system displays the face recognition panel on the LIVE interface Click to configure the alarm linked events 3 NOTE When selecting snapshot the system only supports to activate the current channel for snapshot The system supports to activate multiple channels for video recording Click Save to save the configuration Step 8 4 5 Logout Reboot Shutdown Logout Click an...

Страница 46: ...ly recommend you to use IVSS browser For details see 6 IVSS Client Before you use Web function make sure the network between the Device and PC is proper System supports general browser such as Google Chrome and Firefox to access Web Please use the latest browser version Open the browser enter IP address and then click Enter key Step 1 Enter Web login interface See Figure 5 1 Enter the username and...

Страница 47: ...allation package Open the browser enter IP address and then click Enter key Step 1 Enter Web login interface Click Download to download IVSS browser installation package Step 2 NOTE If you have downloaded IVSS browser packages click Run to enable IVSS browser Double click the IVSS installation package and install the IVSS client according to the Step 3 prompts After the installation is completed t...

Страница 48: ...hin the deployment period There is no activation human face database or the human face database has no data The human face similarity setting is too high After enabling AI by camera there is no human face recognition event Human face recognition is not enabled on the AI plan Human face database is not configured on the Web interface of the remote device It is not within the deployment period There...

Отзывы: