281
3 Installation and Connections
Note: All the installation and operations here should conform to your local electric
safety rules.
3.1 Check Unpacked DVR
When you receive the DVR from the forwarding agent, please check whether there is any
visible damage. The protective materials used for the package of the DVR can protect
most accidental clashes during transportation. Then you can open the box to check the
accessories.
Please check the items in accordance with the list. Finally you can remove the protective
film of the DVR.
Note
Remote control is not a standard accessory and it is not included in the accessory bag.
3.2 About Front Panel and Rear Panel
The model in the front panel is very important; please check according to your purchase
order.
The label in the rear panel is very important too. Usually we need you to represent the
serial number when we provide the service after sales.
3.3 HDD Installation
Important
Shut down the device and then unplug the power cable before you open the case to
replace the HDD!
All figures listed below for reference only!
This series DVR has 1 to 8 HDDs (no limitation for capacity). Please use HDD of 7200rpm
or higher. Usually we do not recommend the HDD for the PC. You can refer to the
Appendix for recommended HDD brand.
Please follow the instructions listed below to install hard disk.
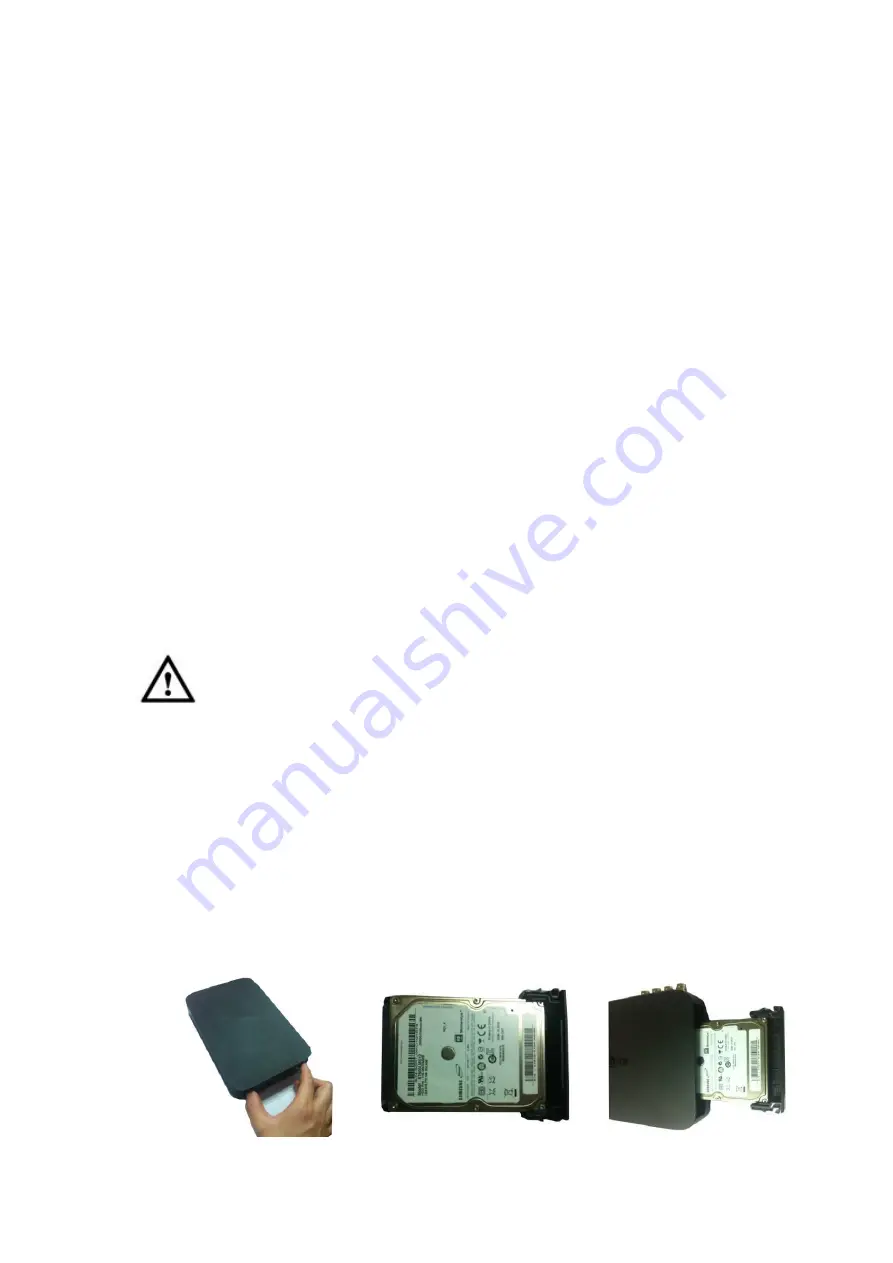
3.3.1 Smart Box Series
Please make sure the metal surface of the HDD is facing up when you are installing!
This series product has only one 2.5-inch SATA HDD.
Please follow the instructions below to install HDD.
Содержание HCVR5104C Series
Страница 1: ...Dahua HDCVI Standalone DVR User s Manual Dahua HDCVI Standalone DVR User s Manual V2 3 2 ...
Страница 200: ...184 ...
Страница 402: ...386 restore original status Figure 4 115 Figure 4 116 4 9 1 3 1Upgrade Camera It is to update the online camera ...
Страница 425: ...409 Figure 4 137 Figure 4 138 ...
Страница 432: ...416 Figure 4 145 Step 2 Draw tripwire 1 Click Draw button to draw the tripwire See Figure 4 146 Figure 4 146 ...
Страница 436: ...420 Figure 4 149 Step 2 Draw the zone 1 Click draw button to draw the zone See Figure 4 150 Figure 4 150 ...
Страница 438: ...422 Figure 4 151 Step 2 Draw the zone 1 Click draw button to draw the zone See Figure 4 152 Figure 4 152 ...
Страница 440: ...424 Figure 4 153 Step 2 Draw the zone 1 Click Draw button to draw a zone See Figure 4 154 ...
Страница 446: ...430 Figure 4 157 Figure 4 158 ...
Страница 447: ...431 Figure 4 159 Figure 4 160 ...
Страница 448: ...432 Figure 4 161 Figure 4 162 ...
Страница 451: ...435 Figure 4 165 Figure 4 166 ...
Страница 452: ...436 Figure 4 167 Figure 4 168 ...
Страница 458: ...442 Figure 4 177 Figure 4 178 4 9 4 1 2 2 Trigger Snapshot ...
Страница 460: ...444 Figure 4 180 Figure 4 181 4 9 4 1 2 3 Priority ...
Страница 466: ...450 Figure 4 186 Figure 4 187 ...
Страница 471: ...455 Figure 4 193 Figure 4 194 ...
Страница 484: ...468 Figure 4 209 For digital channel the interface is shown as below See Figure 4 210 Figure 4 210 ...
Страница 491: ...475 Figure 4 218 Step 2 Click Add user button in Figure 4 218 The interface is shown as in Figure 4 219 Figure 4 219 ...
Страница 557: ...541 Figure 5 69 Figure 5 70 ...
Страница 573: ...557 device Figure 5 86 Figure 5 87 ...
Страница 579: ...563 Figure 5 94 Figure 5 95 ...
Страница 580: ...564 Figure 5 96 Figure 5 97 Please refer to the following sheet for detailed information ...
Страница 584: ...568 Figure 5 101 Figure 5 102 Figure 5 103 Please refer to the following sheet for detailed information ...
Страница 607: ...591 Figure 5 136 Note For admin you can change the email information See Figure 5 137 ...
Страница 637: ...621 448K 196M 512K 225M 640K 281M 768K 337M 896K 393M 1024K 450M 1280K 562M 1536K 675M 1792K 787M 2048K 900M ...


