7
If the ‘CLOCK SET’ display is not already on the screen
press
MENU
.
Choose ‘VCR SET UP’ by pressing
PR-
twice, then
OK
.
Choose ‘CLOCK SET’ then press
OK
.
CLOCK SET
0-9:SETUP(HOUR)
/ :CORRECT
OK:CONFIRM MENU:END
CLOCK SET
0-9:SETUP(HOUR)
/ :CORRECT
OK:CONFIRM MENU:END
TIME - -:- -
DATE - -/- -/- - - -
TIME 11:41
DATE 16/08/2004(MON)
Setting time and date
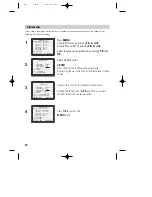
1
2
Once the ‘CLOCK SET’ display is on the screen, move to the
position you want to change by pressing or .
Use the number buttons
0
to
9
on the remote control to
enter the correct time and date.
Press
OK
to confirm the settings, and press
MENU
to end.
Auto Clock
VCR SETUP
CLOCK SET
RF OUTPUT SET
16:9 SET
OSD ON/OFF
AUTO CLOCK
PR+/-:SELECT
OK:CONFIRM MENU:END
AUTO CLOCK
ON
OFF
PR+/-:SELECT
OK:CONFIRM MENU:END
Auto Clock is only available for models with the PDC function (see page 18).
Some broadcasting stations may send the time and date along with the PDC data. The
video will automatically use this time and date during the initial setting up procedure
during normal use, and every time you switch the video off at the mains. If you find that
this time and date is incorrect you can remove this feature by following the steps below
changing it to OFF mode, you will then have to manually set the time and date, see above.


