Daewoo DR-C92D1N Скачать руководство пользователя страница 5

oduct

Information

7

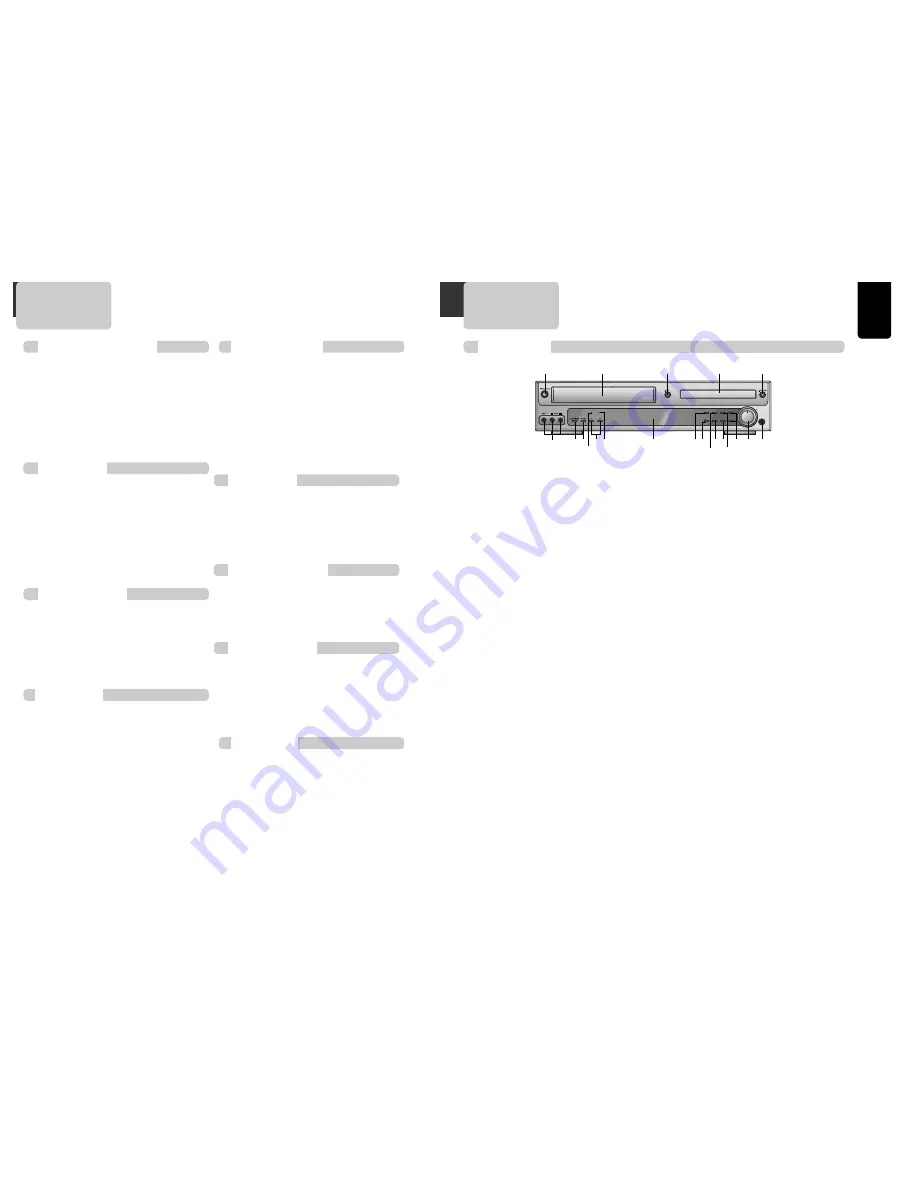
Identification of Controls 

Front panel

!

Power (STANDBY/ON) button

Use to power the device on/off if AC power supply

is connected. 

@

Place to insert videotape 

Insert the desired tape.

#

Eject button 

Use to eject the tape.

$

Disc tray 

%

Open/Close Tray button 

Open or close tray by pressing [OPEN/CLOSE]

button. Place a disc on the disc tray, label side up.

^

Video / Audio input 3 jack

Connect a cable coming from the video/audio out

jacks of a camcorder, another VCR, or an audio

visual source here.

&

Playback/PAUSE button

Playback videotape or disc. 

Press this button to pause a screen. 

*

Stop/MEMORY button

Use to stop playing a tape or disc. Use to memory

radio stations.

(

Tuning & Search –/+

Search- (

œœ

):

Use to rewind currently being

played videotape or disc; or to playback back

rapidly.

(

√√

): 

Use to wind currently being played

videotape or disc; or to playback rapidly. 

Tuning –/+ :

Scan all available radio stations.

)

VHS/REC indicator

The indicator lights in yellow-green in VHS mode.

The indicator lights in red in Recording mode. 

1

DVD/P.SCAN indicator

The indicator lights in yellow-green in DVD mode.

The indicator lights in red in Progressive Scan

mode.

2

Operation Display Window

Display operation of device. For more information,

see “Operation Display Window” in the next page.

3

VCR button

Use to change into VCR or external Input mode.  

4

Record button 

Record a program from TV or other sources

(except DVD).

5

DVD button

Use to change into DVD mode.

6

P.SCAN button

Use to enter into Progressive Scan mode. 

7

SOUND FIELD button

Use to adjust the Sound Fields.

8

AM/FM button

Use to change into RADIO mode.

9

Channel & Preset –/+

Use to select the memorized TV broadcasting

channel or radio stations.

0

Volume control

Change the loudness of the sound from the

speakers connected to the unit.

Headphone jack

6

Contents

L

R

VCR/REC

REW

TUNING

FF

DVD/P-SCAN

VCR

DVD

AM/FM

CH/

REC

P.SCAN

SOUND FIELD CH/PRESET–

MIN

MAX

PHONES

!

&*

2

1

^

@

$

%

#

(

3

67

0 “

4

)

8

9

5

Important Safeguards ................................. 1 
Advantages of This Product Are  .... ............... 4 
Read Carefully before Using ......................... 5 
Contents ................................................ 6 
Identification of Controls  ............................ 7 
Remote Control  ...................................... 10

Connecting with TV .................................. 12 
FM/AM Antenna connection ........................ 14
Speaker system connection  ........................ 15
Connecting with Other Equipment  ............... 16 
Output Select  ........................................ 18 
Clock Set   ............................................. 19

VCR Operation

VCR Playback  ......................................... 20
Memorizing TV Channels  ........................... 21
Using advanced features  ........................... 23 
Hi-Fi Stereo Playback ................................ 26

Recording

Recording ............................................. 44
Timer Recordings   ................................... 46
Watching and Recording Cable TV ................ 49

Radio Operation

Presetting the radio stations ....................... 50
Listening to the radio   .............................. 51

Speaker Setup

Speaker Setup for enjoying the surround sound
effect .................................................. 52
Delay Time Setting  .................................. 54
Setting the sound level  ............................. 56

Installation

DVD Playback ......................................... 32
Playing a desired scene.............................. 34
Confirming the current PLAY mode on screen .. 38
AUDIO, SUBTITLE language and Sound Fields.... 40
ZOOM and Multi Angle ............................... 41
About MP3 discs ...................................... 42
Displaying menu in a disc ........................... 43

DVD initial setting

LANGUAGE Setup .................................. 27
DISPLAY Setup ...................................... 28
AUDIO Setup........................................ 29
RATINGS Setup ..................................... 30

About DVD ............................................. 58
Basic information about VCR and Videotape.... 60
Before doubting about troubles (DVD)  ........... 61
Before doubting about troubles (VCR) ............ 62
Specifications ........................................ 64

DVD Setup

DVD Operation

The others

Product Information

Содержание DR-C92D1N

Страница 1: ...t does not operate Please only use a disc with region code 4 or ALL is a Prohibition mark If this mark is displayed in operating the product please wait for a while then use it If Prohibition mark continues to be displayed in pressing a button after that it means the button does not function in the currently played disc Press a product button on the remote control then use the product DVD operatio...

Страница 2: ...ailed or defeated Avoid direct exposure to beam CAUTION Do not open the top cover There are no user serviceable parts inside the Unit leave all servicing to qualified service personnel CLASS 1 LASER PRODUCT FCC NOTICE This equipment has been tested and found to comply with the limits for a Class B digital device pursuant to part 15 of the FCC Rule These limits are designed to provide reasonable pr...

Страница 3: ...entry as practical 13 Outdoor Antenna Grounding If an outside antenna or cable system is connected to the product be sure the antenna or cable system is grounded so as to provide some protection against voltage surges and built up static charges Section 810 of the National Electrical Code ANSI NFPA No 70 1984 Section 54 of Canadian Electrical Code Part 1 provides PORTABLE CART WARNING symbol provi...

Страница 4: ...y affect image or voice poorly or damage recording Do not spill volatile liquids like insect spray over the player Do not leave rubber or plastic products in contact with the player for a long time They will cause deterioration or paint peel off Not in use When the unit is not in use be sure to remove the disc or tape and turn off the power If you do not use the unit for a long period remove batte...

Страница 5: ...to enter into Progressive Scan mode 7 SOUND FIELD button Use to adjust the Sound Fields 8 AM FM button Use to change into RADIO mode 9 Channel Preset Use to select the memorized TV broadcasting channel or radio stations 0 Volume control Change the loudness of the sound from the speakers connected to the unit Headphone jack 6 Contents L R VCR REC REW TUNING FF DVD P SCAN VCR DVD AM FM CH PRESET REC...

Страница 6: ...input Note VCR signal is only available from Composite Video Out jack and RF Out You must always connect these to the TV in order to set up and use your unit Subwoofer Pre Output Jack Connect an active subwoofer to improve bass performance especially in a large room A V Output Jack A V Input 2 Jack A V Input 1 Jack 1 Connection to TV Required connection for VCR operation Connect one end of the RF ...

Страница 7: ...ton w Adjust the volume E SOUND FIELD button e DVD VCR OSD DISPLAY button R ENTER Confirm selections on a menu screen button r DVD MENU button T DVD Progressive Scan button t DVD Sound LEVEL adjust button Y DVD DELAY adjust button y SLOW FORWARD REVERSE button VCR Frame Advance button in pause mode U DVD VCR FORWARD REVERSE SEARCH button RADIO Scan all available radio stations u DVD ANGLE VCR Reco...

Страница 8: ...he component video connection only supplies video picture in the DVD mode of the DVD Video Therefore in order to use the VCR features or view TV channels at the DVD Video you still need to either connect the RF coaxial cable between the ANT OUT jack of the DVD Video and the TV s Antenna In jack or connect the video cable In the initial SET exclusive channel for video is set to CH 3 To change this ...

Страница 9: ...o obtain the best possible surround sound adjust the speaker parameters distance level etc Front speaker right Front speaker left Rear speaker left surround Rear speaker right surround Center speaker Subwoofer If you feel lack of bass frequency Connect an active subwoofer to the WOOFER OUT connector using a monaural audio cord not supplied When you connect an active subwoofer disconnect the woofer...

Страница 10: ...on Recording is released automatically after 5 minutes since pressing PAUSE button Press REC button if you want to record again RF Cable AUDIO VIDEO Cable You can connect a wide variety of audio video equipment to your DVD Video including an additional VCR Laser Disc Player DVD Player Camcorder Satellite Receiver Video Game Since all of these devices use essentially the same connections they will ...

Страница 11: ...o Select VCR Press VCR button If VCR mode is correctly selected VCR indicator on the front panel is lighted Then remote control button works as VCR function Press the VCR button then it becomes to the VCR OPERATION mode To Select Watch Modes or External Input Press VCR button To toggle and select VCR PLAYBACK BROADCASTING RECEPTION or EXTERNAL INPUT press VCR button repeatedly To Select DVD SETUP ...

Страница 12: ...s button to power on Press VCR button of remote control to change into VCR mode Insert the desired tape If you want to playback it press PLAY button When the operational status is flickering or poor adjust it with TRACKING button 1 1 2 2 3 3 To stop it press button For pause press PLAY PAUSE button in playback mode If you press this button once more it starts playback again 4 4 Press EJECT button ...

Страница 13: ...VCR on channel 3 of your TV Select OFF if you want the VCR to remain in the TV mode This is useful if you watch your VCR on the TV s video input and you don t want your antenna cable signal interrupted by the VCR 2 2 1 1 FUNCTIONS Auto Play ON Auto TV VCR ON Index Search Go To Search Move Select End SETUP ENTER To Delete Channels Manually Follow the procedures below to delete stored channels You m...

Страница 14: ...ch for an index mark FUNCTIONS Auto Play ON Auto TV VCR ON Index Search Go To Search If you want to search through a certain number of index marks press two number buttons to enter the number of marks you want to search Press CLEAR on the remote to correct an entry or Press REW to search backward or FF to search forward The VCR will locate your index mark and begin playback If you did not enter a ...

Страница 15: ...sult a television guide for program broadcasting information LANGUAGE Setup In STOP or RESUME STOP mode press the SETUP button to display the DVD SETUP menu 1 1 Select OSD Language by pressing button Please select a language to be displayed on DVD screen 5 5 Select Audio by pressing button Set it as the preferred audio language In case the audio language is set and recorded in the DISC it is autom...

Страница 16: ...pect Ratio LetterBox 4 3 Screen Saver Off Video Out S Video Off On Aspect Ratio LetterBox 4 3 Screen Saver Off Video Out S Video Progressive Component S Video If a user selects LetterBox 4 3 the user can watch the original scene of 16 9 but the top and bottom of the screen look black color If a disc size is originally recorded in 4 3 a user cannot watch it in a wide screen though a user sets a siz...

Страница 17: ...gned The initial password is 3308 In case you forget newly input password you can use 3308 as a password DVD initial setting DVD initial setting Password Unassigned Parental 8 ADULT Default Reset Password Password Unassigned Unassigned Limits 8 No Limit Enter NEW password Password Password Unassigned Unassigned Limits 8 No Limit Enter password Password Unassigned Parental 8 ADULT Default Reset 1 G...

Страница 18: ...se playback press or œœ button in Playback mode You can watch fast playing reverse screen This reverse playback can be unavailable for certain DVD Unavailable for MP3 If you want slow or reverse playback press or œ button in Playback mode You can watch the desired screen in the slow forward reverse playback For the case of Video CD this reverse slow playback function is unavailable The mark will a...

Страница 19: ...be displayed on the bottom right box Press the œ or buttons to select Play and press ENTER to begin program playback Press the œ or buttons to select Clear All and press ENTER to clear CD Playlist 1 1 After completing setting press PLAY button Then titles and chapters track are played in the above programmed order To exit from Program Play mode press the SETUP button in Program menu screen 2 2 Rep...

Страница 20: ...t playback end position B is set and a defined period from A to B is playback repeatedly 2 2 To exit from repeat playback mode press A B button It enters into Normal Playback mode 3 3 In completing entering please press ENTER button PLAY starts from the selected position 4 4 A MP3 disc may not be repeated from A to B DVD VCD CD Repeating a defined period from A to B B A A B T _ _0 C 019 01 46 03 T...

Страница 21: ...ist With œ buttons you can move the cursor to MP3 Music File To playback MP3 File press ENTER key DVD VCD CD MP3 Confirming the current VCD CD disc mode Confirming the current MP3 disc mode T 001 C 020 01 46 03 T 001 00 49 29 1 3 Stereo 1 4 Dolby Digital 5 1Ch English Press DISPLAY button again It shows the subtitle selected and repeat playback mode To exit from Display mode press DISPLAY button a...

Страница 22: ...ing an audio language AUDIO SUBTITLE language and Sound Fields The user may select an audio language and subtitle language if a disc includes Multi language Press the AUDIO button It shows the audio information DVD disc includes The user can select each audio information by using buttons In completing selecting please press AUDIO button one more Press SUBTITLE button It shows the subtitle informat...

Страница 23: ...ust be within 8 352 kbps and VBR File names must incorporate the MP3 file extension EXAMPLE MP3 where each is a letter or number Use only alphabet and or numbers in file names If you use special characters the file and or folder names may not be displayed correctly on the on screen display This unit can read the maximum 999 files and folder The sampling frequency must be within 4kHz 48kHz The abil...

Страница 24: ...nsert a recordable tape 2 2 Play the DVD disc and press REC button DVD plays and VCR starts recording 3 3 To exit copy press button Also it stops automatically when DVD playback is finished or recorded tape is reached to the end To Enjoy Another TV Channel or DVD during recording 1 1 If you want to watch another TV channel during recording with video press TV VCR button It is available of changing...

Страница 25: ...in VCR mode You can set the Timer Program Before timer program setting clock should be set correctly and video mode should be selected Timer Recordings TIMER RECORDINGS Press SETUP button and select TIMER RECORDINGS Move into TIMER RECORDINGS with and then select the desired one with ENTER button Select Make a New Program Press ENTER button to select Make a new Program 1 1 2 2 Select Timer Recordi...

Страница 26: ...ccording to recording speed Tape Type SP Mode Standard Play SLP Mode Extended Play T 60 1 00 3 00 T 90 1 30 4 30 T 120 2 00 6 00 T 160 2 40 8 00 Protecting video cassettes from accidental erasure Cassettes have a safety tab to prevent erasure Break off the safety tab with a screw driver If you wish to record on a cassette without a safety tab cover the hole with cellophane tape Inserting video cas...

Страница 27: ...UNING button for about two seconds Presetting the radio stations You can preset 50 stations for FM and AM Before tuning make sure that you have turned down the volume to the minimum Press FM AM button until the FM or AM appears in the display window And then every time you press FM AM button FM and AM changes alternately 1 1 Press and hold TUNING button for about two seconds until the frequency in...

Страница 28: ...appearing on the TV picture Use speakers in your setup that have similar tonal characteristics Speaker Positioning Example Center Speaker Front Speaker Right Front Speaker Left Subwoofer Surround Speaker Left Surround Speaker Right Surround Sound Audio Components SpeakerSetupforenjoyingthesurroundsoundeffect DTS Digital Surround Dolby Digital and Dolby Pro Logic technologies can be used to enjoy 3...

Страница 29: ...ener The interval from the speakers to the listener If the distance from the listener to each speaker is the same in the Dolby Digital and Dolby Pro Logic mode the delay time of each speaker is as follows In Dolby Digital mode Center delay time 0ms Rear delay time 5ms In Dolby Pro Logic mode Center delay time no setting Rear delay time 15 30ms If the rear delay time is set in Dolby Digital mode in...

Страница 30: ... varies as below In case of Configure 2 or 3 it is impossible to adjust the Level setting for the Woofer WF Small Speaker applied with high pass filter Large Speaker applied without high pass filter 5 5 In Dolby Digital and Dolby Pro Logic mode by using the test tone function you can easily adjust the sound balance of the speakers from the listener s position in DVD initial setup mode speaker setu...

Страница 31: ... touch a side containing play information Do not attach a bit of paper or sticky tape on it Do not expose a disc to a direct sunlight or electric heating systems After using it please keep a disc in a case Cleaning Disc Before using it please rub it from center toward outside with clean clothes Do not use any type of solvent such as thinner benzol benzene commercial cleaning goods or antistatic sp...

Страница 32: ...region code is ALL the playback screen may shake The file name of MP3 recognize only the Alphabet A Z a z numbers 0 9 can be displayed The letters except above case will not be displayed normally If the surface of disk is injured the file display and playback can be impossible How to use a head cleaner In case of a old or contaminated videotape screen may not be clean from the contamination of VCR...

Страница 33: ...ot ejected A channel on video and a play screen does not appear Noise screen noise appears on screen Noise appears on screen after recording While in playing noise appears Sound and screen are irregular Sound comes out but screen does not appear Screen is irregular and stripes appears Screen Error message is displayed in a screen While recording and playing the top of screen extremely waves A scre...

Страница 34: ...R Audio output terminal 2 kinds 8 8dBm VCR 2 0Vrms DVD RCA JACK AUDIO output DVD only Analogue AUDIO output 2 CH 2 0Vrms Playable tape Very high dense tapes with VHS marks Playable disc DVD VIDEO CD CD 12mm CD 8mm MP3 CD R CD RW Tape speed SP 33 35mm s SLP 11 12mm s Playtime SP 2hrs SLP 6hrs use of T 120 tape Clock display 12 hrs AM PM Time Recording 8 programs a year VIDEO S N VCR Over 45dB Stand...

Отзывы: