background image

Magnetic Switch Indicator (Red Mark) 

The  Magnetic  Switch  Indicator  is  a  red  dot  showing 
where  the  Magnetic  Activation  Switch  is  located.    You 
can use the Magnetic Indicator on the Transmitter or the 
Activation  Magnet  on  the  Buckle  to  activate  and 
deactivate your Collar Receiver (

see page 11

).


Collar Receiver LED Indicator Light 

The  LED  light  on  the  Collar  Receiver  will  turn  on  when 
Magnet  Indicator  is  held  against  the  Magnetic  Switch 
Indicator.  When the Collar Receiver is ON, the LED light 
will  flash  once  every  2  seconds  in  normal  mode  and 
double-flash  every  2  seconds  in  Battery  Saving  Mode.  
You  will  also  see  flashes  when  applying  Continuous 
Stimulation or Beep.  When the collar battery is low and 
needs to be replaced, the LED will flash rapidly (about 3 
times every 2 seconds) while the Collar Receiver is ON.


Speaker 

Emits an audible beep when “Beep” button is pushed. 


Collar Belt with Embedded Receiver Antenna 

The  Collar  Belt  is  adjustable  to  fit  a  wide  range  of  neck 
sizes  (

see  page  15

).    The  embedded  collar  antenna  is 

woven into the Collar Belt, and it is about 4 inches long.  
You should be able to feel the embedded antenna on the 
nylon belt.


PARTS & FUNCTIONS 

WARNING 

Do not cut the part of the Collar Belt that has the embedded 
antenna.  Doing so will damage the antenna and may result 
in severely decreased Collar Receiver range. 

Содержание RedHead RH 300

Страница 1: ...1 RedHead RH 300 Electronic Dog Trainer Owner s Manual Manufactured by...

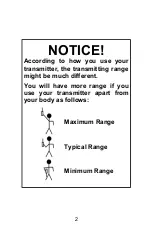
Страница 2: ...ording to how you use your transmitter the transmitting range might be much different You will have more range if you use your transmitter apart from your body as follows Maximum Range Typical Range M...

Страница 3: ...s 5 Parts and Functions 6 Installing Changing Batteries 10 Turning ON and OFF 11 Battery Saving Mode 12 Testing 13 Reprogramming 14 Properly Fitting the Collar 15 Setting the Intensity Level 16 Mainte...

Страница 4: ...f stimulation intensity with an easy no look clicking intensity selection dial Easy one hand operation allows for maximum control and safety This model includes both the Continuous Stimulation and the...

Страница 5: ...15 adjustable intensity levels of Continuous Stimulation Beeping Tone Battery Saving Mode for the collar battery Gentle Touch System extra mild stimulation MAXX Range Invisible Embedded Collar Antenn...

Страница 6: ...ransmitter PARTS FUNCTIONS Intensity Selection Dial Antenna LED Indicator Light Magnet Indicator Red Mark in back Continuous Stimulation Button Beep Button Lanyard Attachment Battery Compartment in ba...

Страница 7: ...tion of the magnet in the Transmitter The magnet is used to turn the Collar Receiver ON OFF and for ID reprogramming Transmitter LED Indicator Light When any of the buttons on the transmitter is pushe...

Страница 8: ...Cap Speaker Buckle with Activation Magnet Battery Compartment Cap The collar requires one 6 volt battery included in package Batteries should be inserted with end in first see page 10 Contacts Contact...

Страница 9: ...econds in Battery Saving Mode You will also see flashes when applying Continuous Stimulation or Beep When the collar battery is low and needs to be replaced the LED will flash rapidly about 3 times ev...

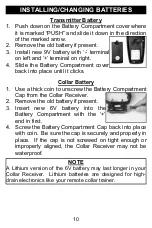
Страница 10: ...thick coin to unscrew the Battery Compartment Cap from the Collar Receiver 2 Remove the old battery if present 3 Insert new 6V battery into the Battery Compartment with the end in first 4 Screw the Ba...

Страница 11: ...er away from the Collar Receiver as soon as the LED light starts flashing 4 The Collar Receiver is now ON and the red LED light should be flashing NOTE The Transmitter is always in a permanent sleep s...

Страница 12: ...battery can last up to approximately 72 standby hours In the Battery Saving Mode the Collar Receiver battery can last up to approximately 240 standby hours These figures are estimates and vary depend...

Страница 13: ...r light will light repeatedly when the Continuous Stimulation button is pushed the test light will be brighter at higher intensity levels To Test the Beep 1 Press the Beep button 2 An audible beep wil...

Страница 14: ...ceiver until the LED Light stays on solid The Collar Receiver is now in the Code Running Mode the LED light will stay lit for approximately 8 seconds while it is in this mode 4 Remove the Transmitter...

Страница 15: ...od contact to the skin if it appears that your dog is not responding to the stimulation Also a loose collar can also result in skin irritations from the contacts moving or rubbing too much against you...

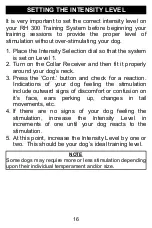
Страница 16: ...tton and check for a reaction Indications of your dog feeling the stimulation include outward signs of discomfort or confusion on it s face ears perking up changes in tail movements etc 4 If there are...

Страница 17: ...d a mild soap and then allowed to dry completely Always allow the entire unit to completely dry before using NOTE It is recommended that the collar unit be rinsed with fresh clean water after use in w...

Страница 18: ...lar and how to properly train with it before placing it on your dog The contacts electrodes on this collar are made with high grade stainless steel to help prevent any chemical or allergic reactions w...

Страница 19: ...und to comply with the limits for a Class B digital device pursuant to part 15 of the FCC Rules These limits are designed to provide reasonable protection against harmful interference in a residential...

Страница 20: ...20 2872 Walnut Hill Lane Dallas Texas 75229 Tel 214 350 9446 888 588 8364 Fax 214 350 7847 Website www dtsystems com E mail customerservice dtsystems com RH 300 2016 04 20 Printed in Korea...

Отзывы: