


40
D-Link DAP-1665 User Manual
Section 3 - Configuration
Advanced Settings:
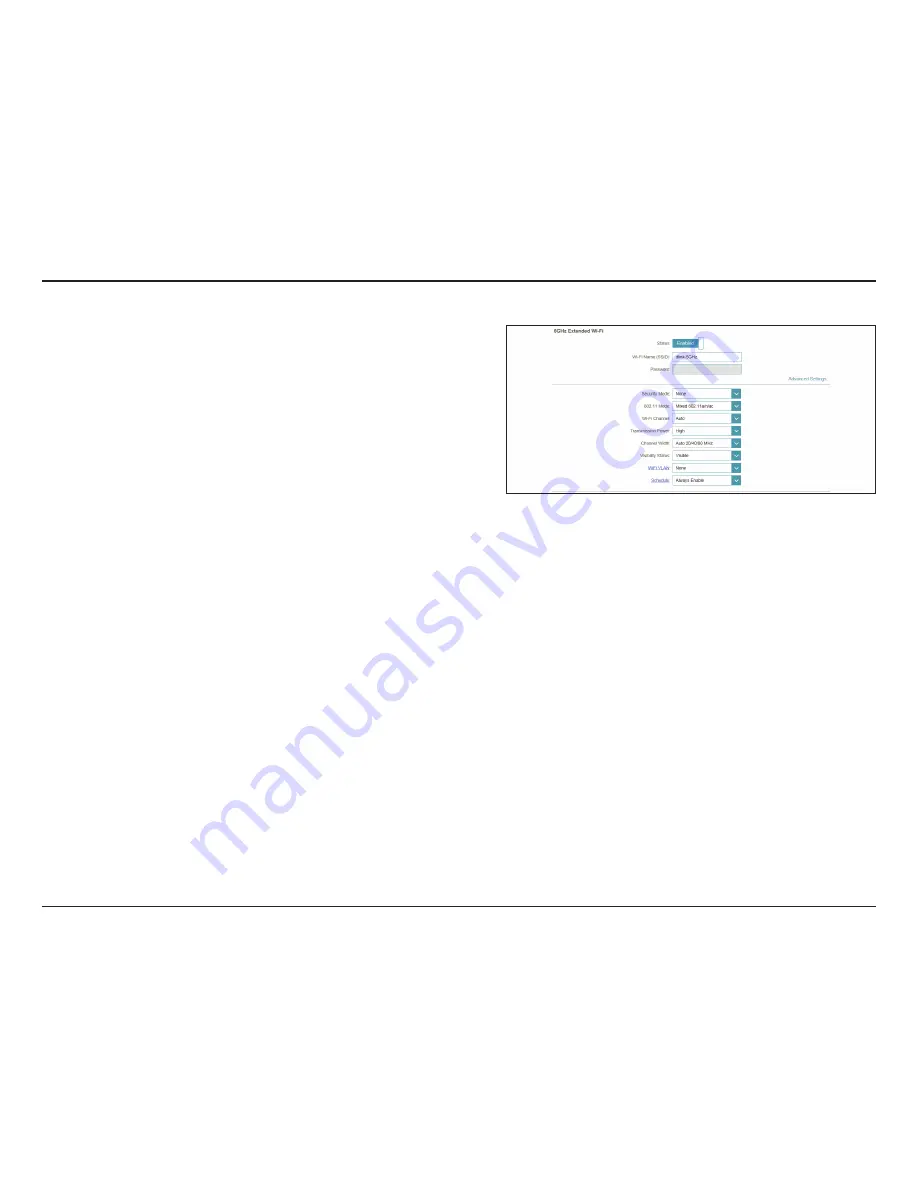
Security
Mode:
802.11 Mode:
Wi-Fi Channel:
Transmission
Power:
Channel
Width:
Visibility
Status:
Select the type of wireless security you wish to use for the
extended network. Choose from
WPA/WPA2-Personal
/
WPA/
WPA2-Enterprise/None
.
Select one of the following:
802.11a Only
- Select if you are only using 802.11a wireless
clients.
802.11n Only
- Select if you are only using 802.11n wireless
clients.
Mixed 802.11a/n -
Select if you are using a mix of 802.11n and
802.11a wireless clients.
802.11ac Only
- Select if you are only using 802.11ac wireless
clients.
Mixed 802.11n/ac -
Select if you are using a mix of 802.11ac
and 802.11n wireless clients.
Mixed 802.11a/n/ac
- Select if you are using a mix of 802.11ac,
802.11n, and 802.11a wireless clients.
Choose from channels 1-11 for an existing wireless network or
to reduce interference in congested areas.
The
Auto
setting can be selected to allow the DAP-1665 to
automatically choose the channel with the least amount of
interference.
Depending on your wireless reception and coverage area, you
can choose between
Low, Medium,
or
High
power.
Select the Channel Width:
Auto 20/40
- Select if you are using both 802.11n and non-
802.11n wireless devices.
20/40/80 MHz
- Select if you are not using any 802.11n wireless
clients.
Select whether you would like the network name (SSID) of your
wireless network to be
Visible
or
Invisible
to wireless clients.
If
Invisible
, the SSID of the DAP-1665 will not be seen by site
survey utilities, so wireless clients will have to manually enter
the SSID of your wireless network in order to connect to it.


