126
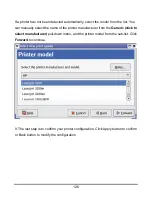
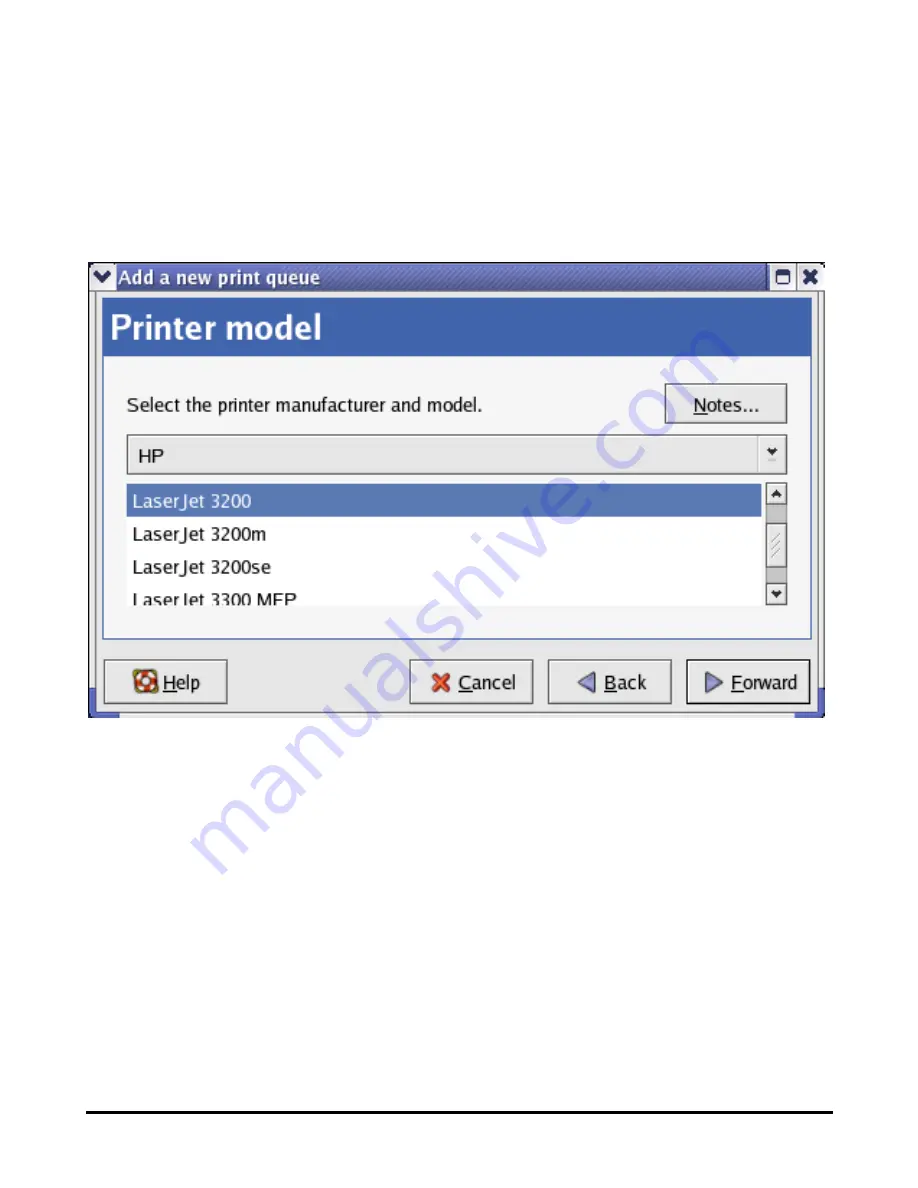
If a printer has not been detected automatically, select the model from the list. You
can manually select the name of the printer manufacturer from the
Generic (click to
select manufacturer)
pull-down menu, and the printer model from the sub-list. Click
Forward
to continue.
9. The last step is to confirm your printer configuration. Click Apply button to confirm
or Back button to modify the configuration.
Содержание AirPlus DP-G310
Страница 1: ...1 D Link DP G310 Wireless G Print Server Manual Rev 01 February 2008 ...
Страница 44: ...39 If yes then click Finish button to exit the installation window and now you may start your printing tasks ...
Страница 59: ...54 ...
Страница 62: ...57 HELP The Help screen provides you brief information about the print server for your reference ...
Страница 63: ...58 Reboot If you want to reset the print server you may just click the Reboot for restarting ...
Страница 64: ...59 Refresh Printer Status Click Printer to refresh printer status ...
Страница 65: ...60 TCP IP Printing for Windows Vista Go to Start Î Control Panel Î Printers ...
Страница 66: ...61 Click Add a printer Select the first option Add a local printer and then click Next ...
Страница 69: ...64 Select Custom and click Settings ...
Страница 71: ...66 ...
Страница 73: ...68 Click Next to start installing the printer ...
Страница 74: ...69 After clicked Print a test page a small dialogue box will show up as below Click Close ...
Страница 75: ...70 Click Finish The printer is now ready for printing with Windows Vista on your network ...
Страница 77: ...72 Select the first option Local printer attached to this computer and click Next ...
Страница 79: ...74 Click Next ...
Страница 81: ...76 Select Custom and click Settings ...
Страница 83: ...78 ...
Страница 84: ...79 Click Next ...
Страница 85: ...80 Click Finish ...
Страница 87: ...82 At this screen you can input a name for the printer and then click Next ...
Страница 88: ...83 Select Yes to print a test page click Next ...
Страница 89: ...84 Click Finish The printer is now ready for printing with Windows XP on your network ...
Страница 91: ...86 Select the first option Local printer attached to this computer and click Next ...
Страница 93: ...88 Click Next ...
Страница 95: ...90 Select Custom and click Settings ...
Страница 97: ...92 ...
Страница 98: ...93 Click Next ...
Страница 99: ...94 Click Finish ...
Страница 101: ...96 At this screen you can input a name for the printer and then click Next ...
Страница 102: ...97 Select the first option Do not share this printer and click Next ...
Страница 103: ...98 Select Yes to print a test page click Next ...
Страница 104: ...99 Click Finish The printer is now ready for printing with Windows 2000 on your network ...
Страница 107: ...102 2 Double click on the folder lpr 3 Highlight lpr inf 4 Click OK Click OK to accept the location of the file ...
Страница 108: ...103 You should now be back to the Network Properties Page Highlight LPR for TCP IP Printing and click Properties ...
Страница 109: ...104 Click Add Port ...
Страница 111: ...106 ...
Страница 113: ...108 Click OK Windows will ask for a restart Click Yes ...
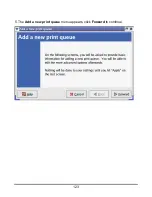
Страница 128: ...123 5 The Add a new print queue menu appears click Forward to continue ...
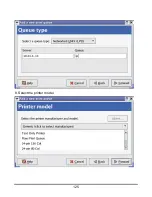
Страница 130: ...125 8 Select the printer model ...
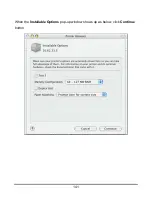
Страница 146: ...141 When the Installable Options pop up window shows up as below click Continue button ...

