5. Once you finish configuring necessary network settings, you can start surfing the
Internet. You will be served with NetGenie Splash Screen (
)
Your computer is now secured with the Quick Security feature automatically turned
on.
Page 10
Secure Internet Connectivity through Direct Cable
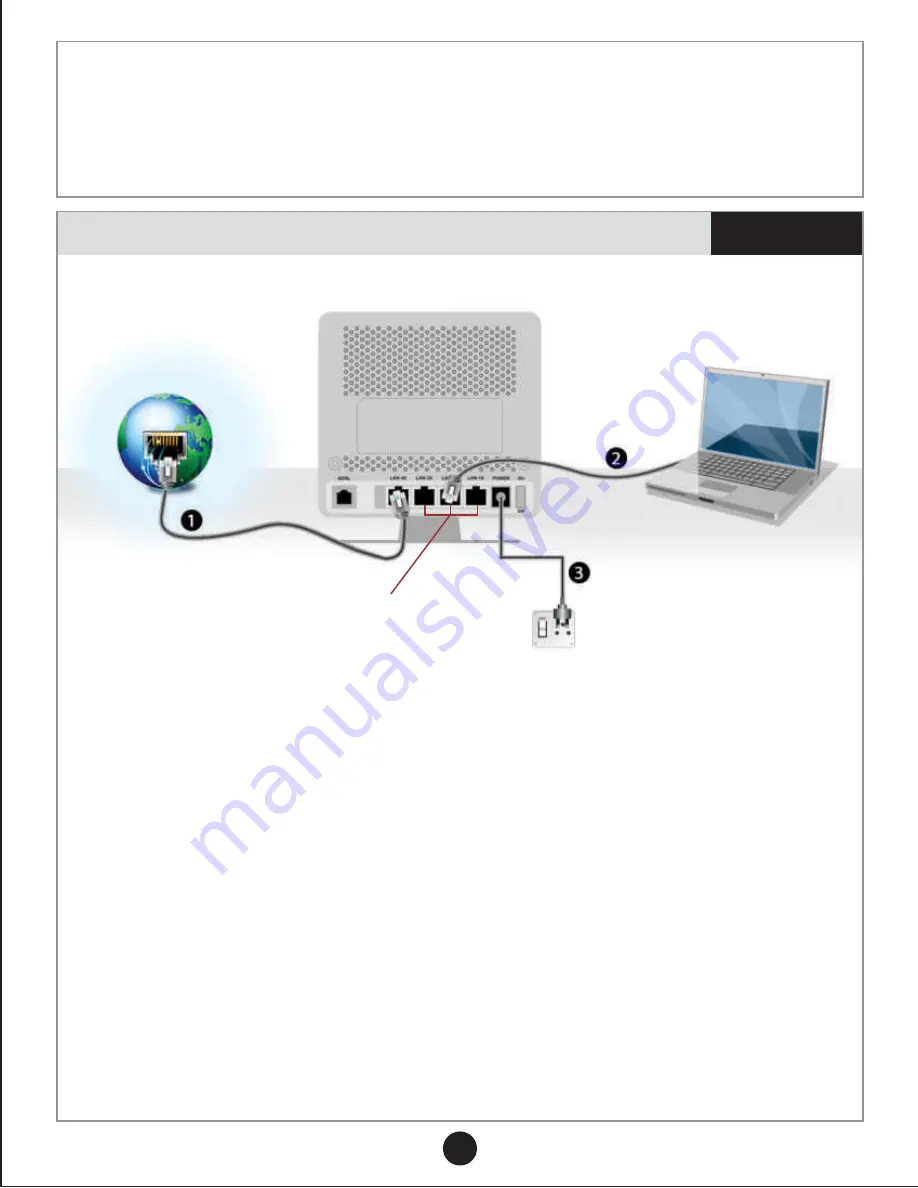
Scenario 2
1. Unplug the Internet cable that connects to your computer and plug it into the “LAN
4X” NetGenie socket
2. Use the RJ-45 Ethernet cable provided with the NetGenie appliance to connect
your computer to any of the “LAN” NetGenie sockets.
3. Switch-on your NetGenie appliance. Wait till the Power LED and “LAN 4” LED
turns green and for “LAN” LED to turn green and remain steady
4. Open your browser and go to the default IP Address i.e. http://10.1.1.1 to access
NetGenie Web Admin Console. Use the default User Name and Password i.e.
‘admin’ to log in.
5. You need to configure network settings to connect to the Internet. You can either
run the NetGenie ‘Network Configuration Wizard’ (
) or configure the
settings manually.
6. Once you finish configuring necessary network settings, start surfing the Internet,
you will be served with NetGenie Splash Screen (
)
Your computer is now secured with the Quick Security feature automatically turned
on.
page 7
Page10
NetGenie
Secure Internet Appliance
Internet
Laptop Or
Desktop
NetGenie
Power Cable
Connect your Internet
cable here
Connect your Computer/
LAN here to any of the ports
5


