Secure Internet Connectivity through ADSL
Scenario 1
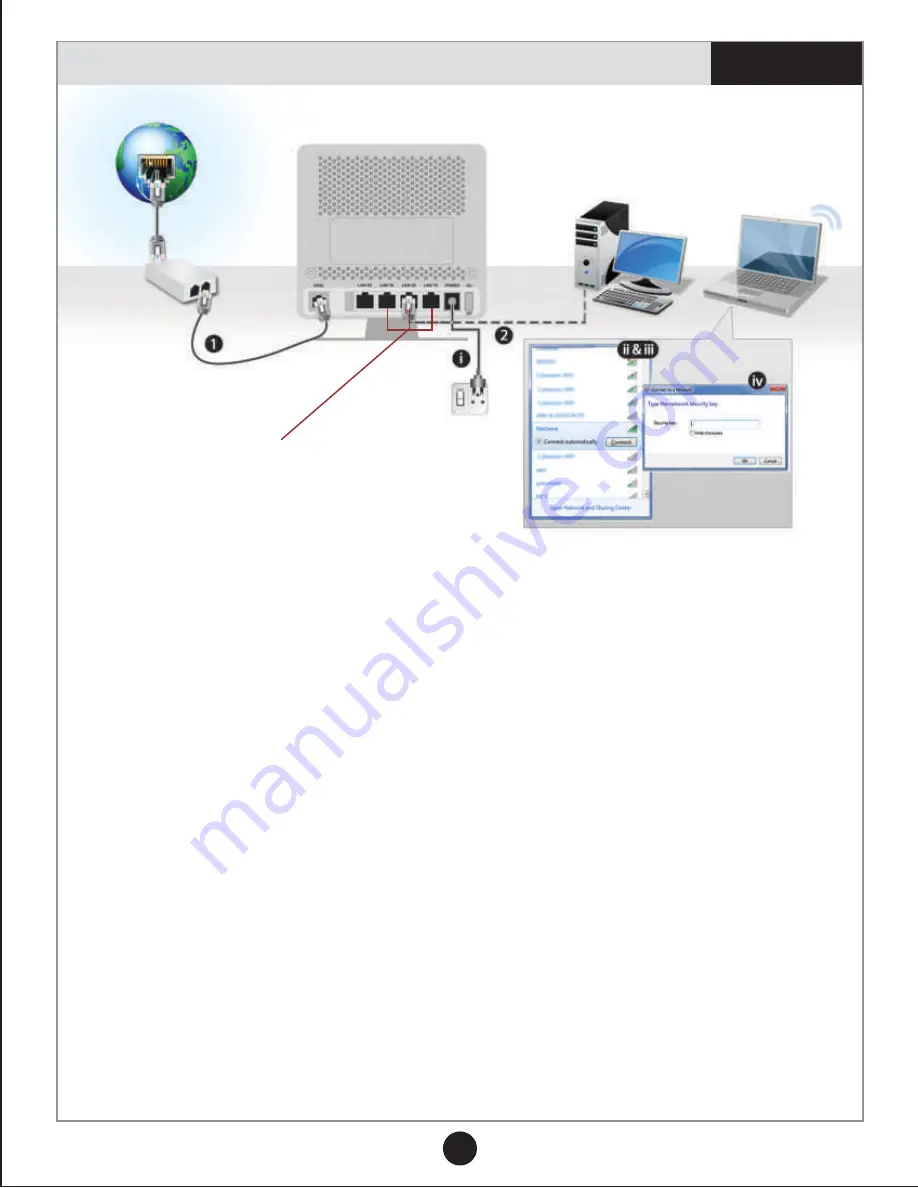
1. Unplug the existing telephone broadband wire from your ADSL/Cable Modem
and plug it into the NetGenie socket labelled as “ADSL”.
2. Use the RJ-45 Ethernet cable provided with the NetGenie appliance to connect
your computer to any of the “LAN” NetGenie sockets and switch-on the NetGenie
appliance.
OR
i) Switch-on your NetGenie appliance. Wait till the Power LED and “ADSL” LED
turns green and for the WLAN/WPS LED to turn green and stabilize.
ii) Start your laptop. Make sure that your Wireless Network Adapter is enabled.
Your laptop will auto detect the wireless network (SSID) named “NetGenie”.
iii) Click the Network icon in computer's system tray (bottom-right of your screen)
from where you can view available wireless networks. Select “NetGenie”.
iv) After selecting “NetGenie”, you will be asked to enter the exact Security/Pass
Key printed on the sticker at the back of your appliance(Please refer to Getting
your NetGenie Ready section on
).
3. Open your browser and go to the default IP Address i.e. http://10.1.1.1 to access
NetGenie Web Admin Console. Use the default User Name and Password i.e.
‘admin’ to log in.
4. You need to configure network settings to connect to the Internet. You can either
run the NetGenie ‘Network Configuration Wizard’ (
) or configure the
settings manually.
Page 3
page 7
NetGenie
Secure Internet Appliance
Connect your Computer/
LAN to any of the ports
Connect your ADSL
cable here
Laptop
Desktop
NetGenie
Power Cable
Internet
ADSL
splitter
4


